contemporaryjewelry

Munich Jewellery Week 2017 - Participating shows

Last year, it was my first time visiting Munich Jewellery Week. YES. Amazing, inspiring, unforgettable, and definitely want to go again. 

Sadly, I couldn't make it back to Munich this year. But, some of my work are invited in two shows!! 


DUALITY OF PRESENCE 

Opening Reception: 8 March 2017, 18:00 – 21:00
Adalbertstraße 44
Munich Jewellery Week // SCHMUCK

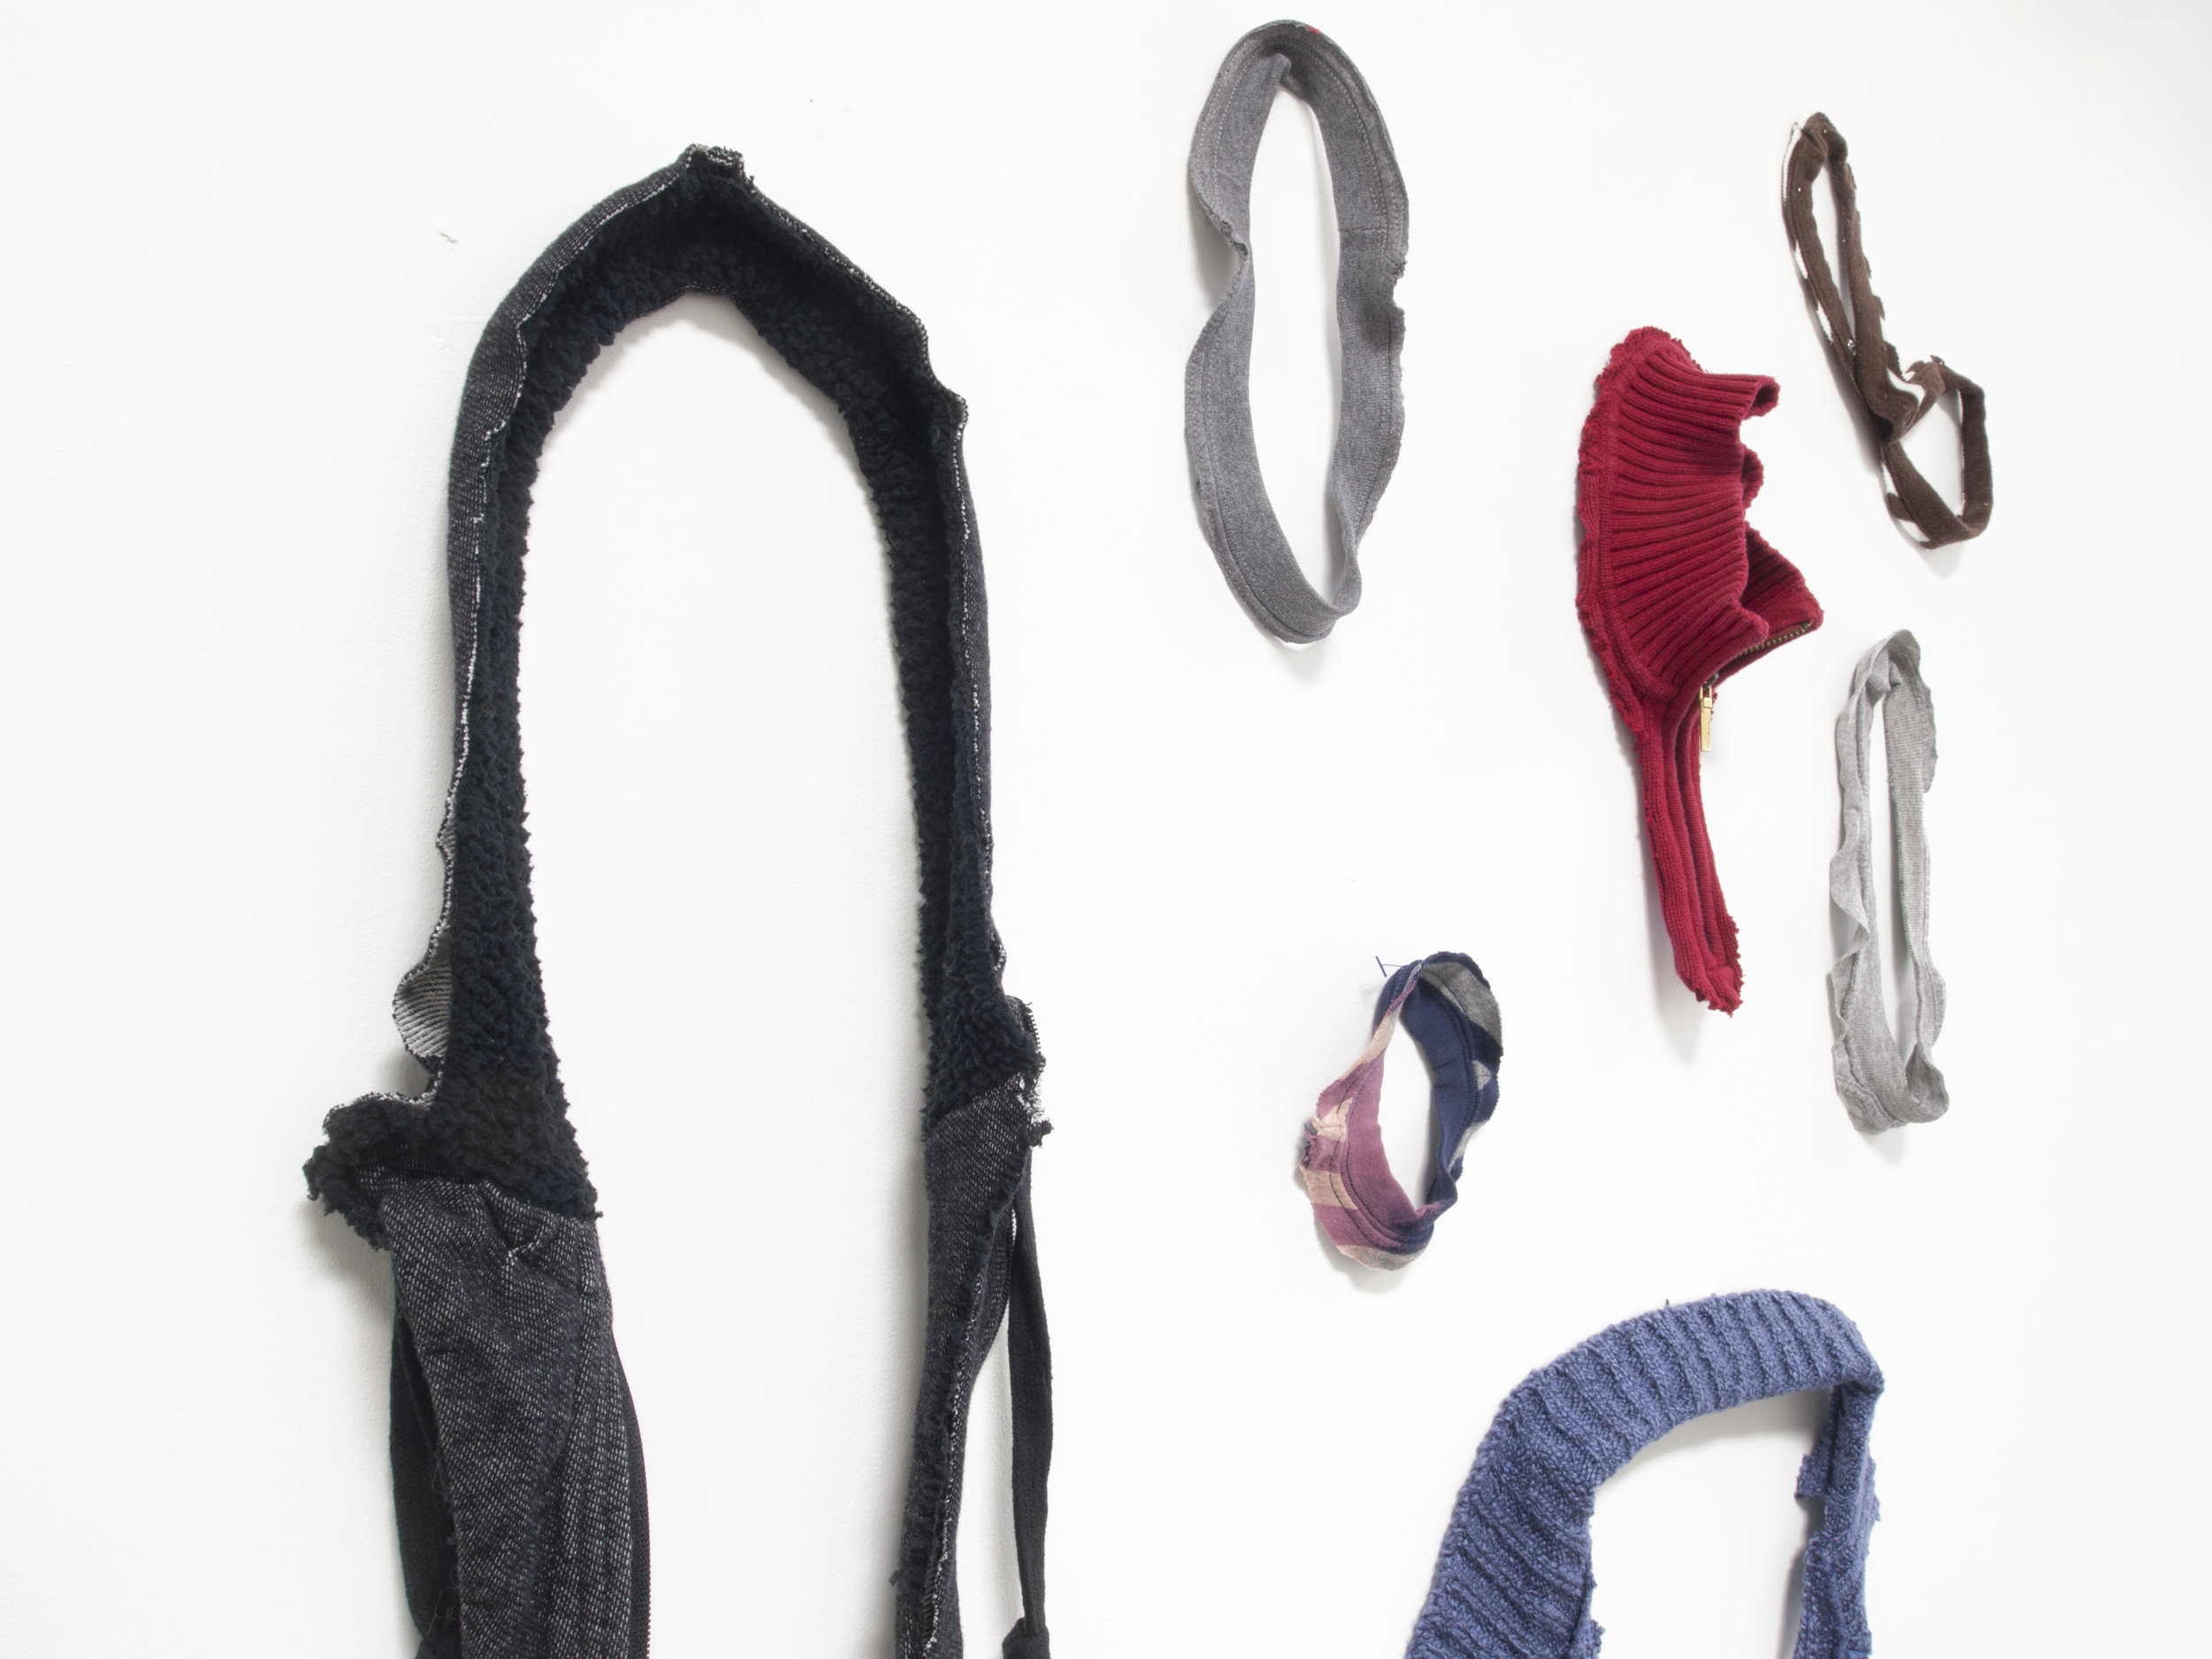
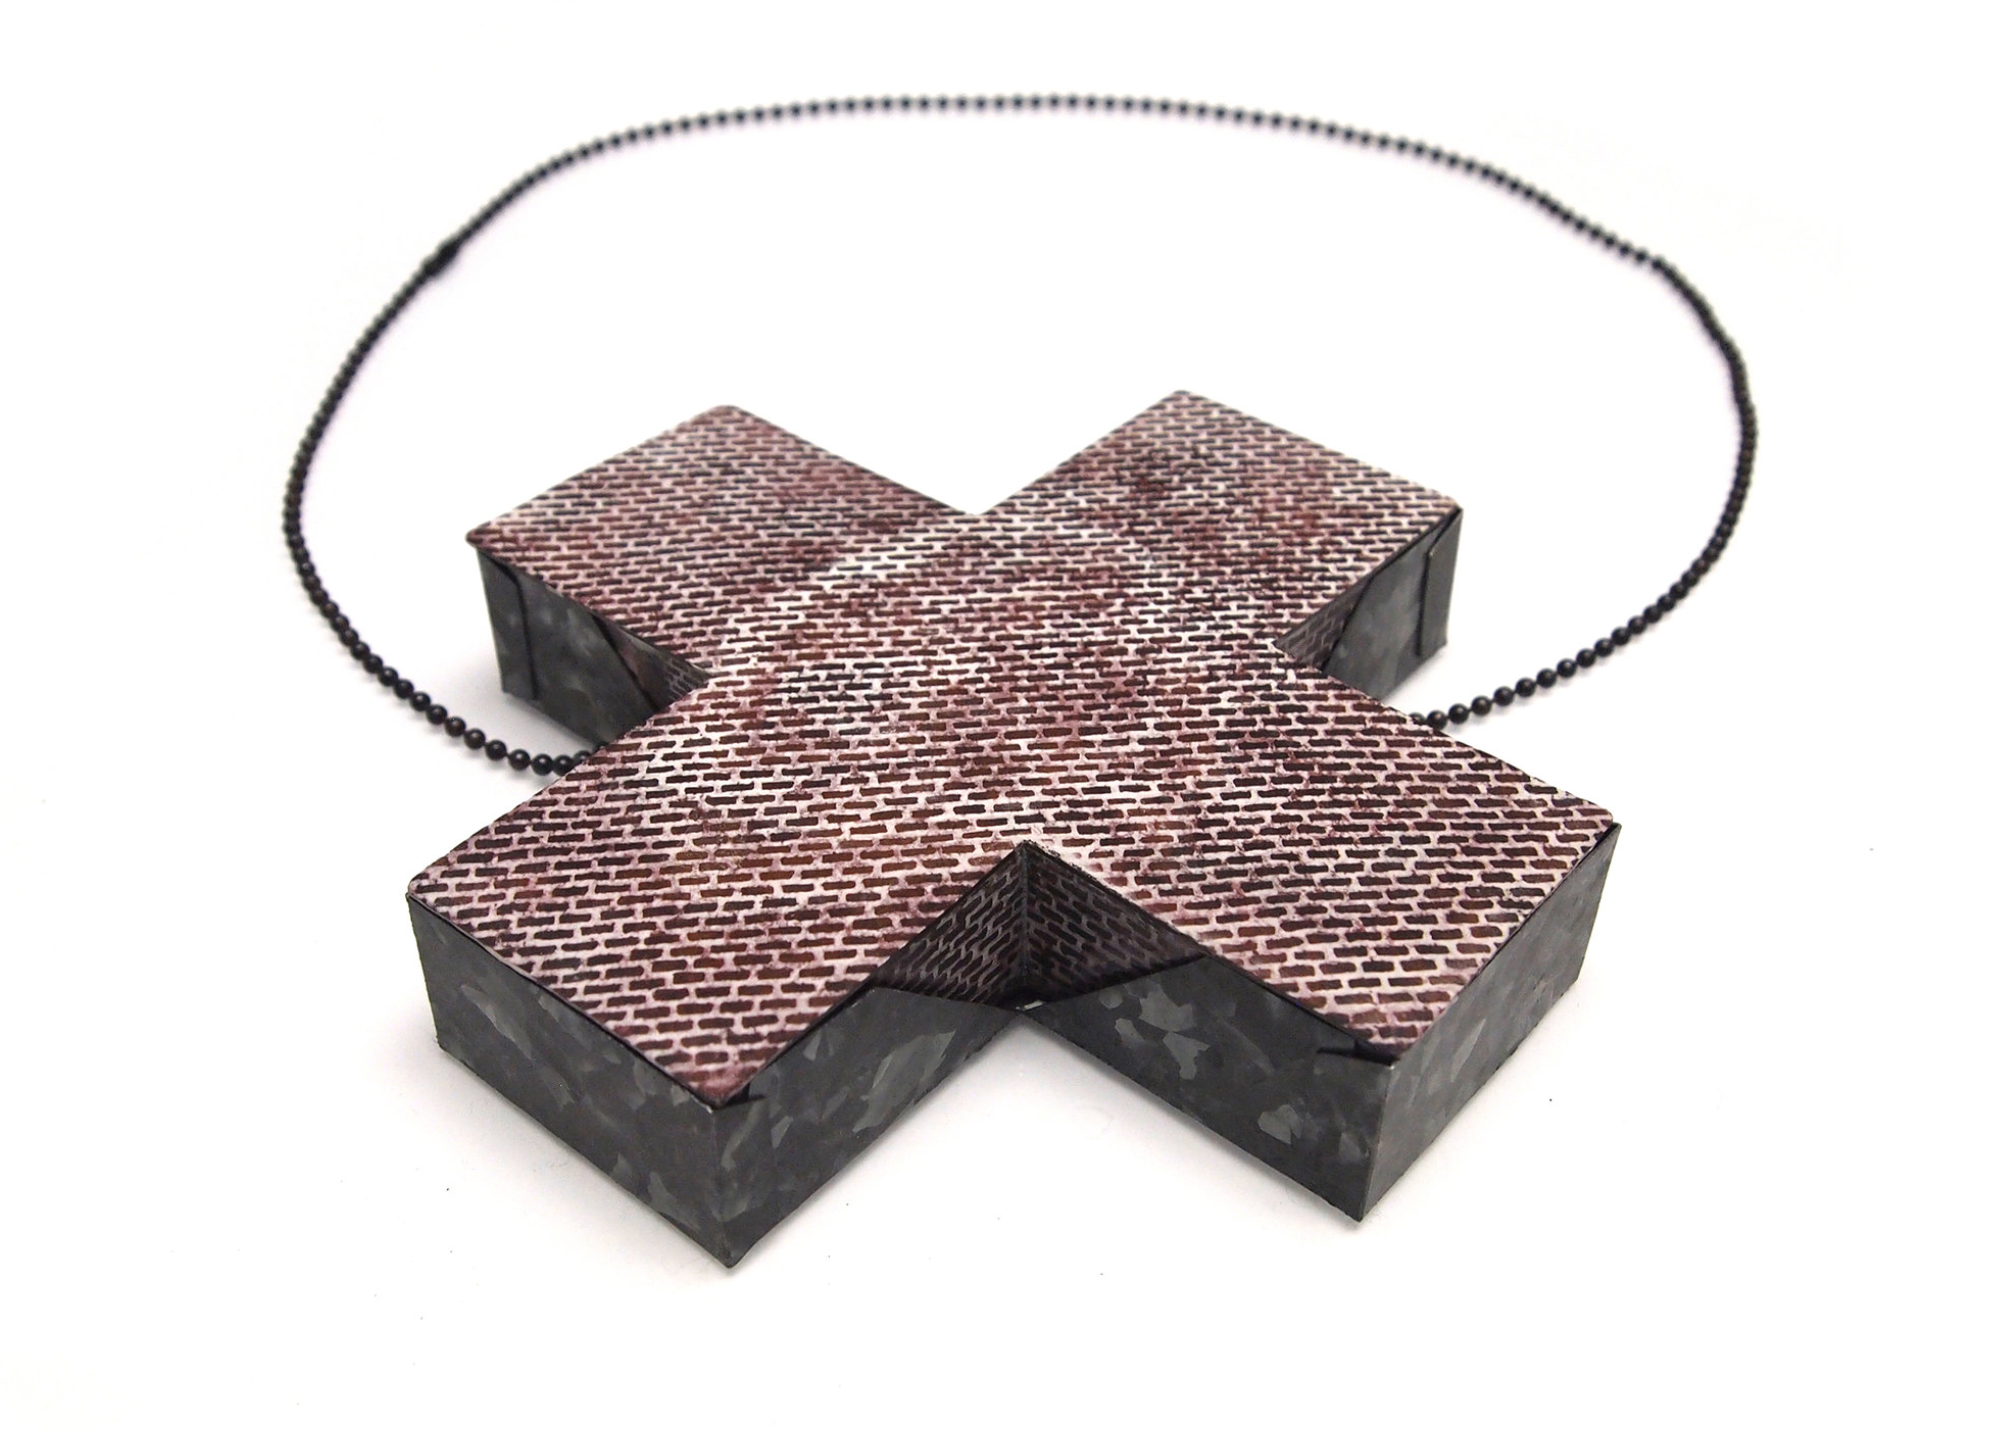
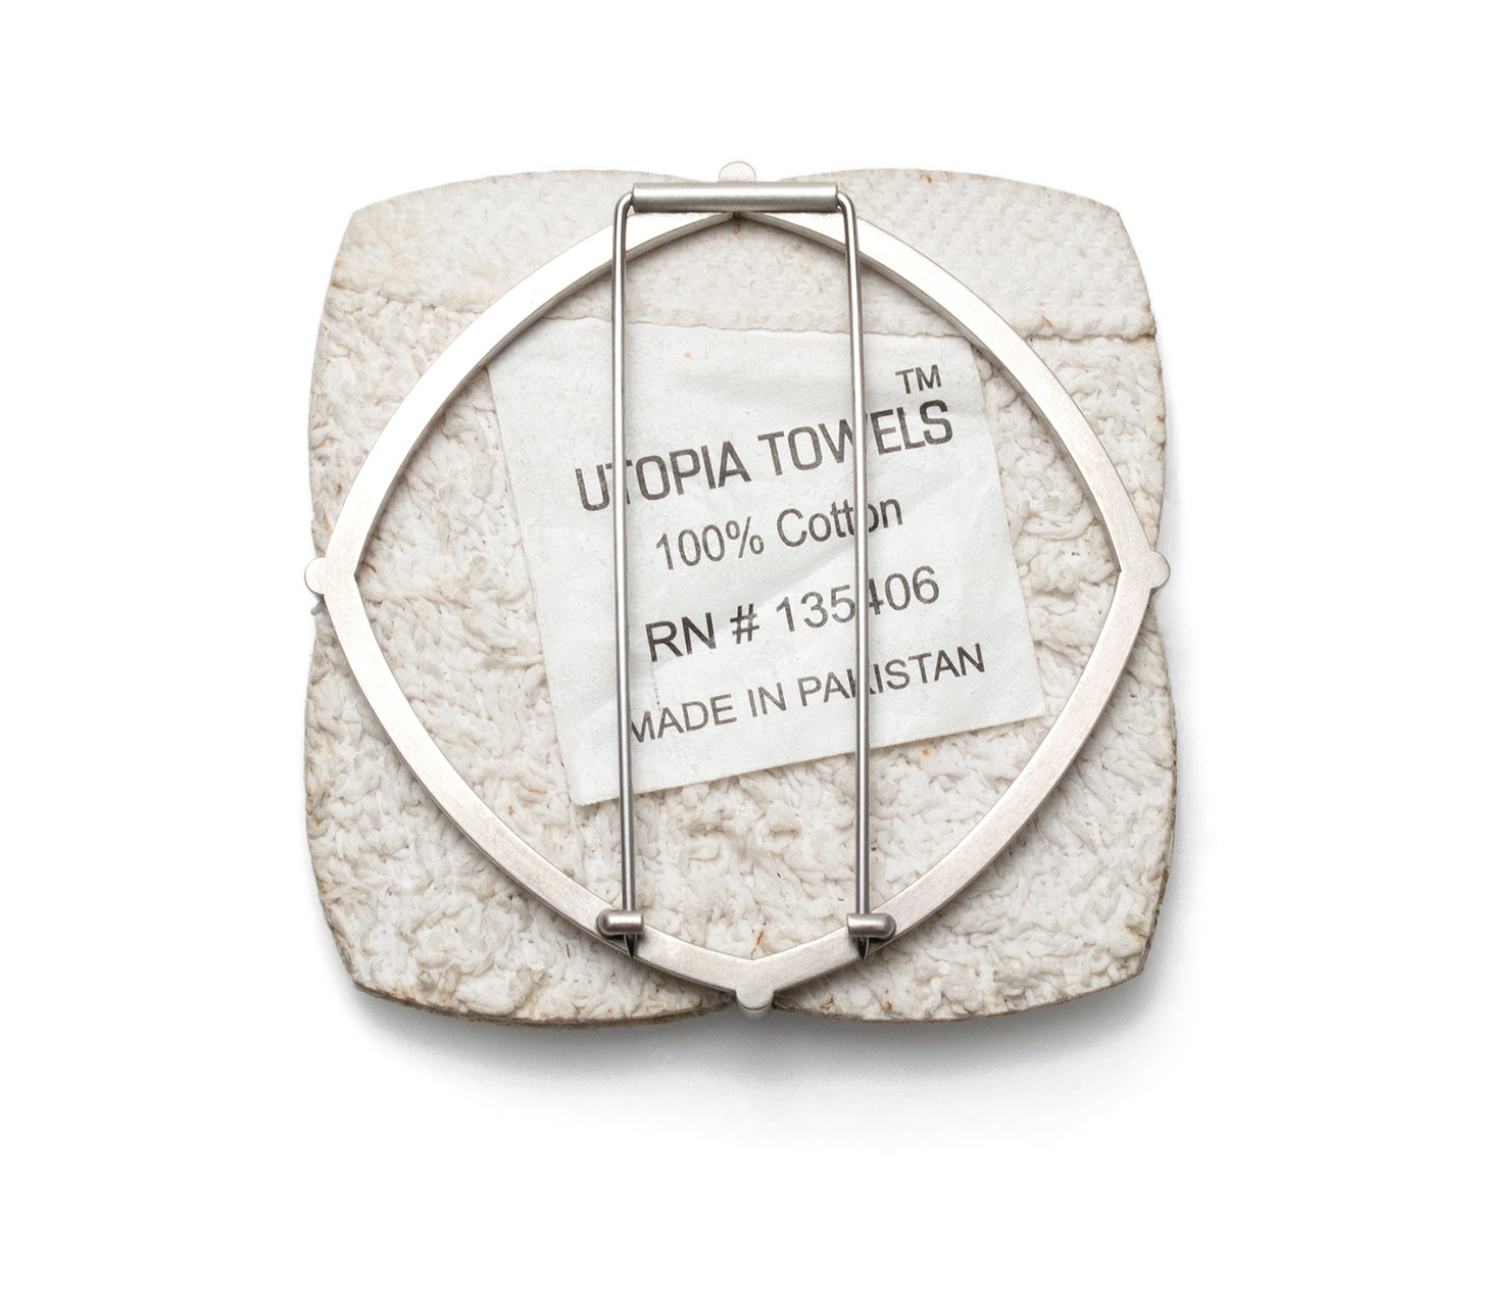
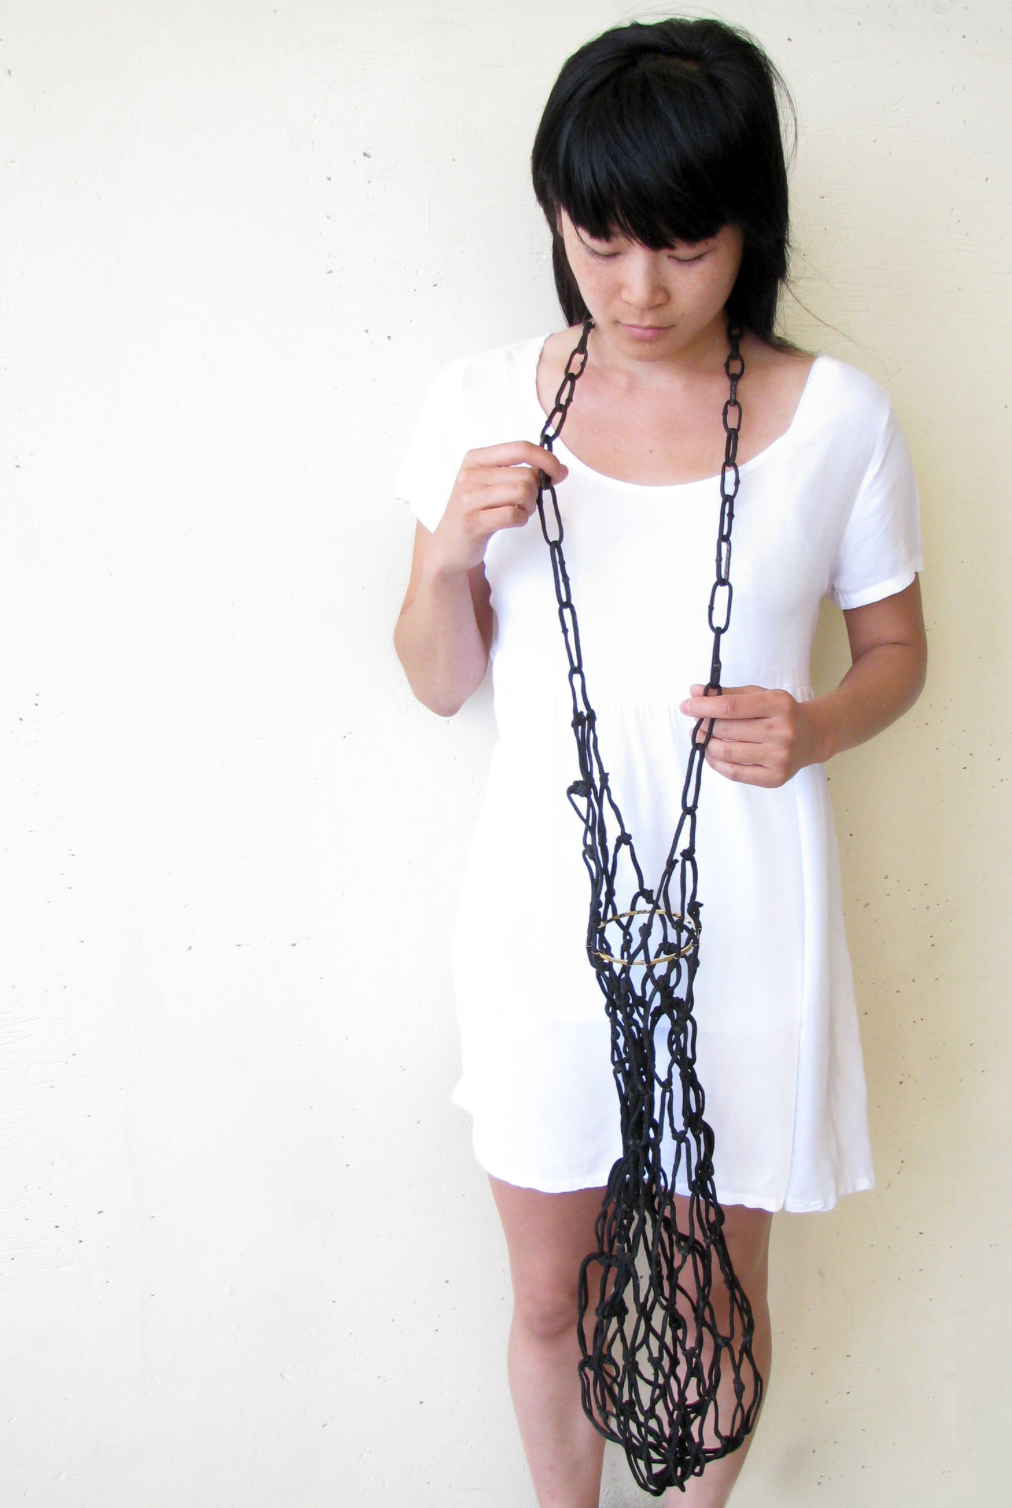
This exhibition explores the current climate of material usage in contemporary craft world, especially among the artists from the United States. The invited artists use specific material and form to deliver stories about place, histories, and conveyance. Curated by Kerianne Quick and Jess Tolbert. 

Jessica Andersen  I  Lynn Batchelder  I  Thea Clark I Nikki Couppee  I  Motoko Furuhashi  I  Steven Gordon Holman  I  Alexandra Hopp  I   Masumi Kataoka  I   Joshua KoskerI  Tova Lund I  Sharon Massey I  Jayden Moore  I  Wei Lah Poh  I  Kerianne Quick (Curator)  I   Kaiya Rainbolt   I   Yumi Janairo Roth   I  Jina Seo   I Jess Tolbert (Curator)   I  Demi Thomloudis

For more information: https://www.dualityofpresence.com

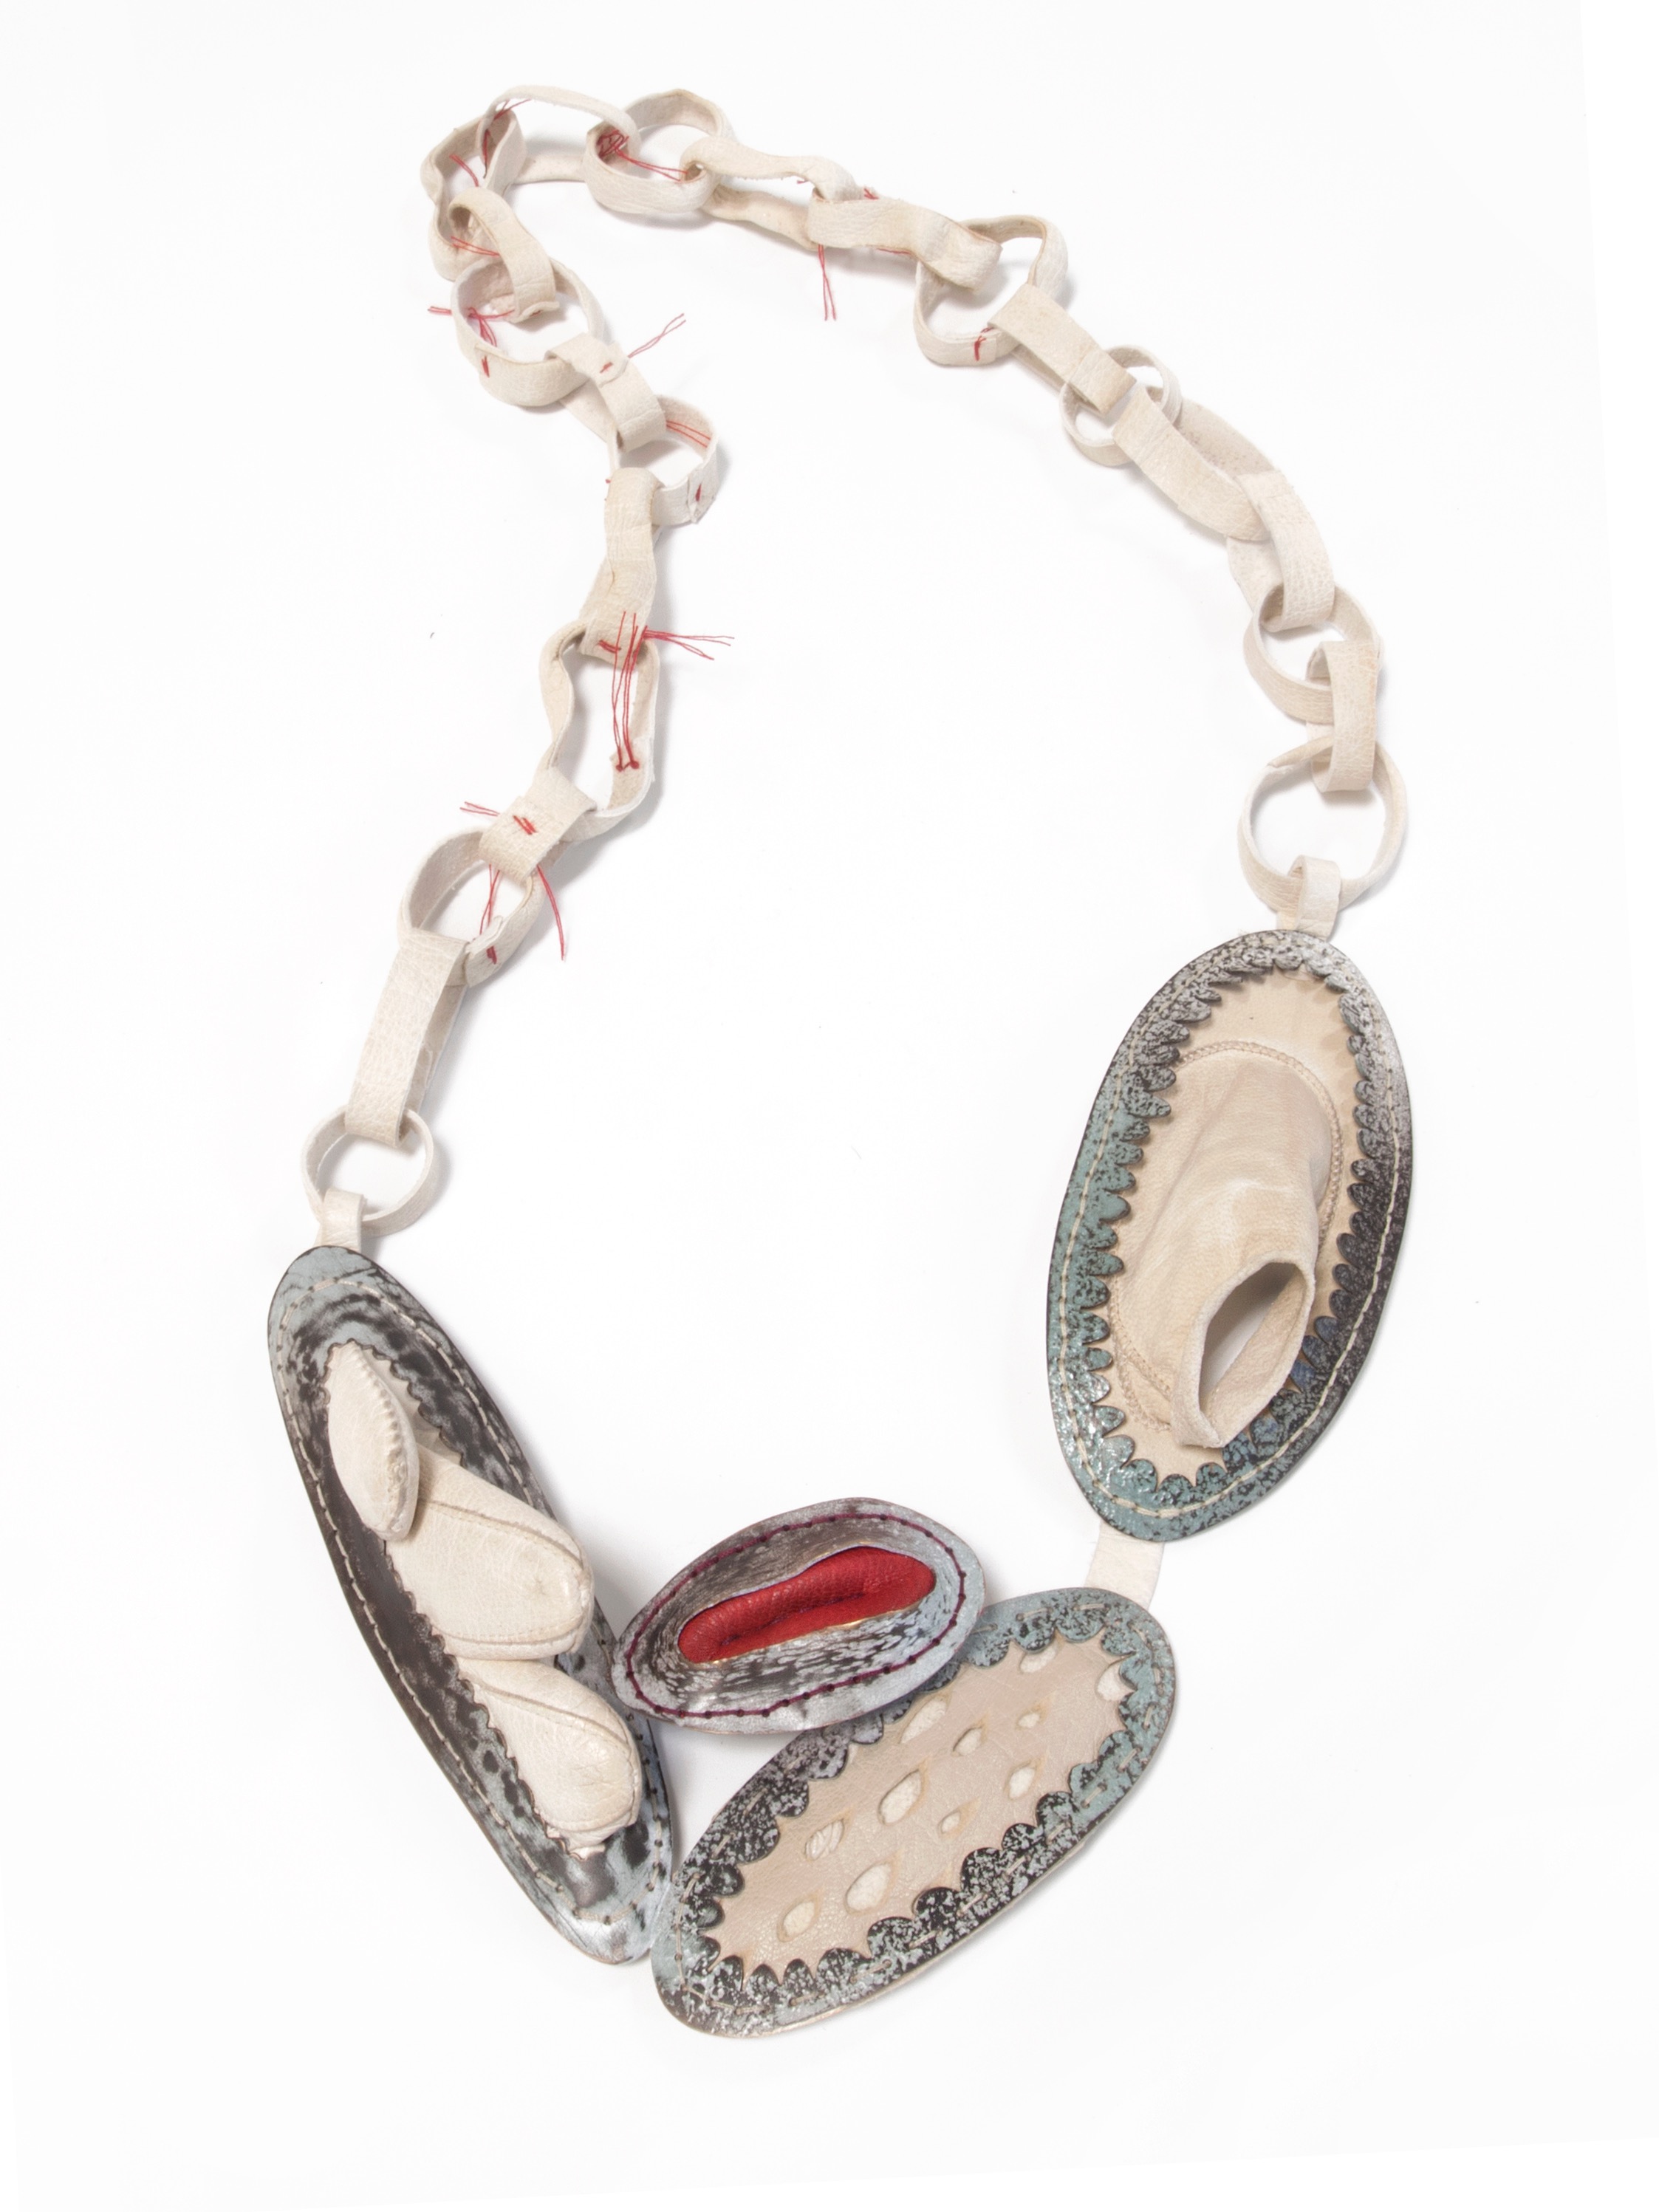
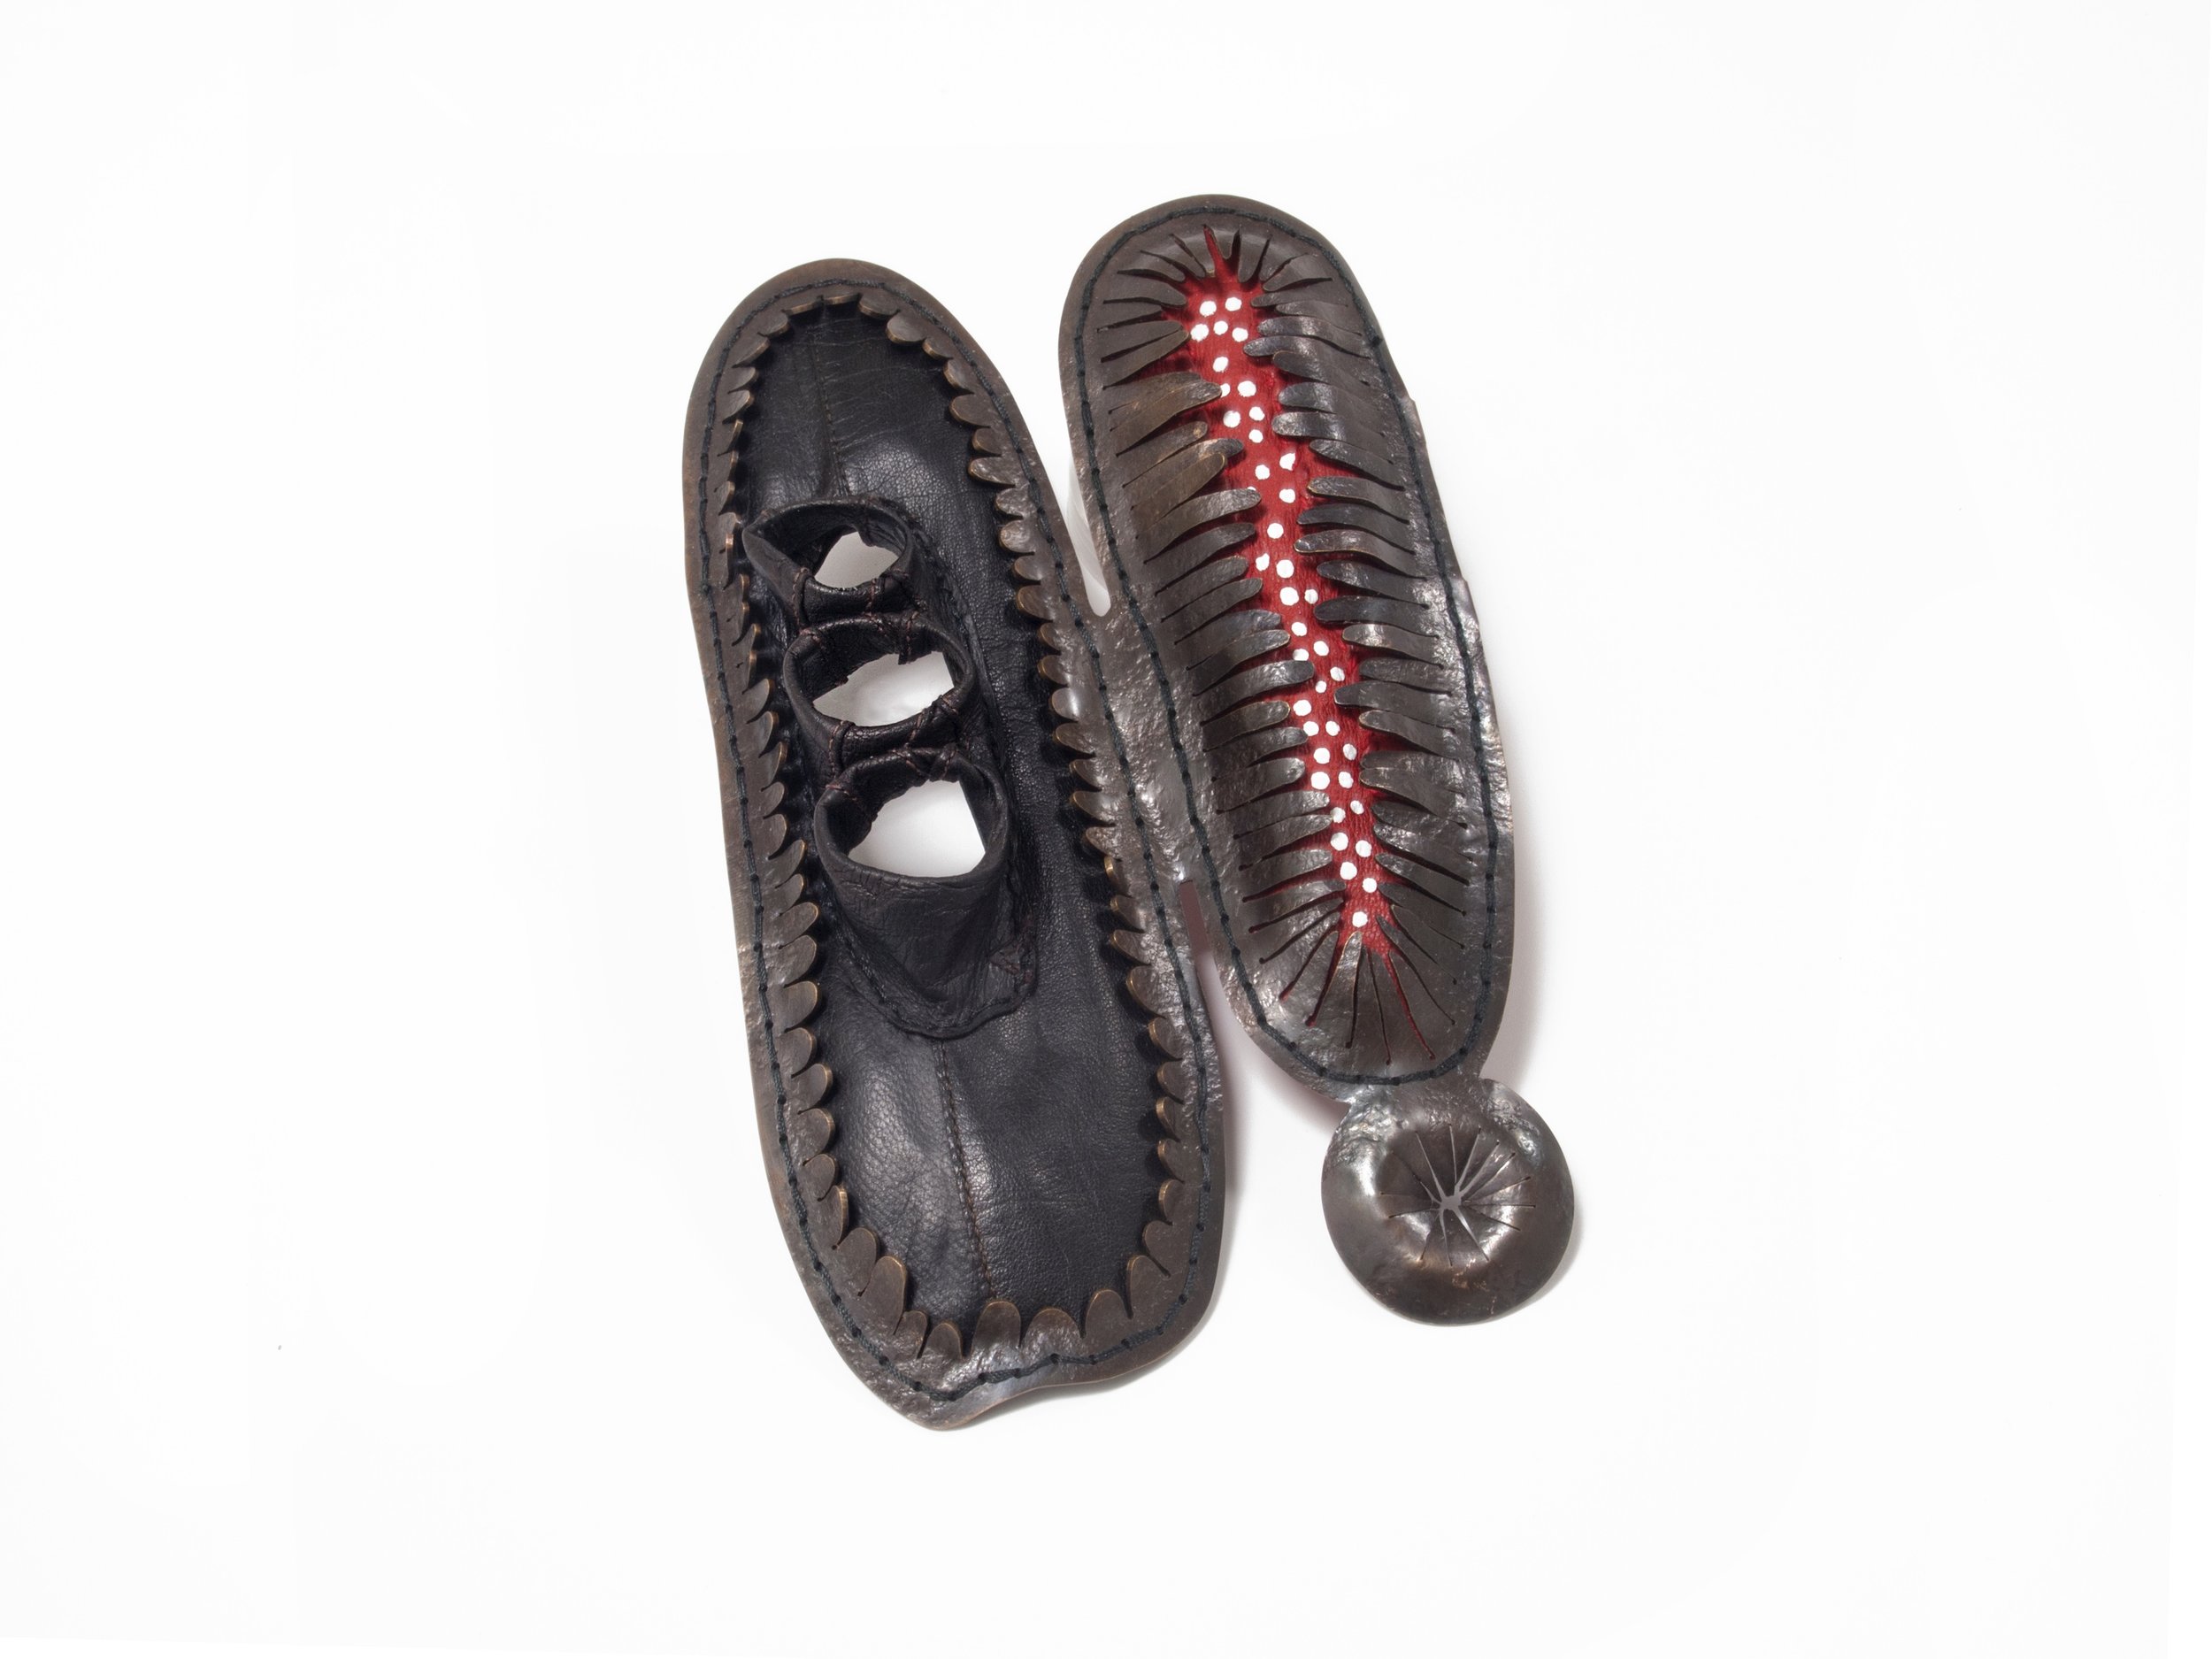
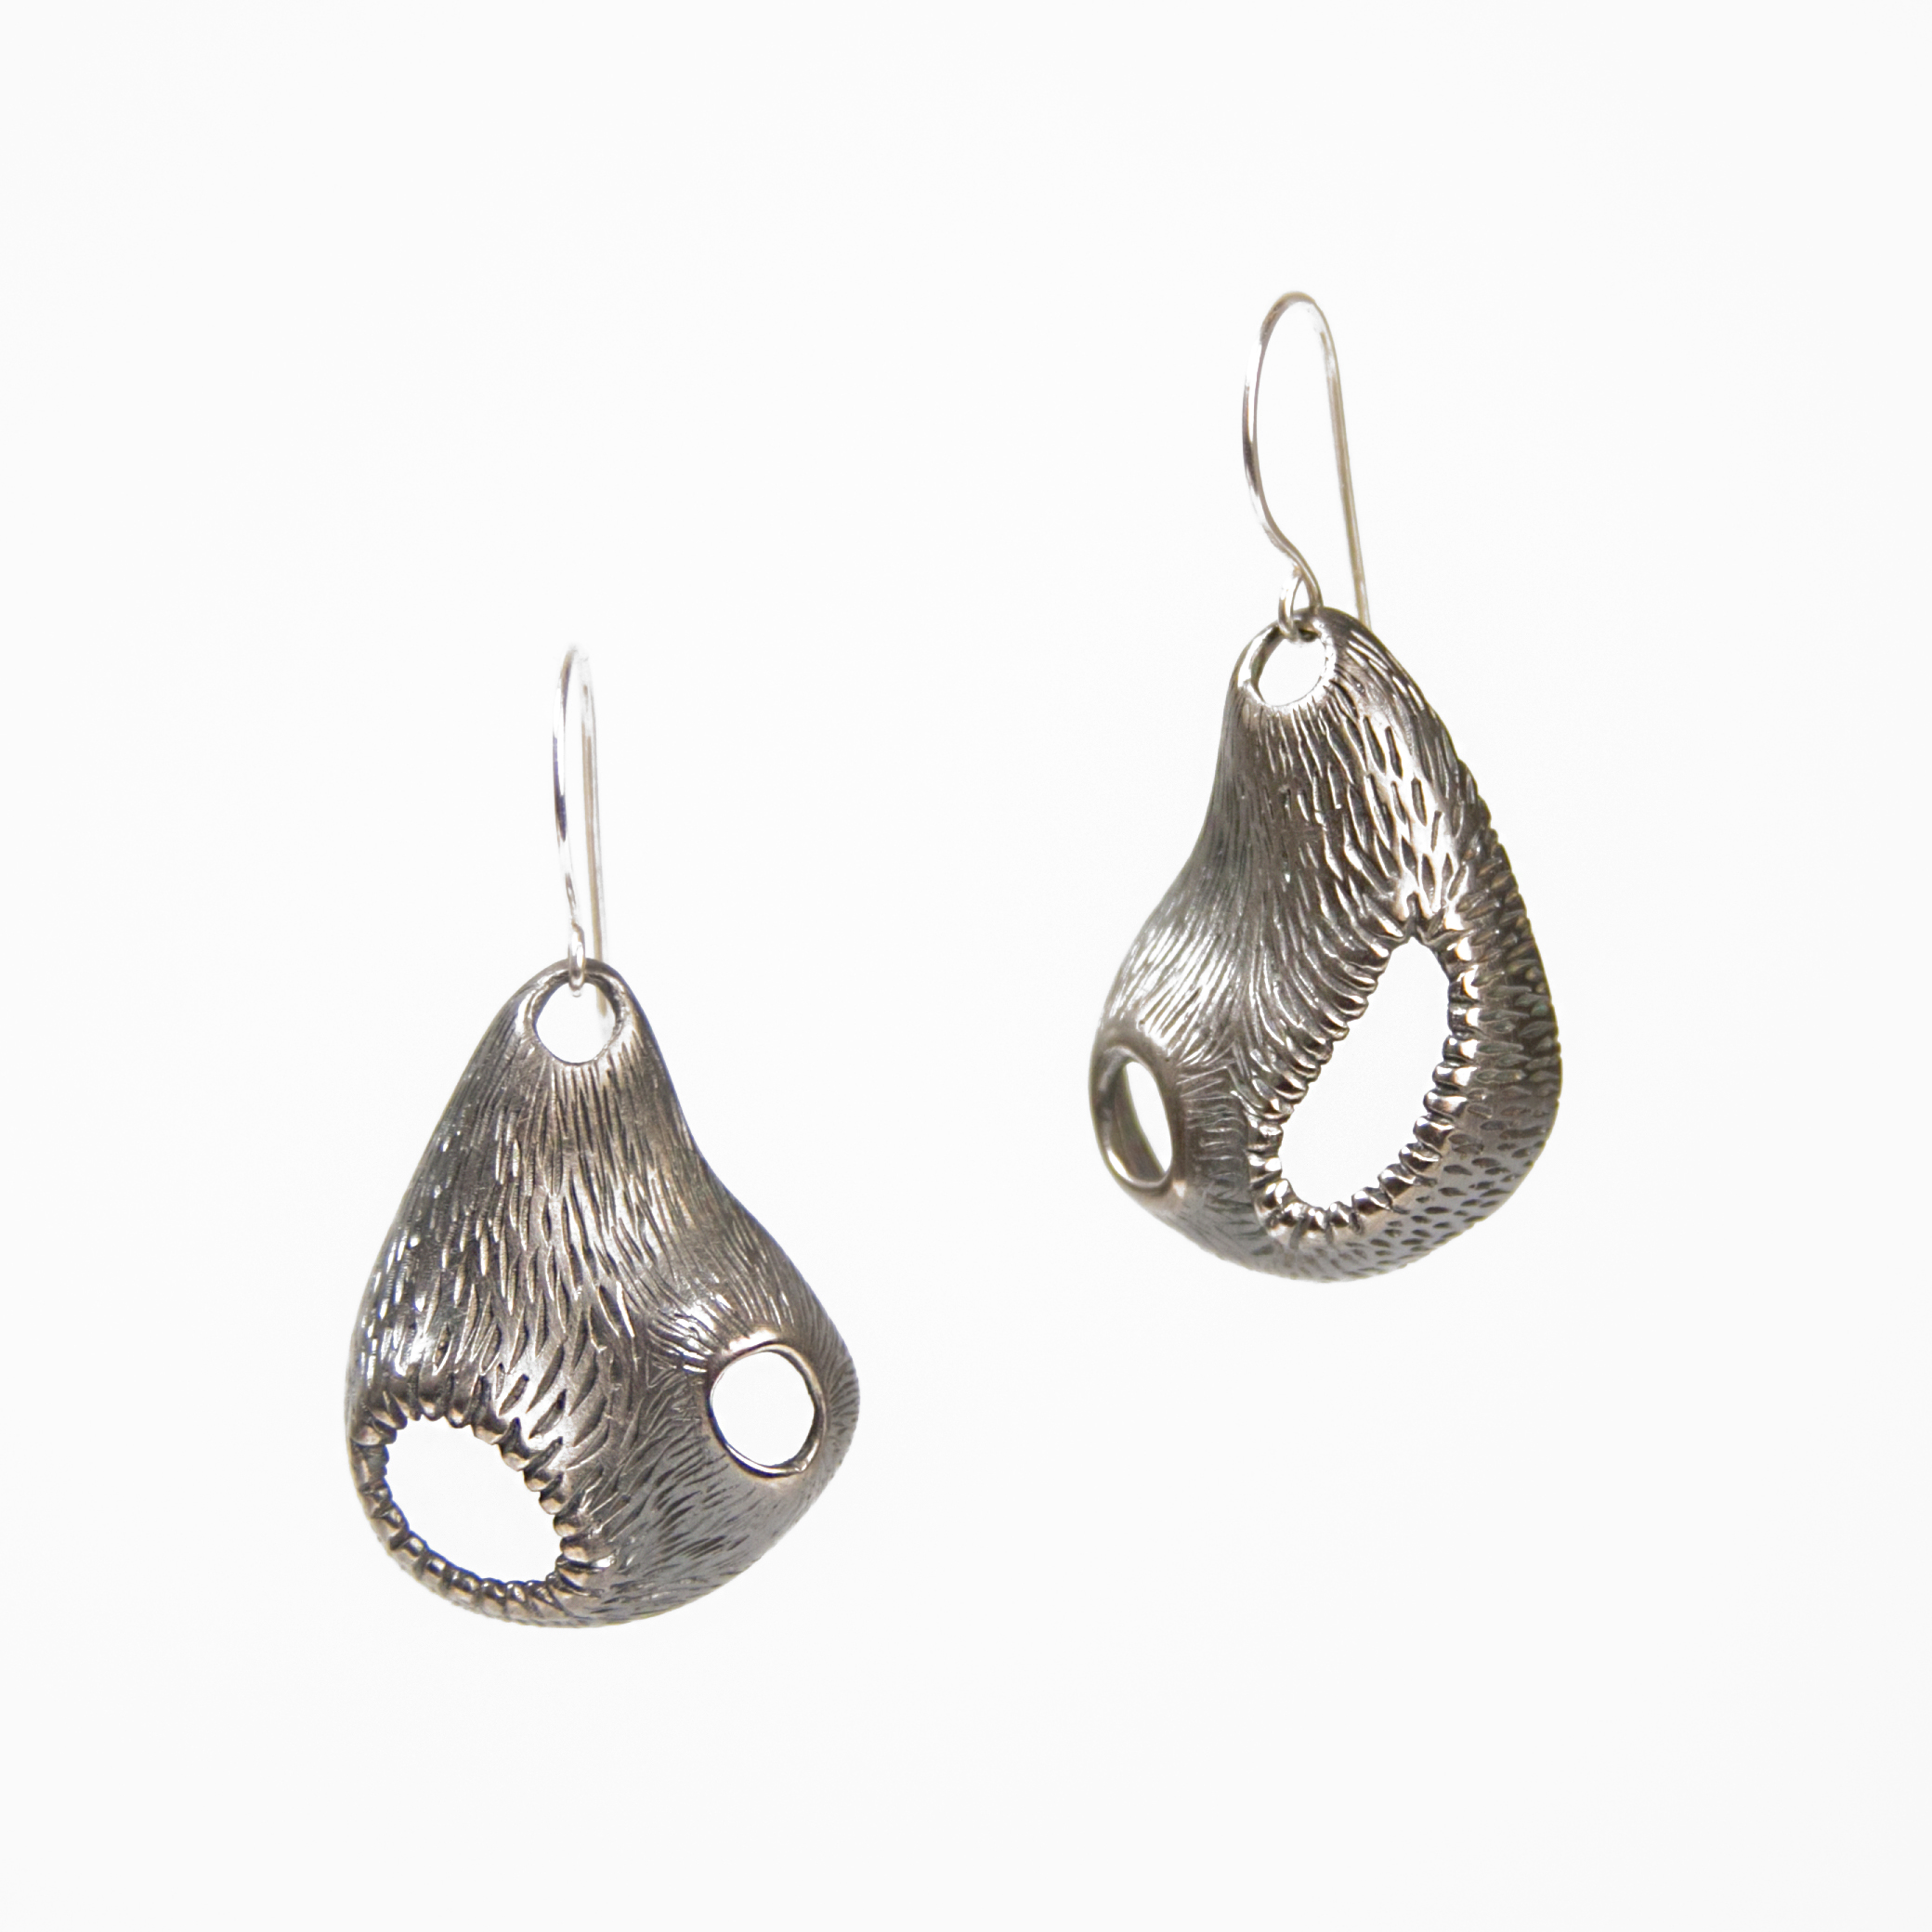
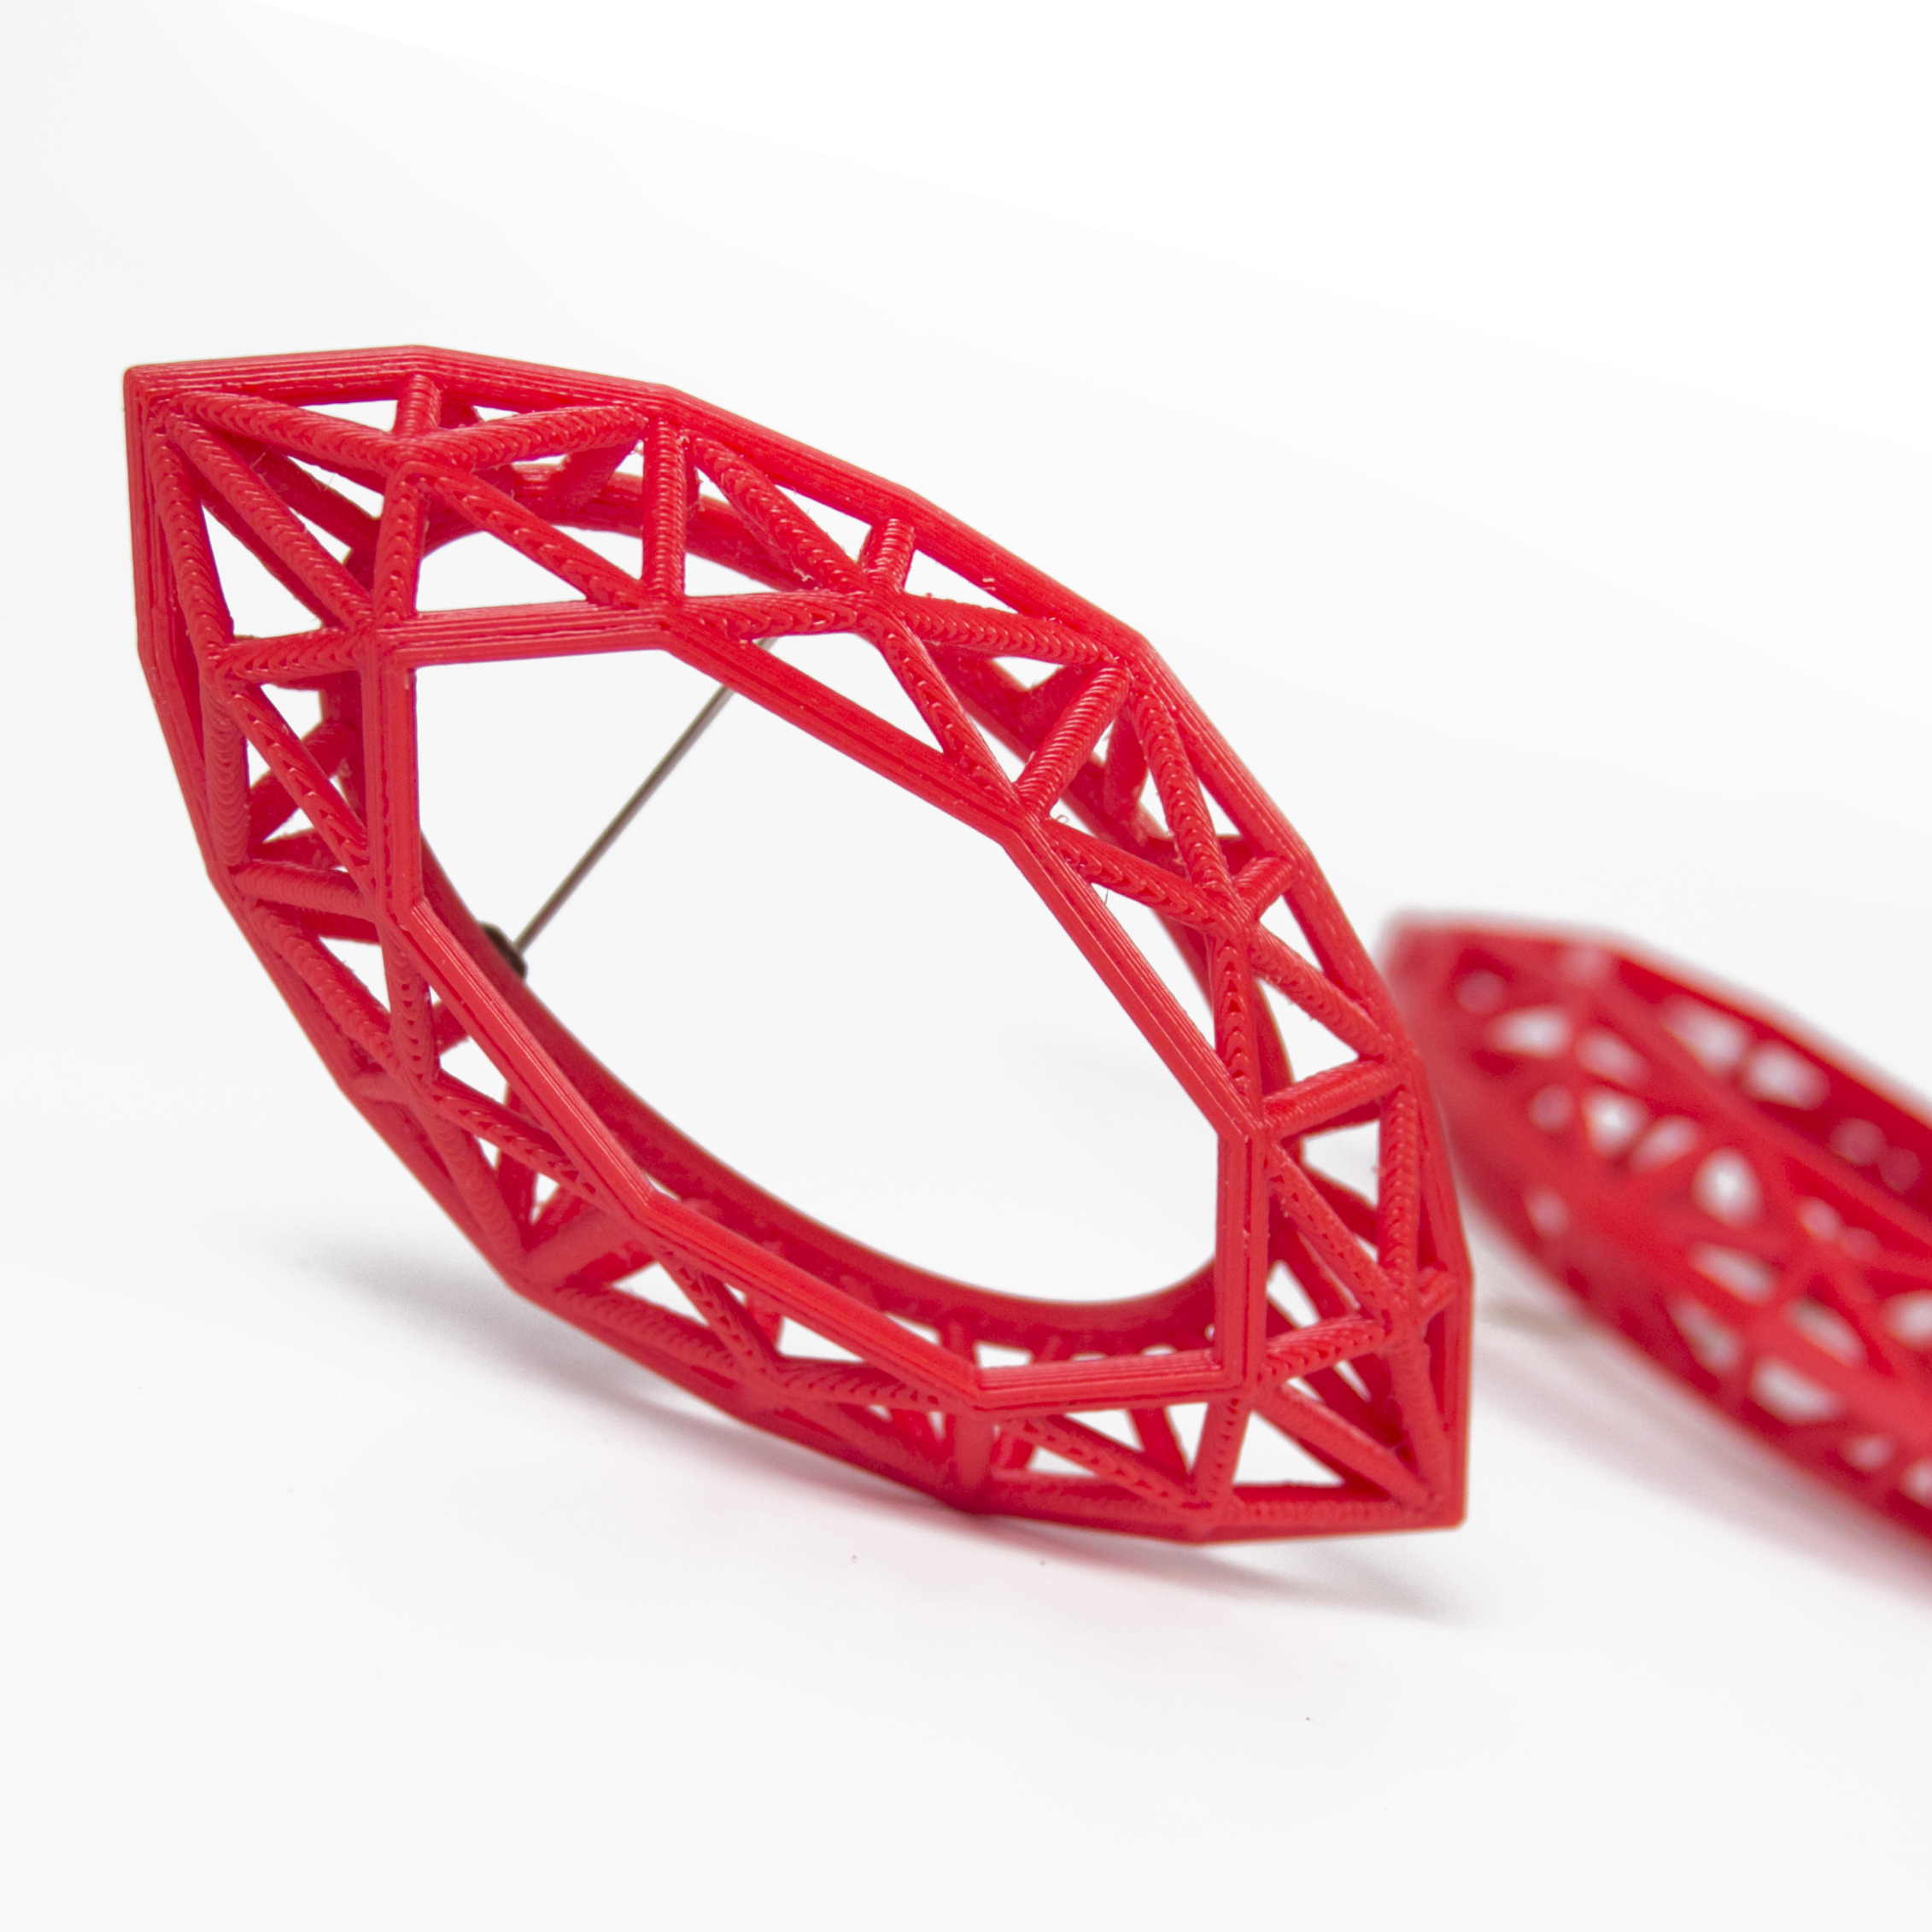
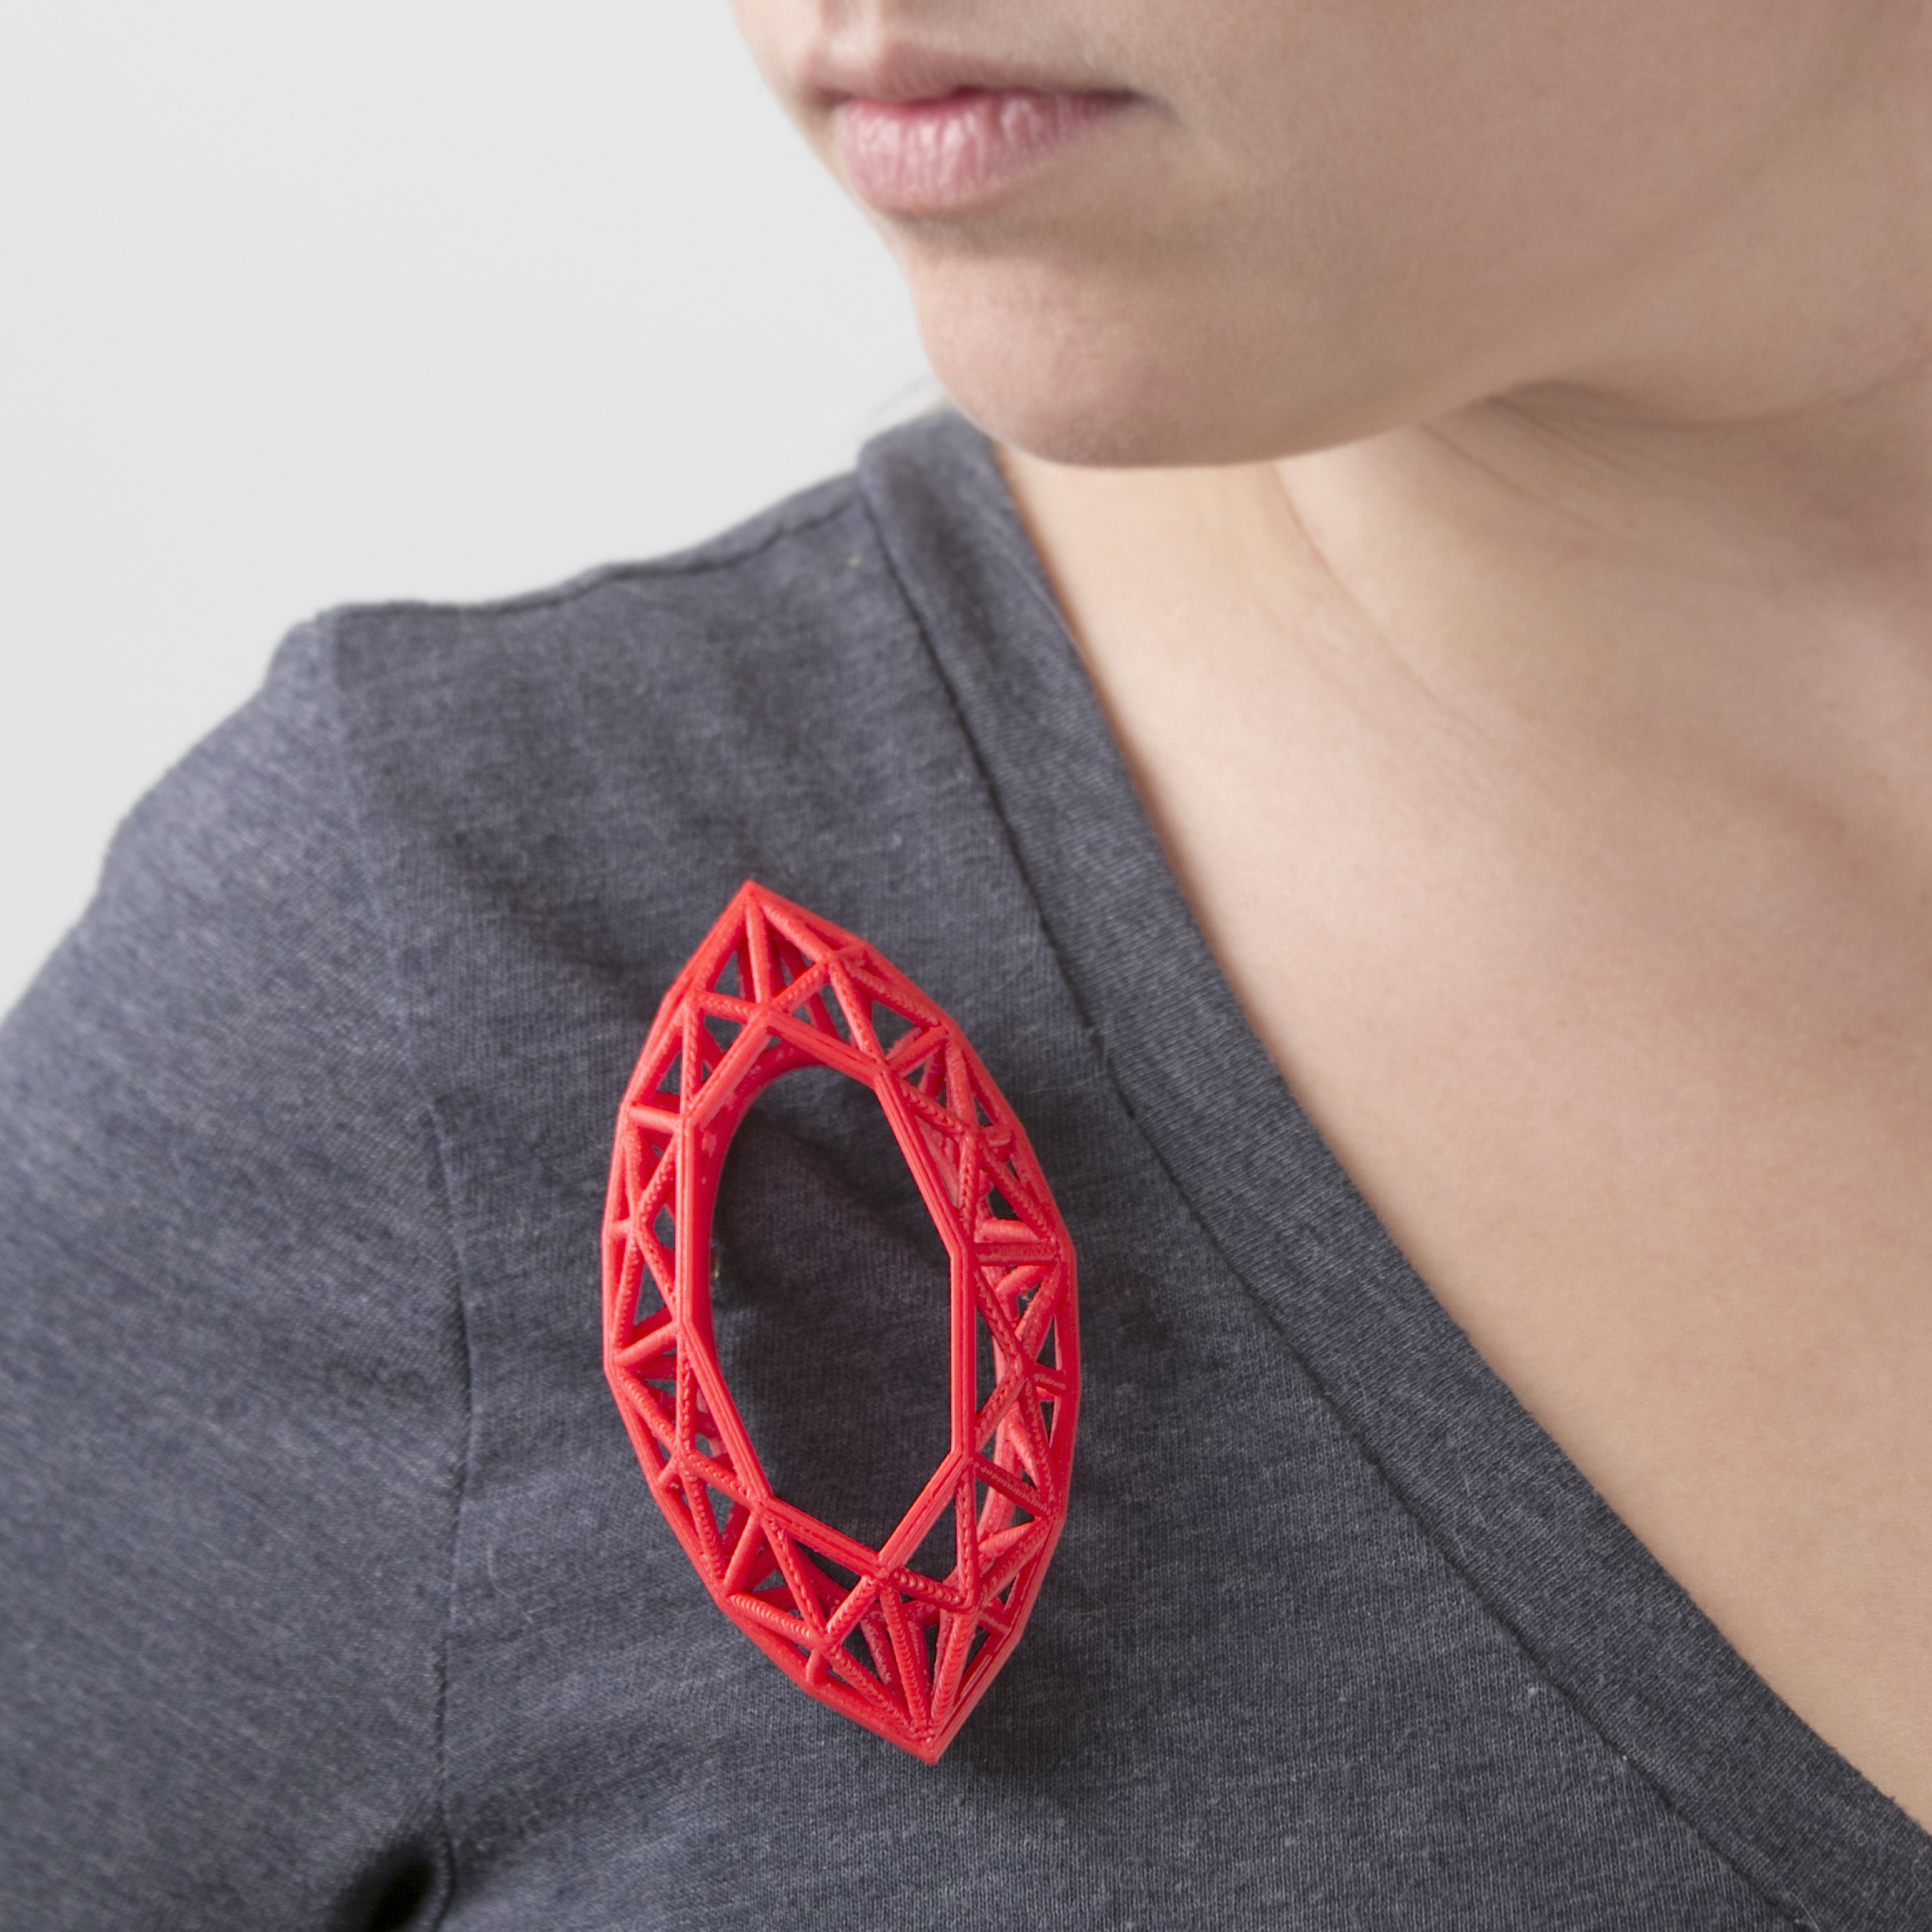
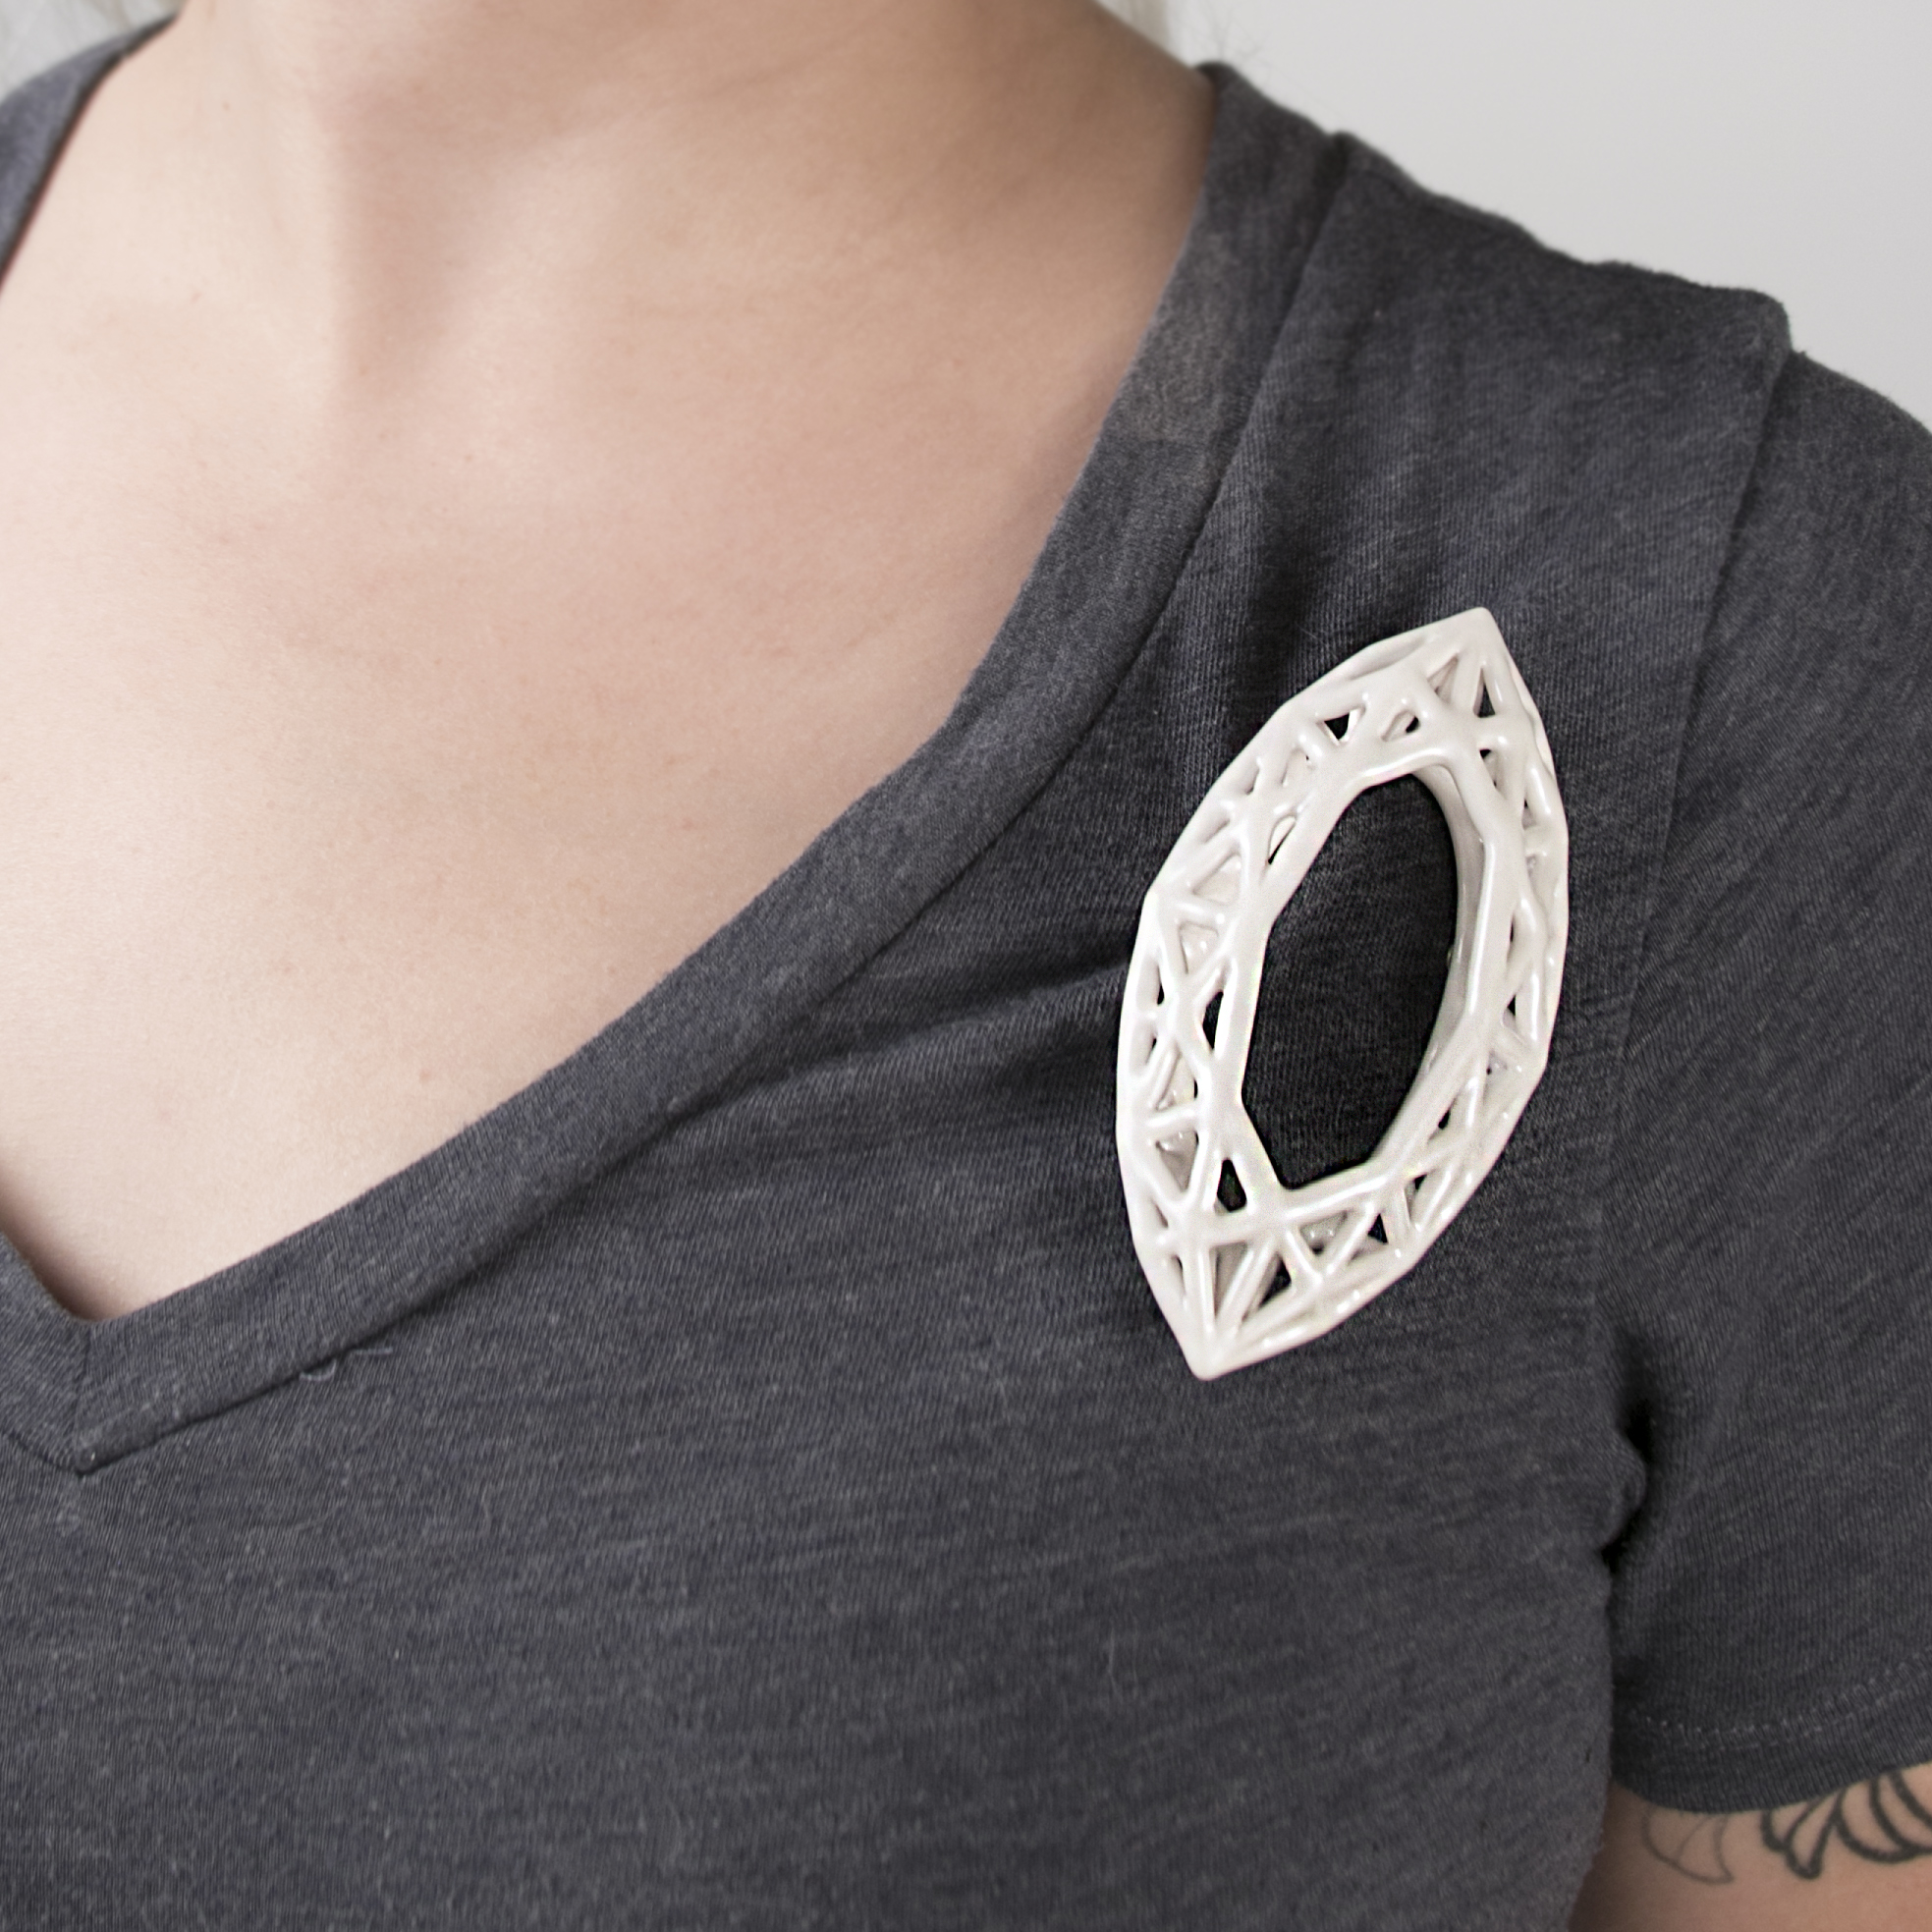
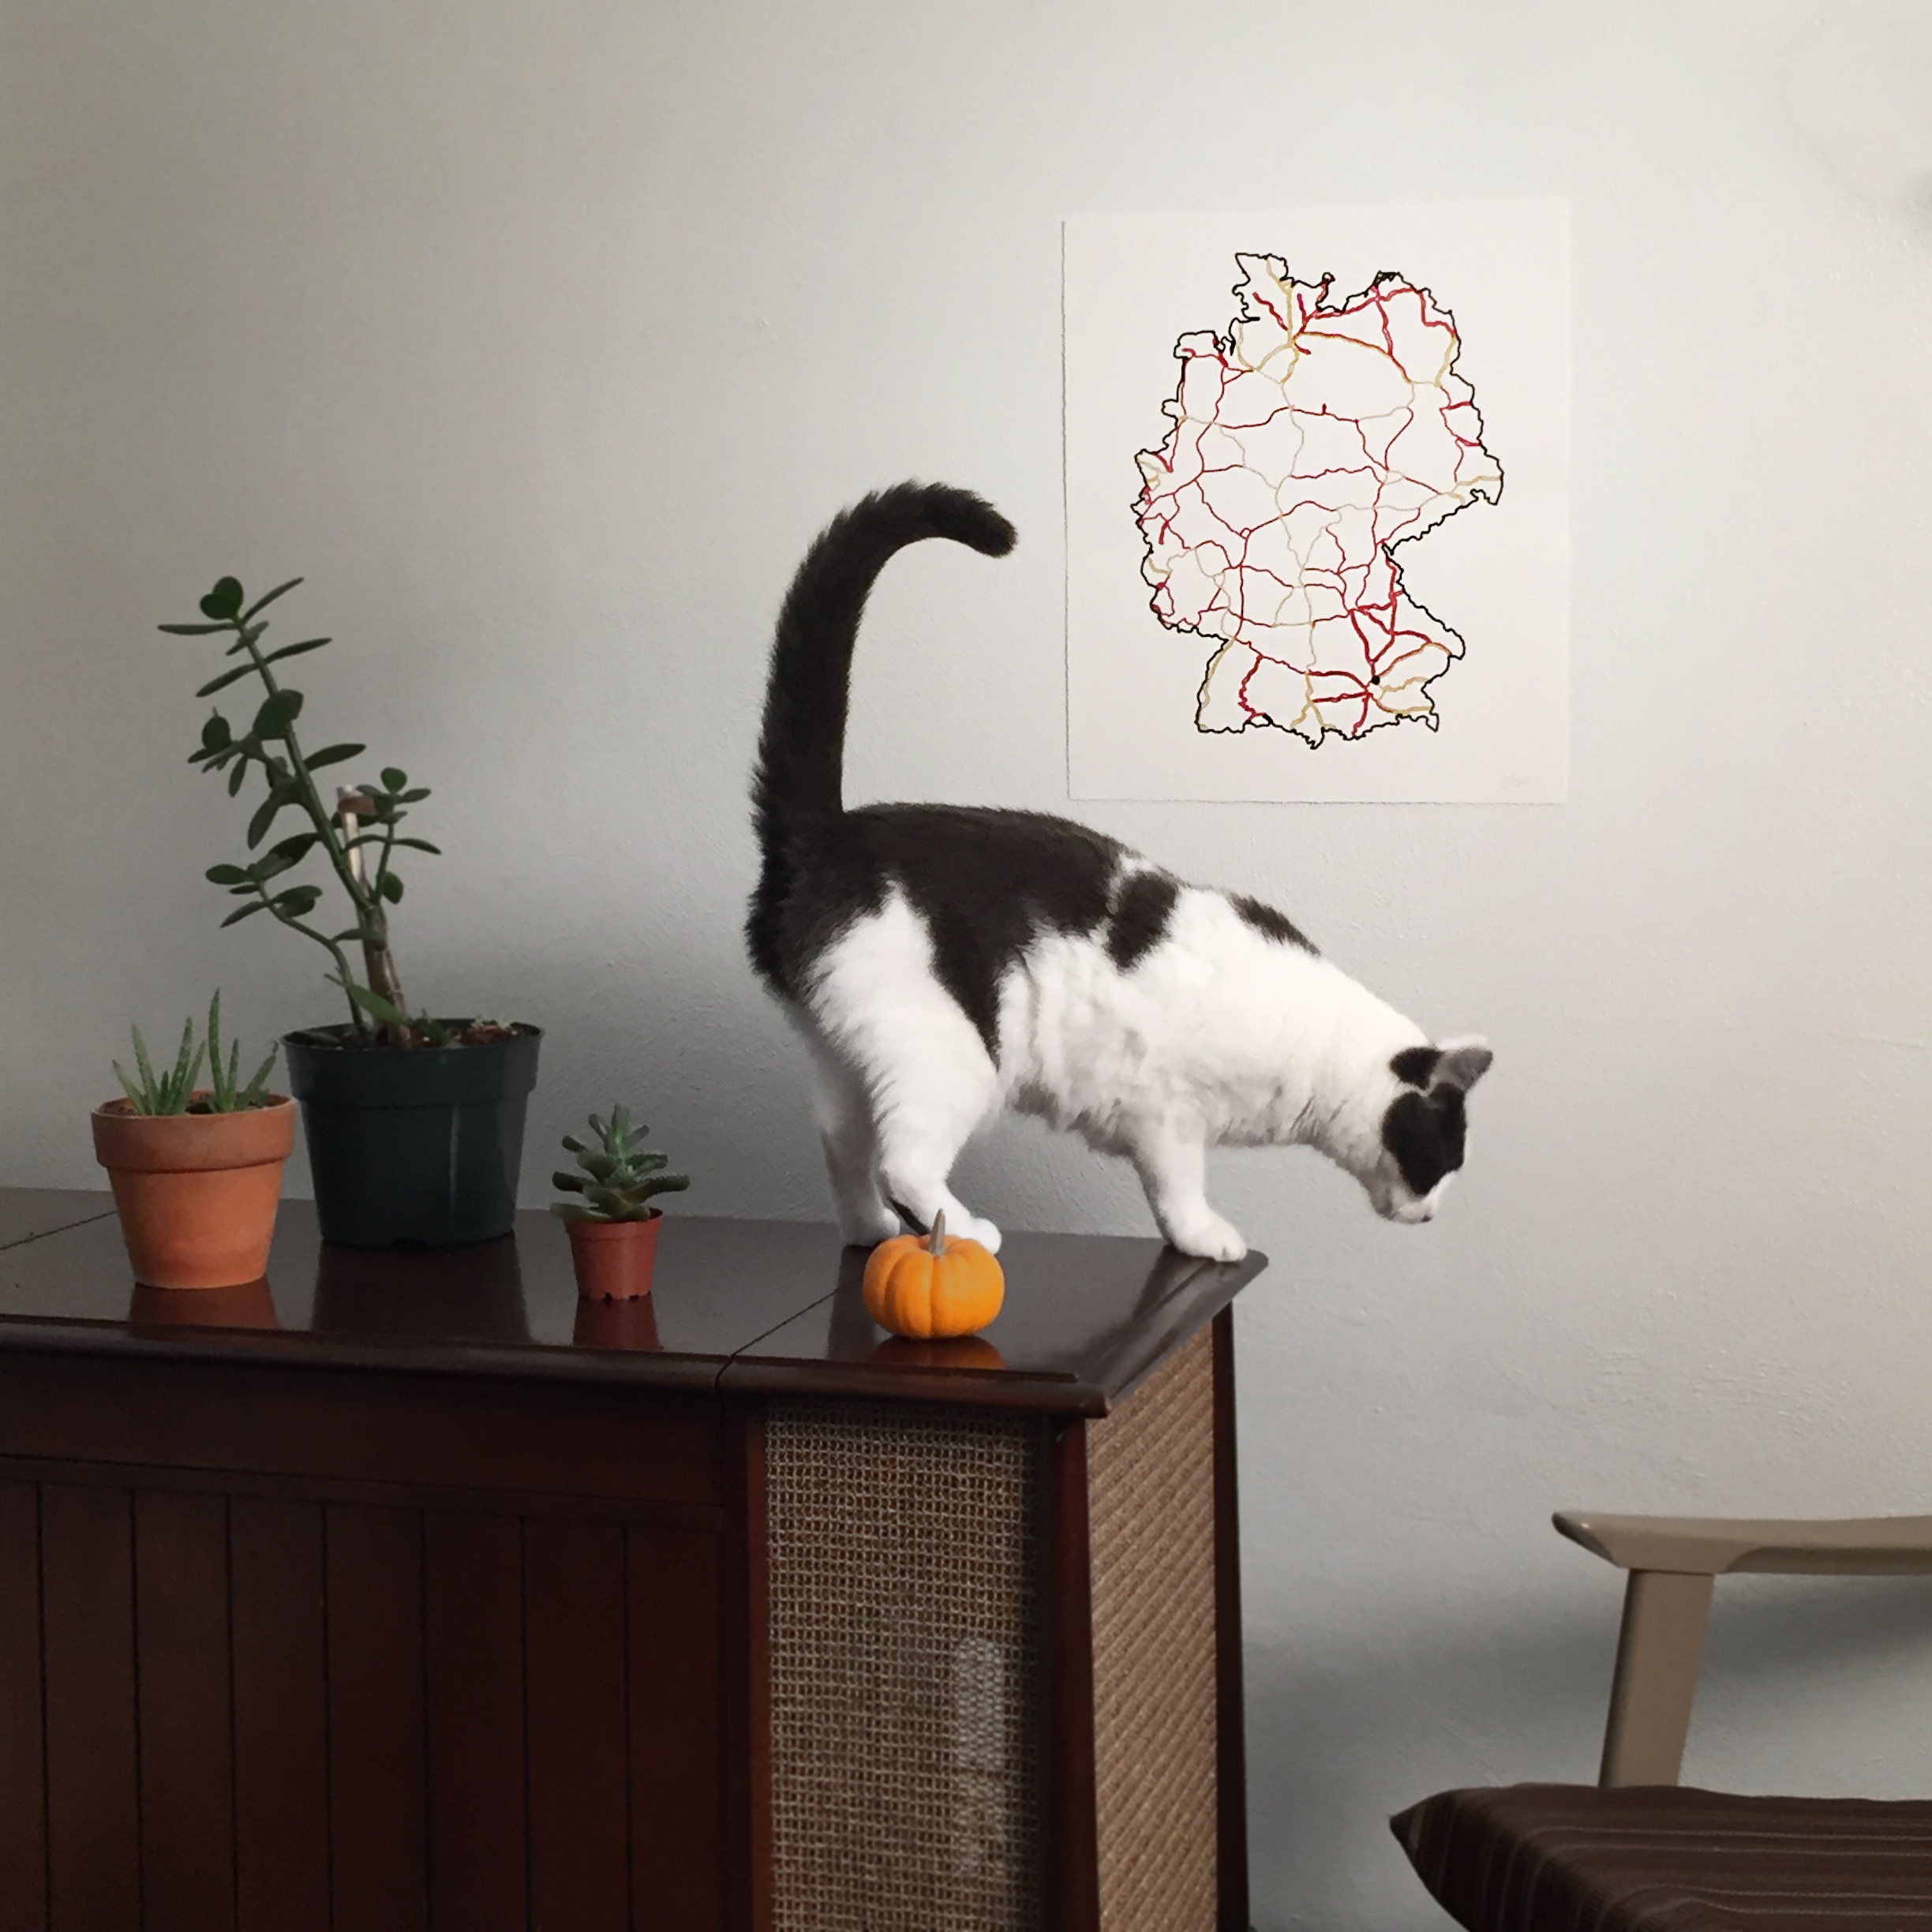
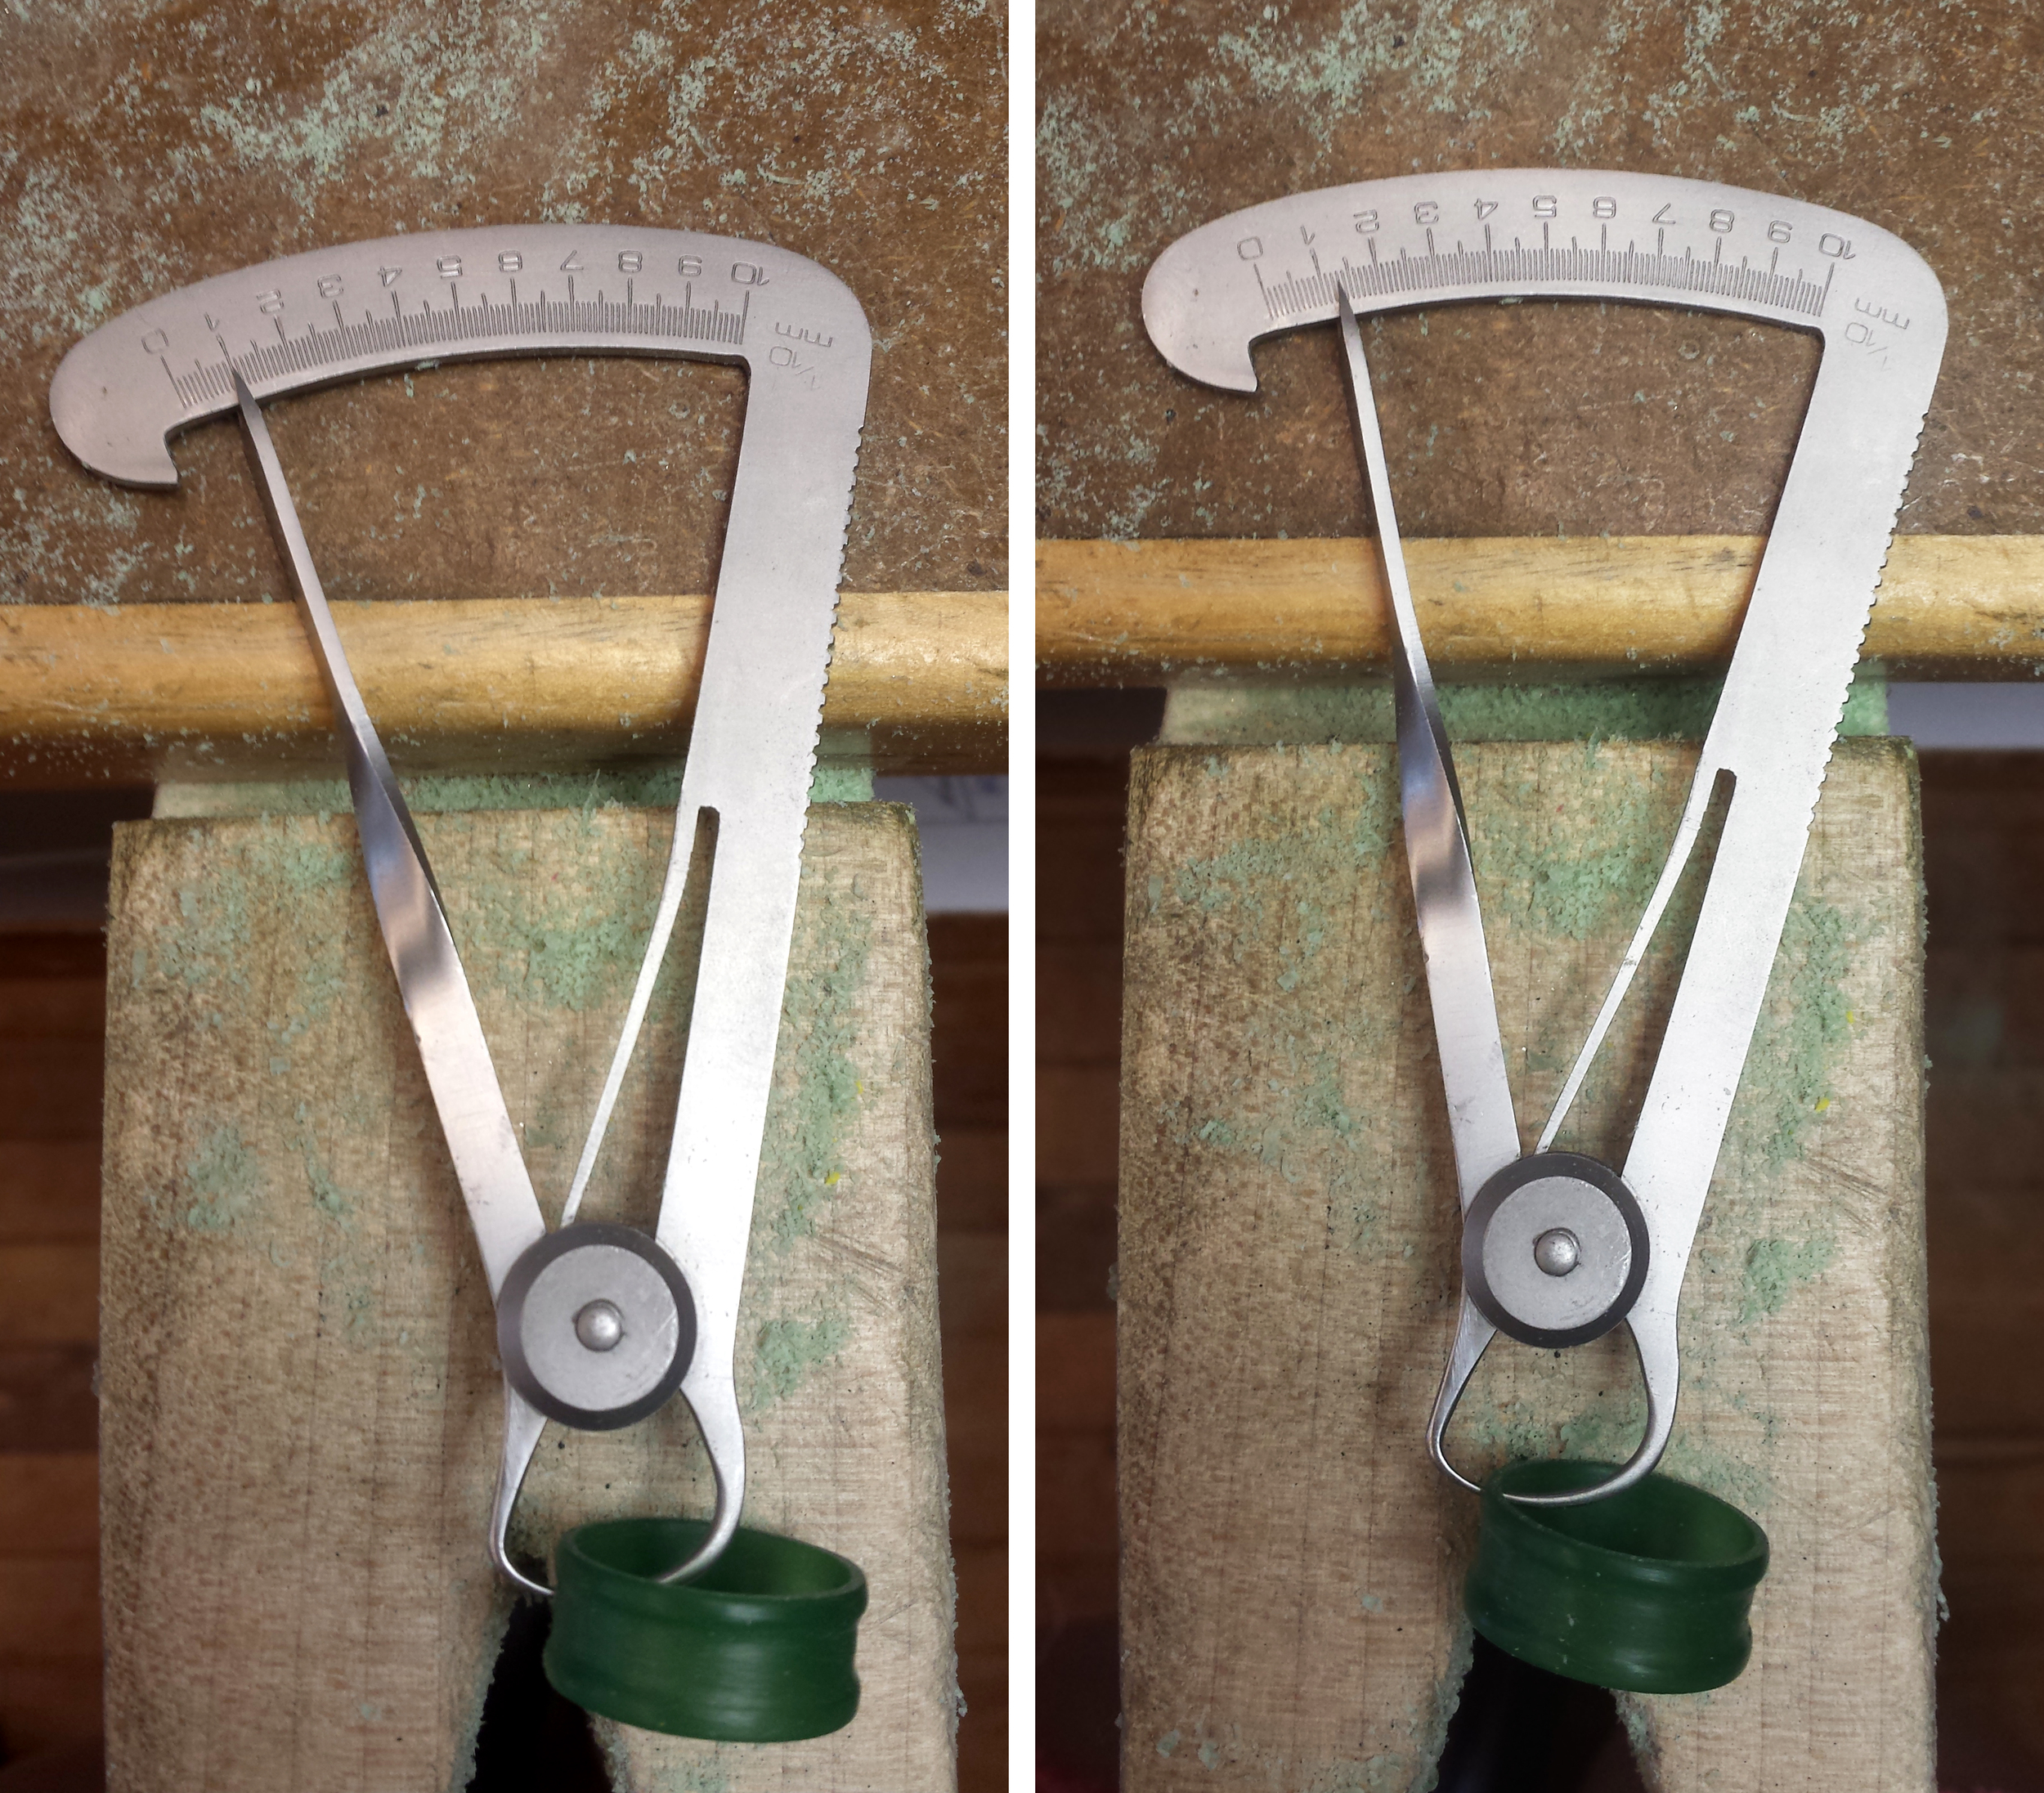
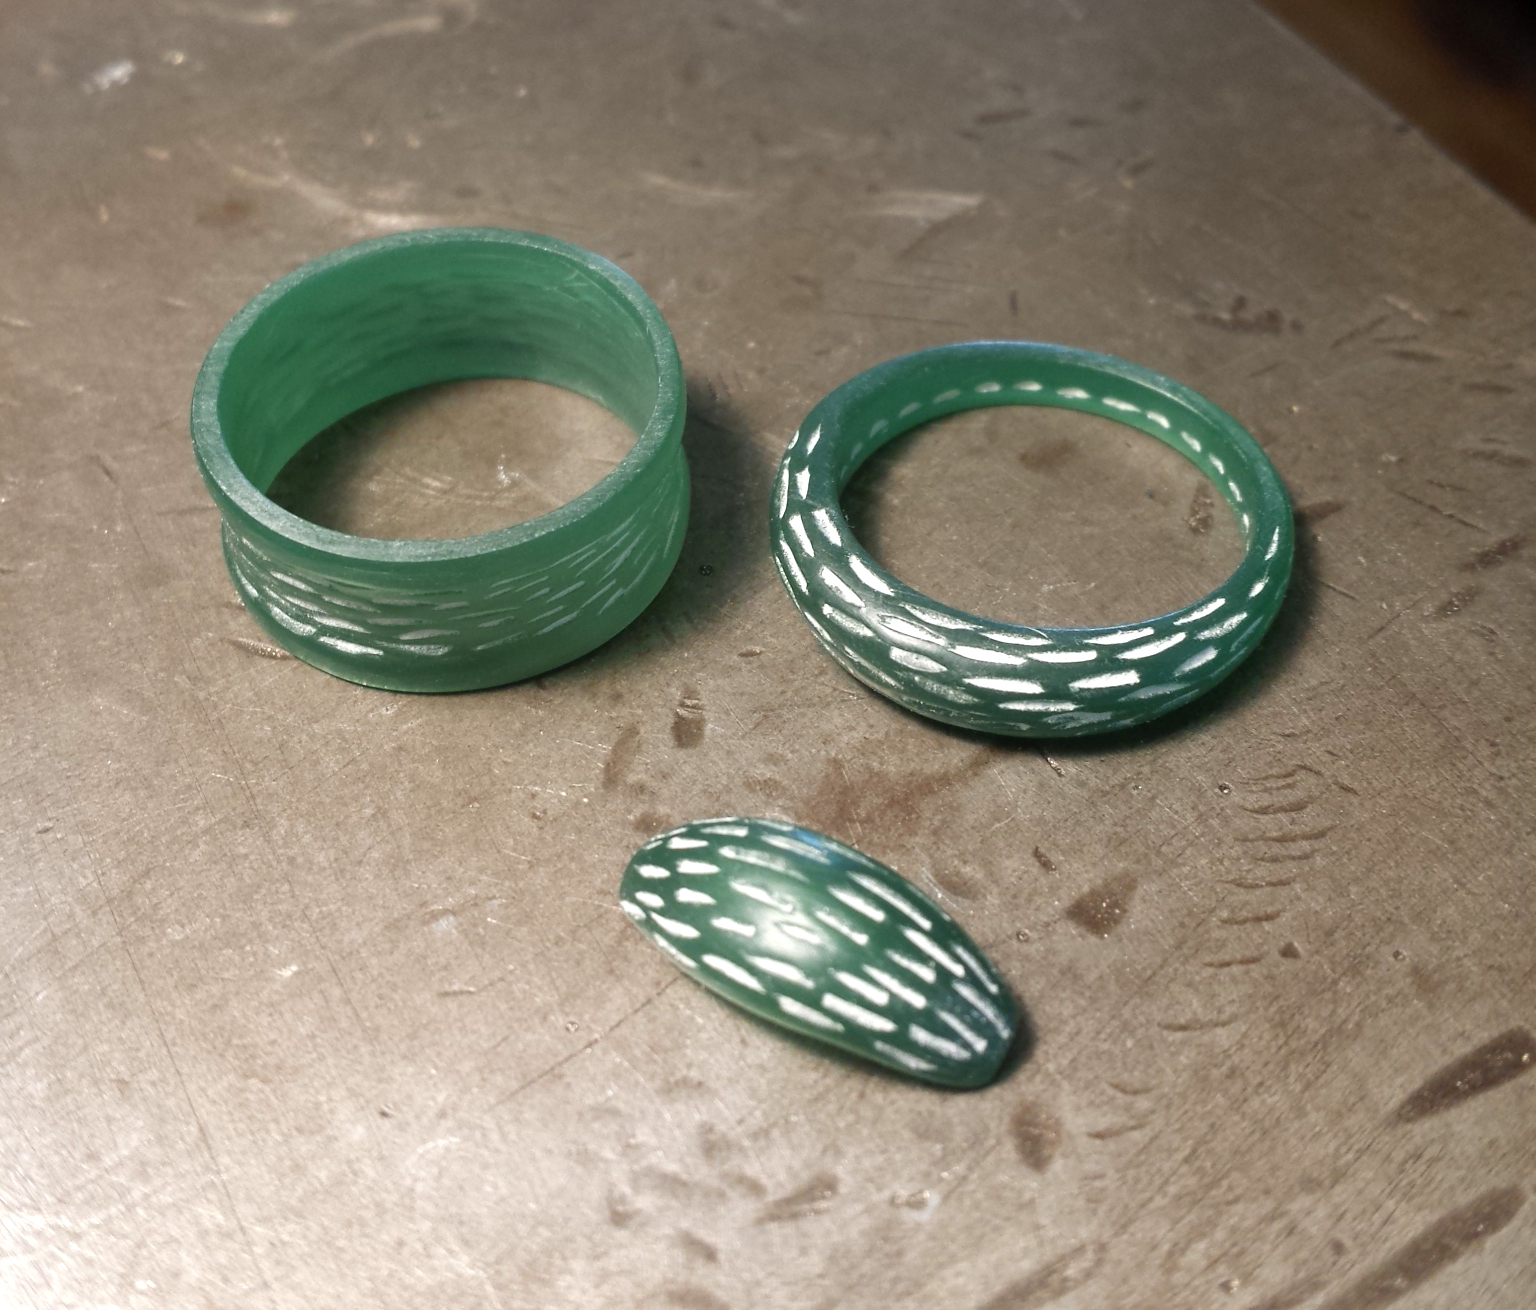
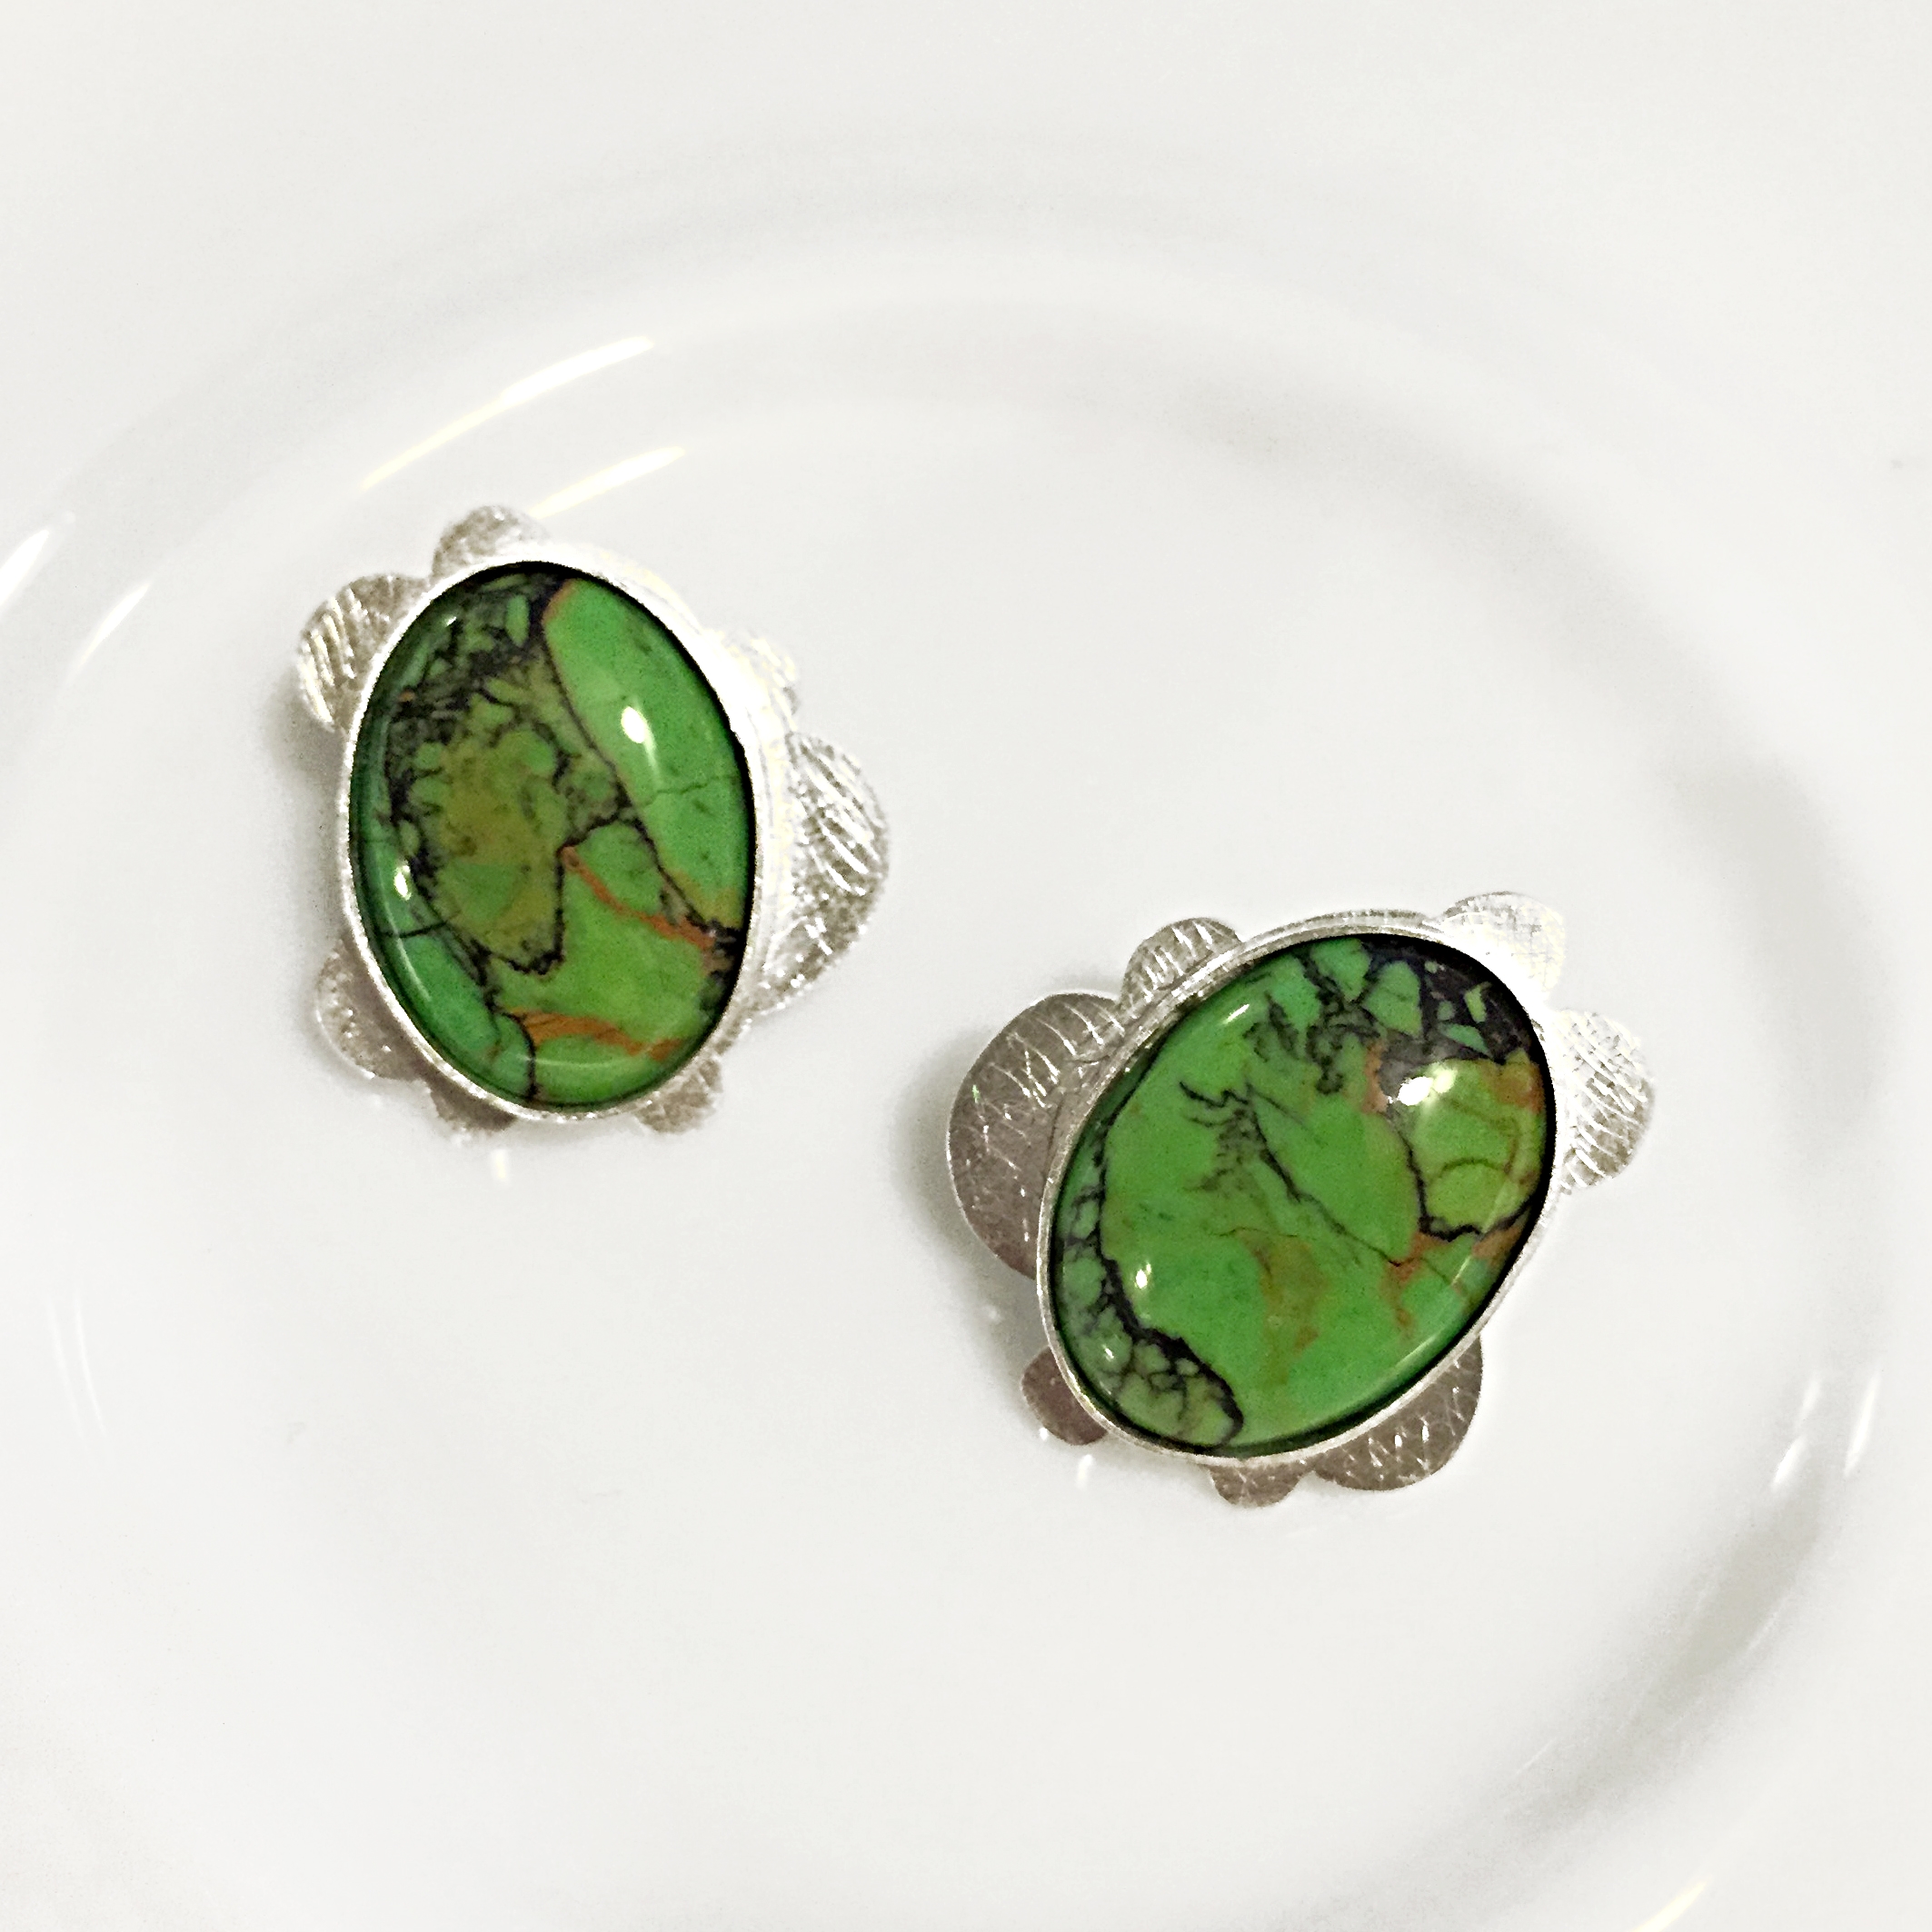
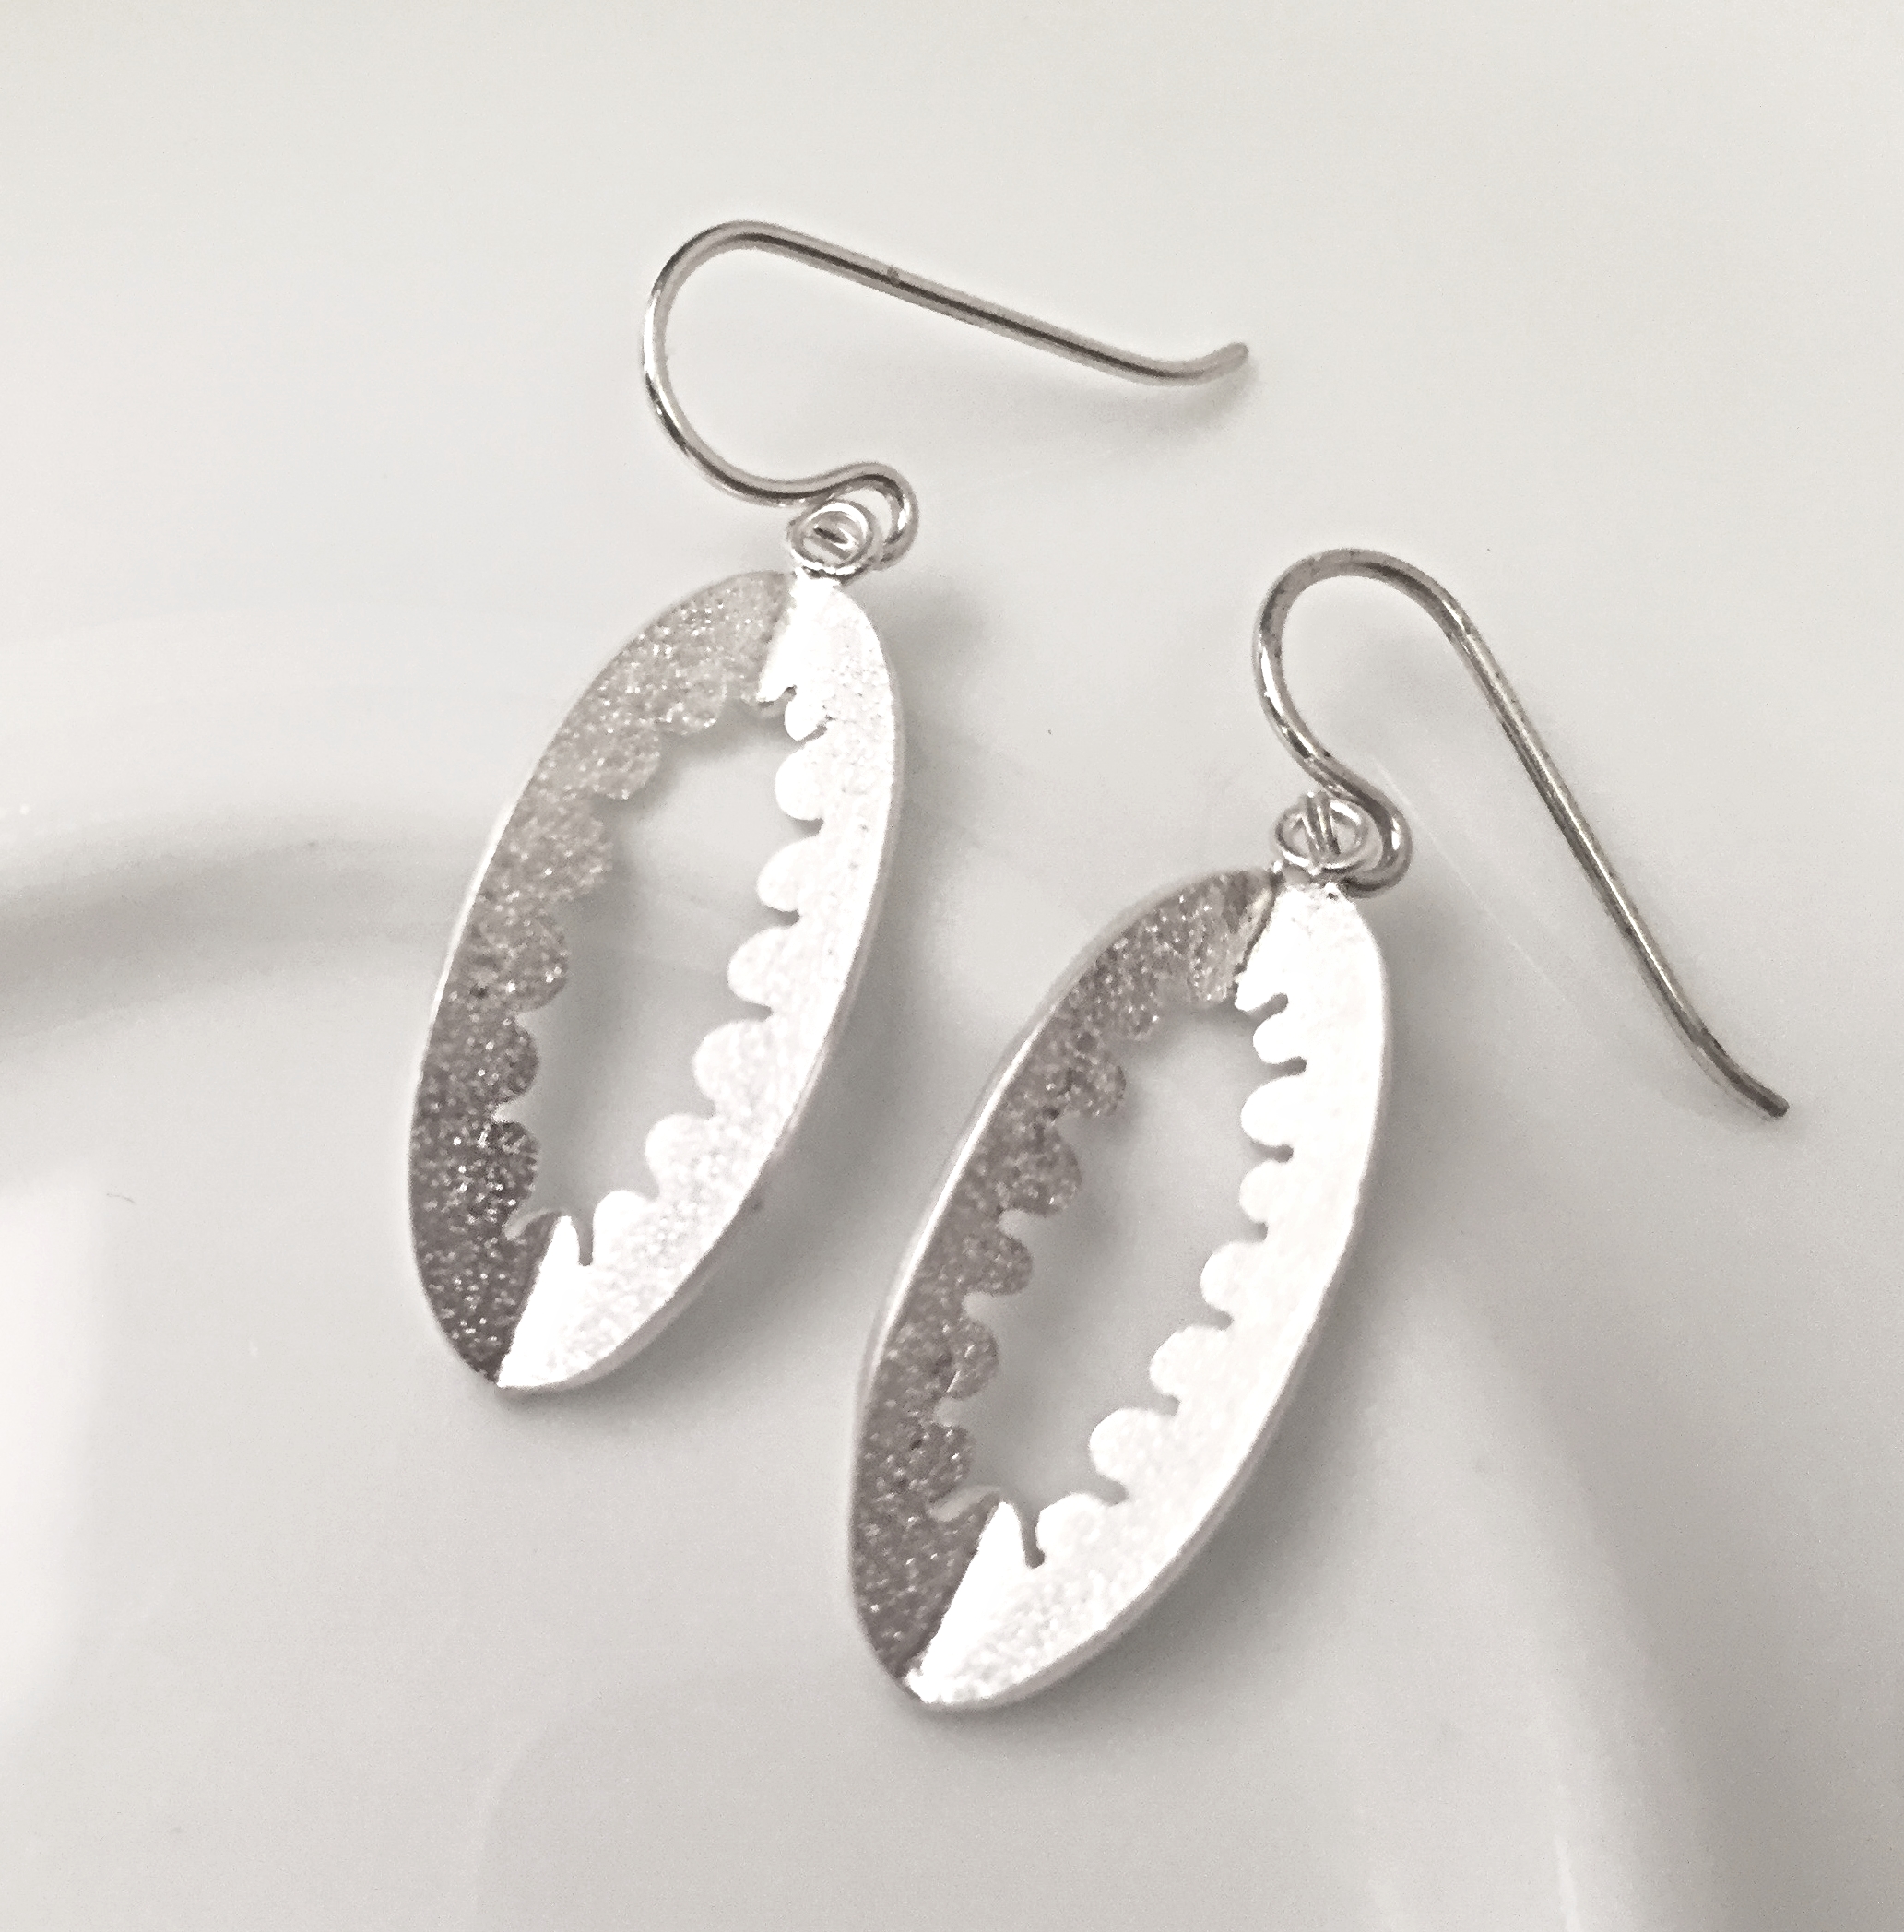
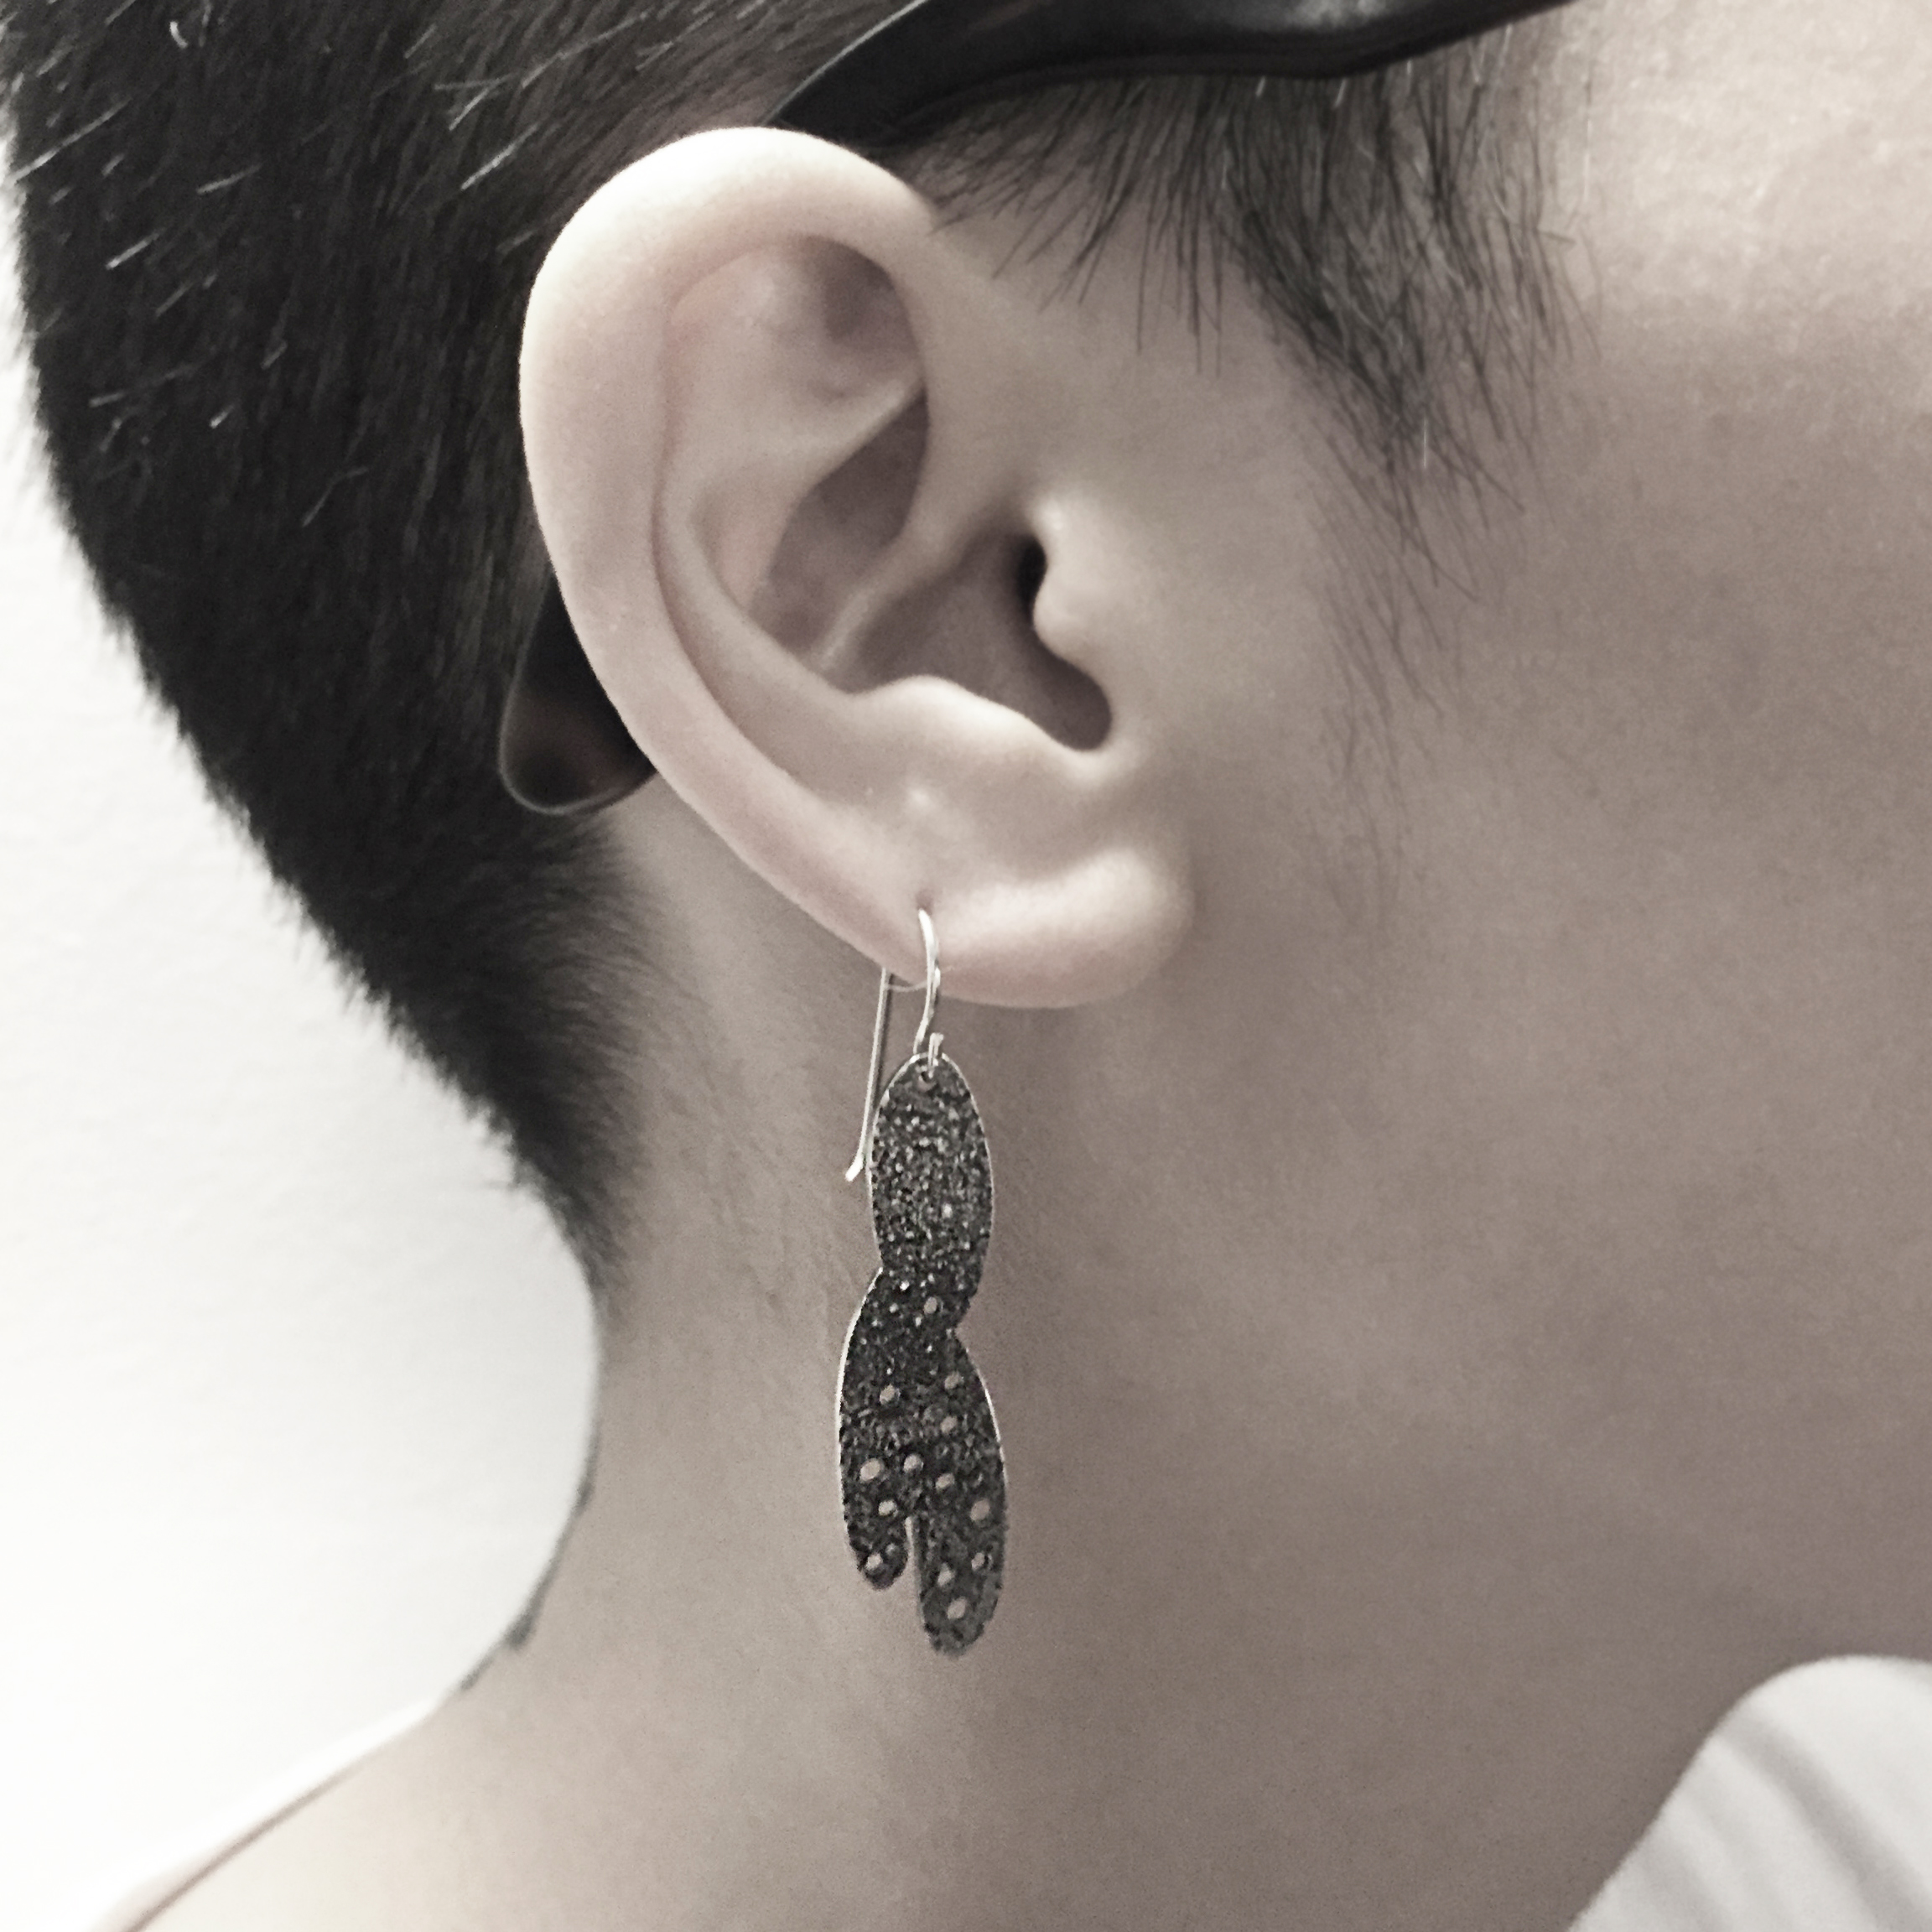
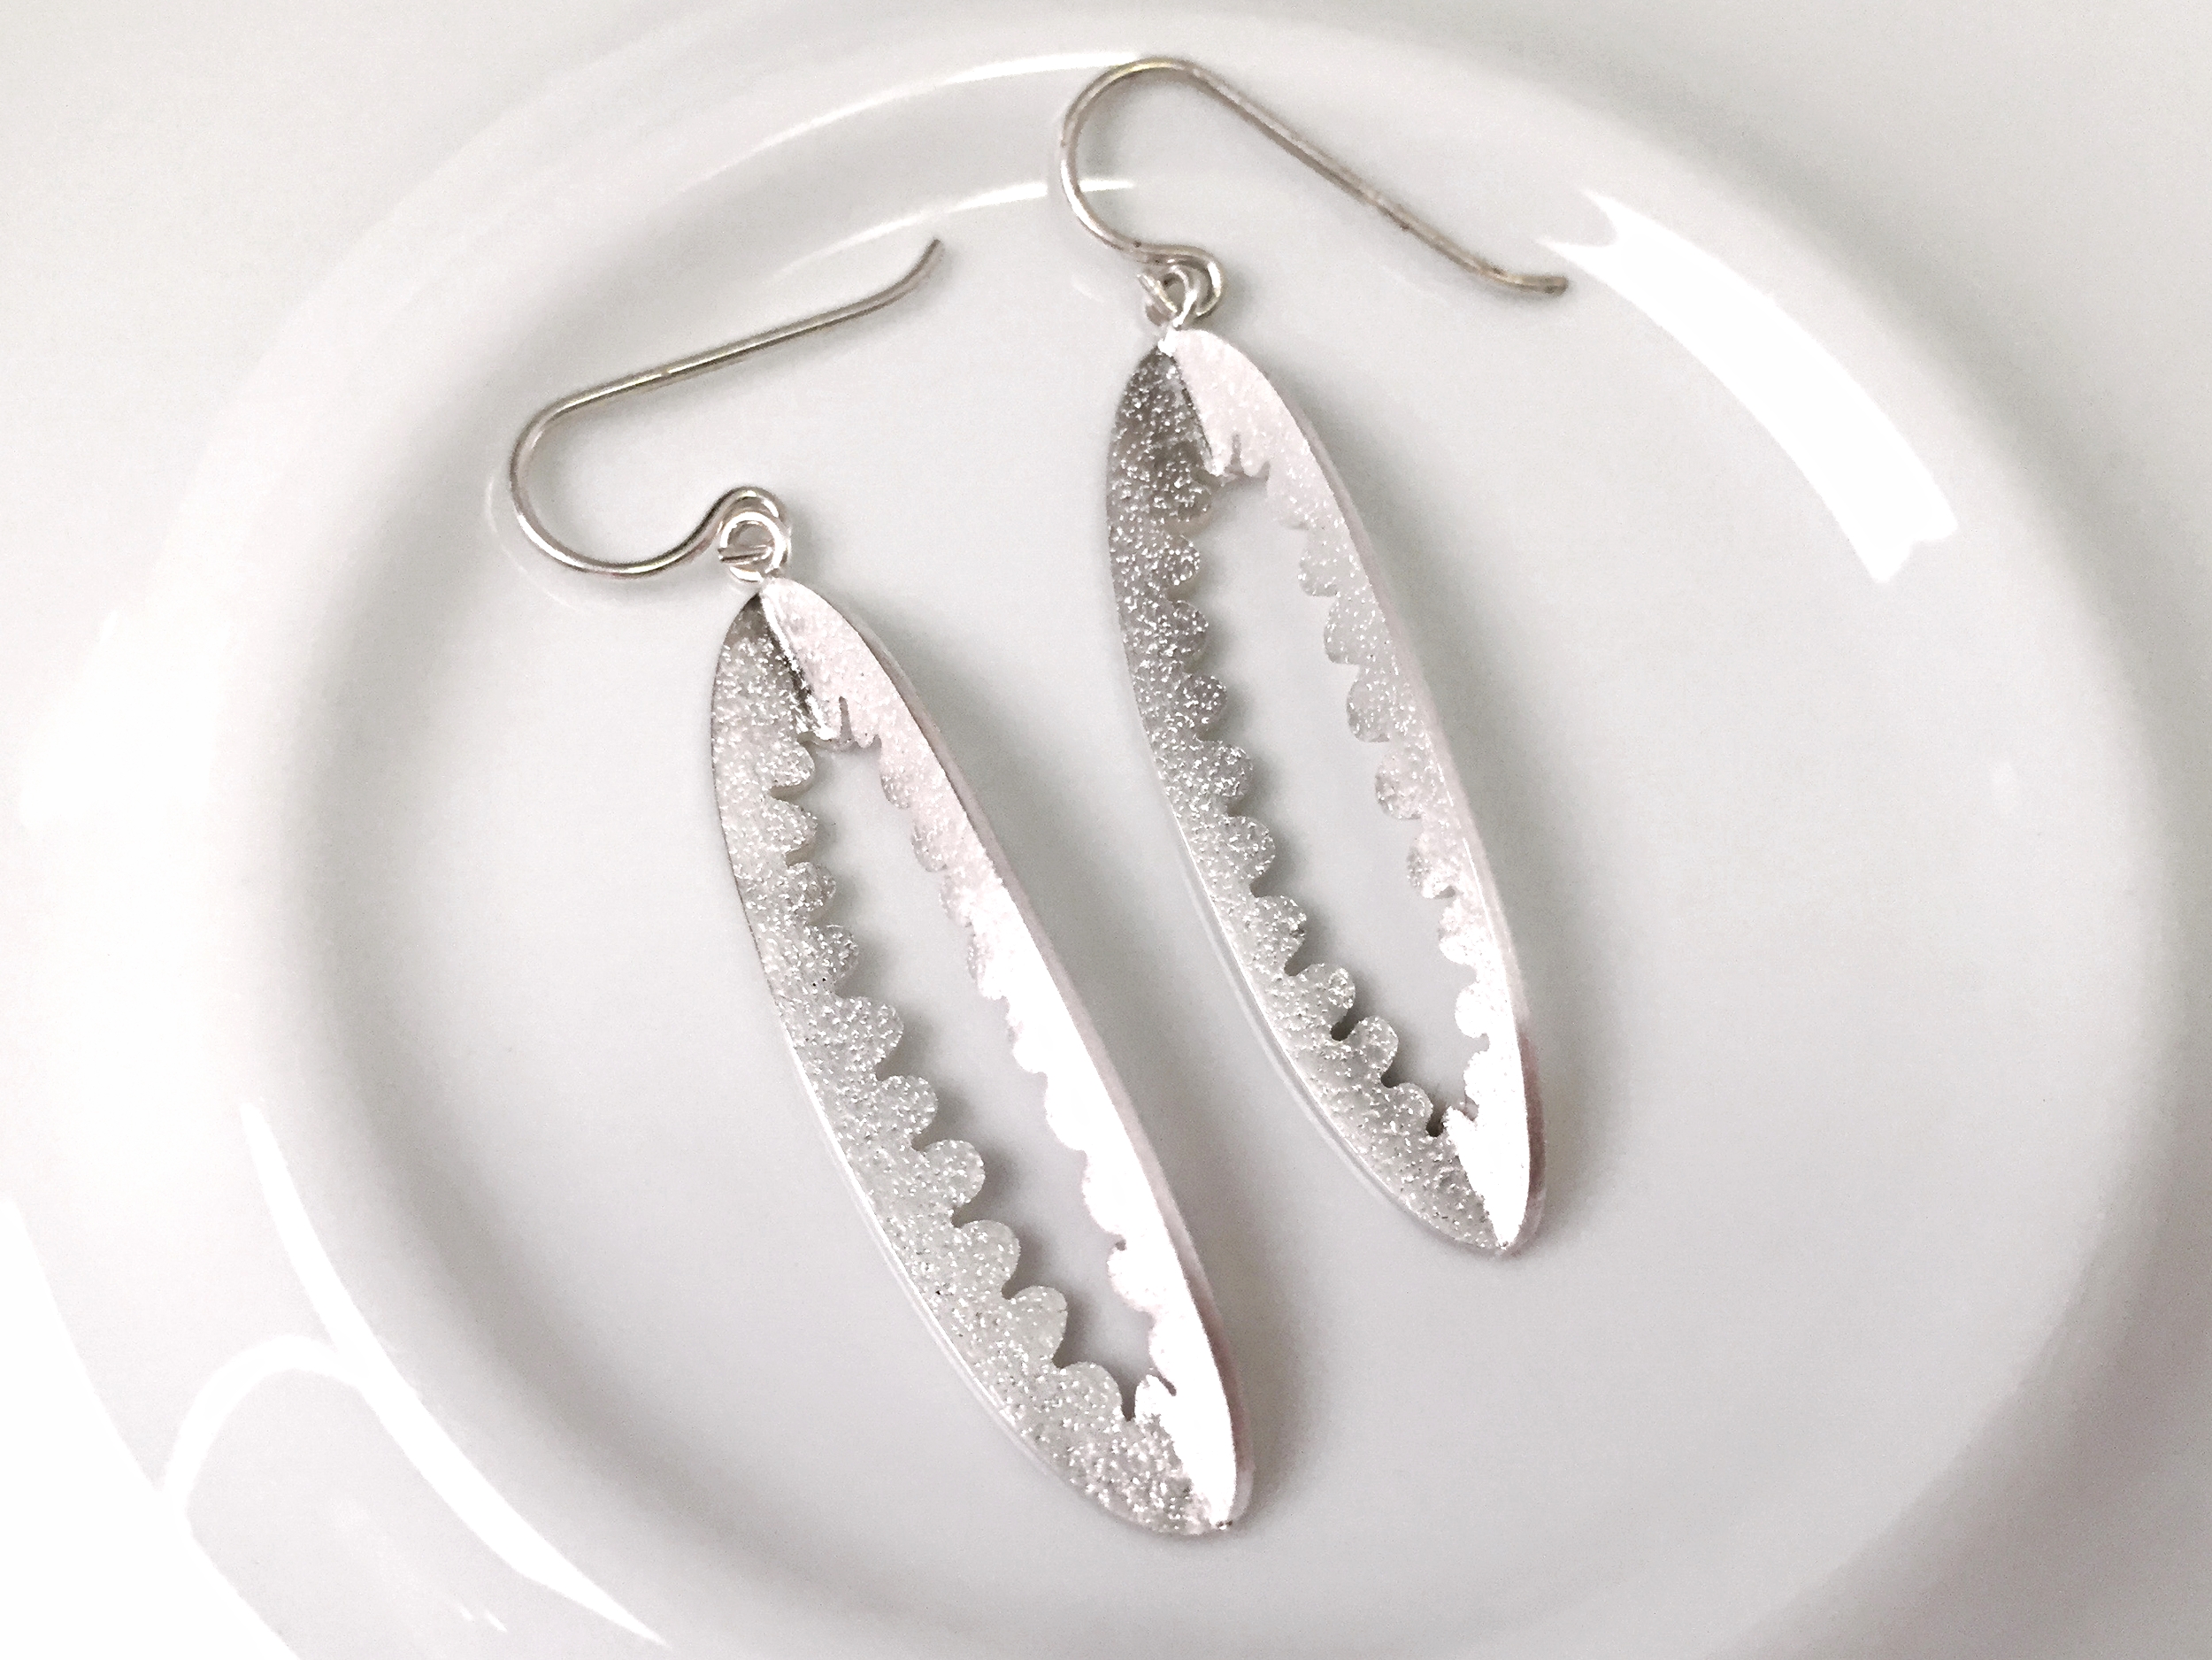
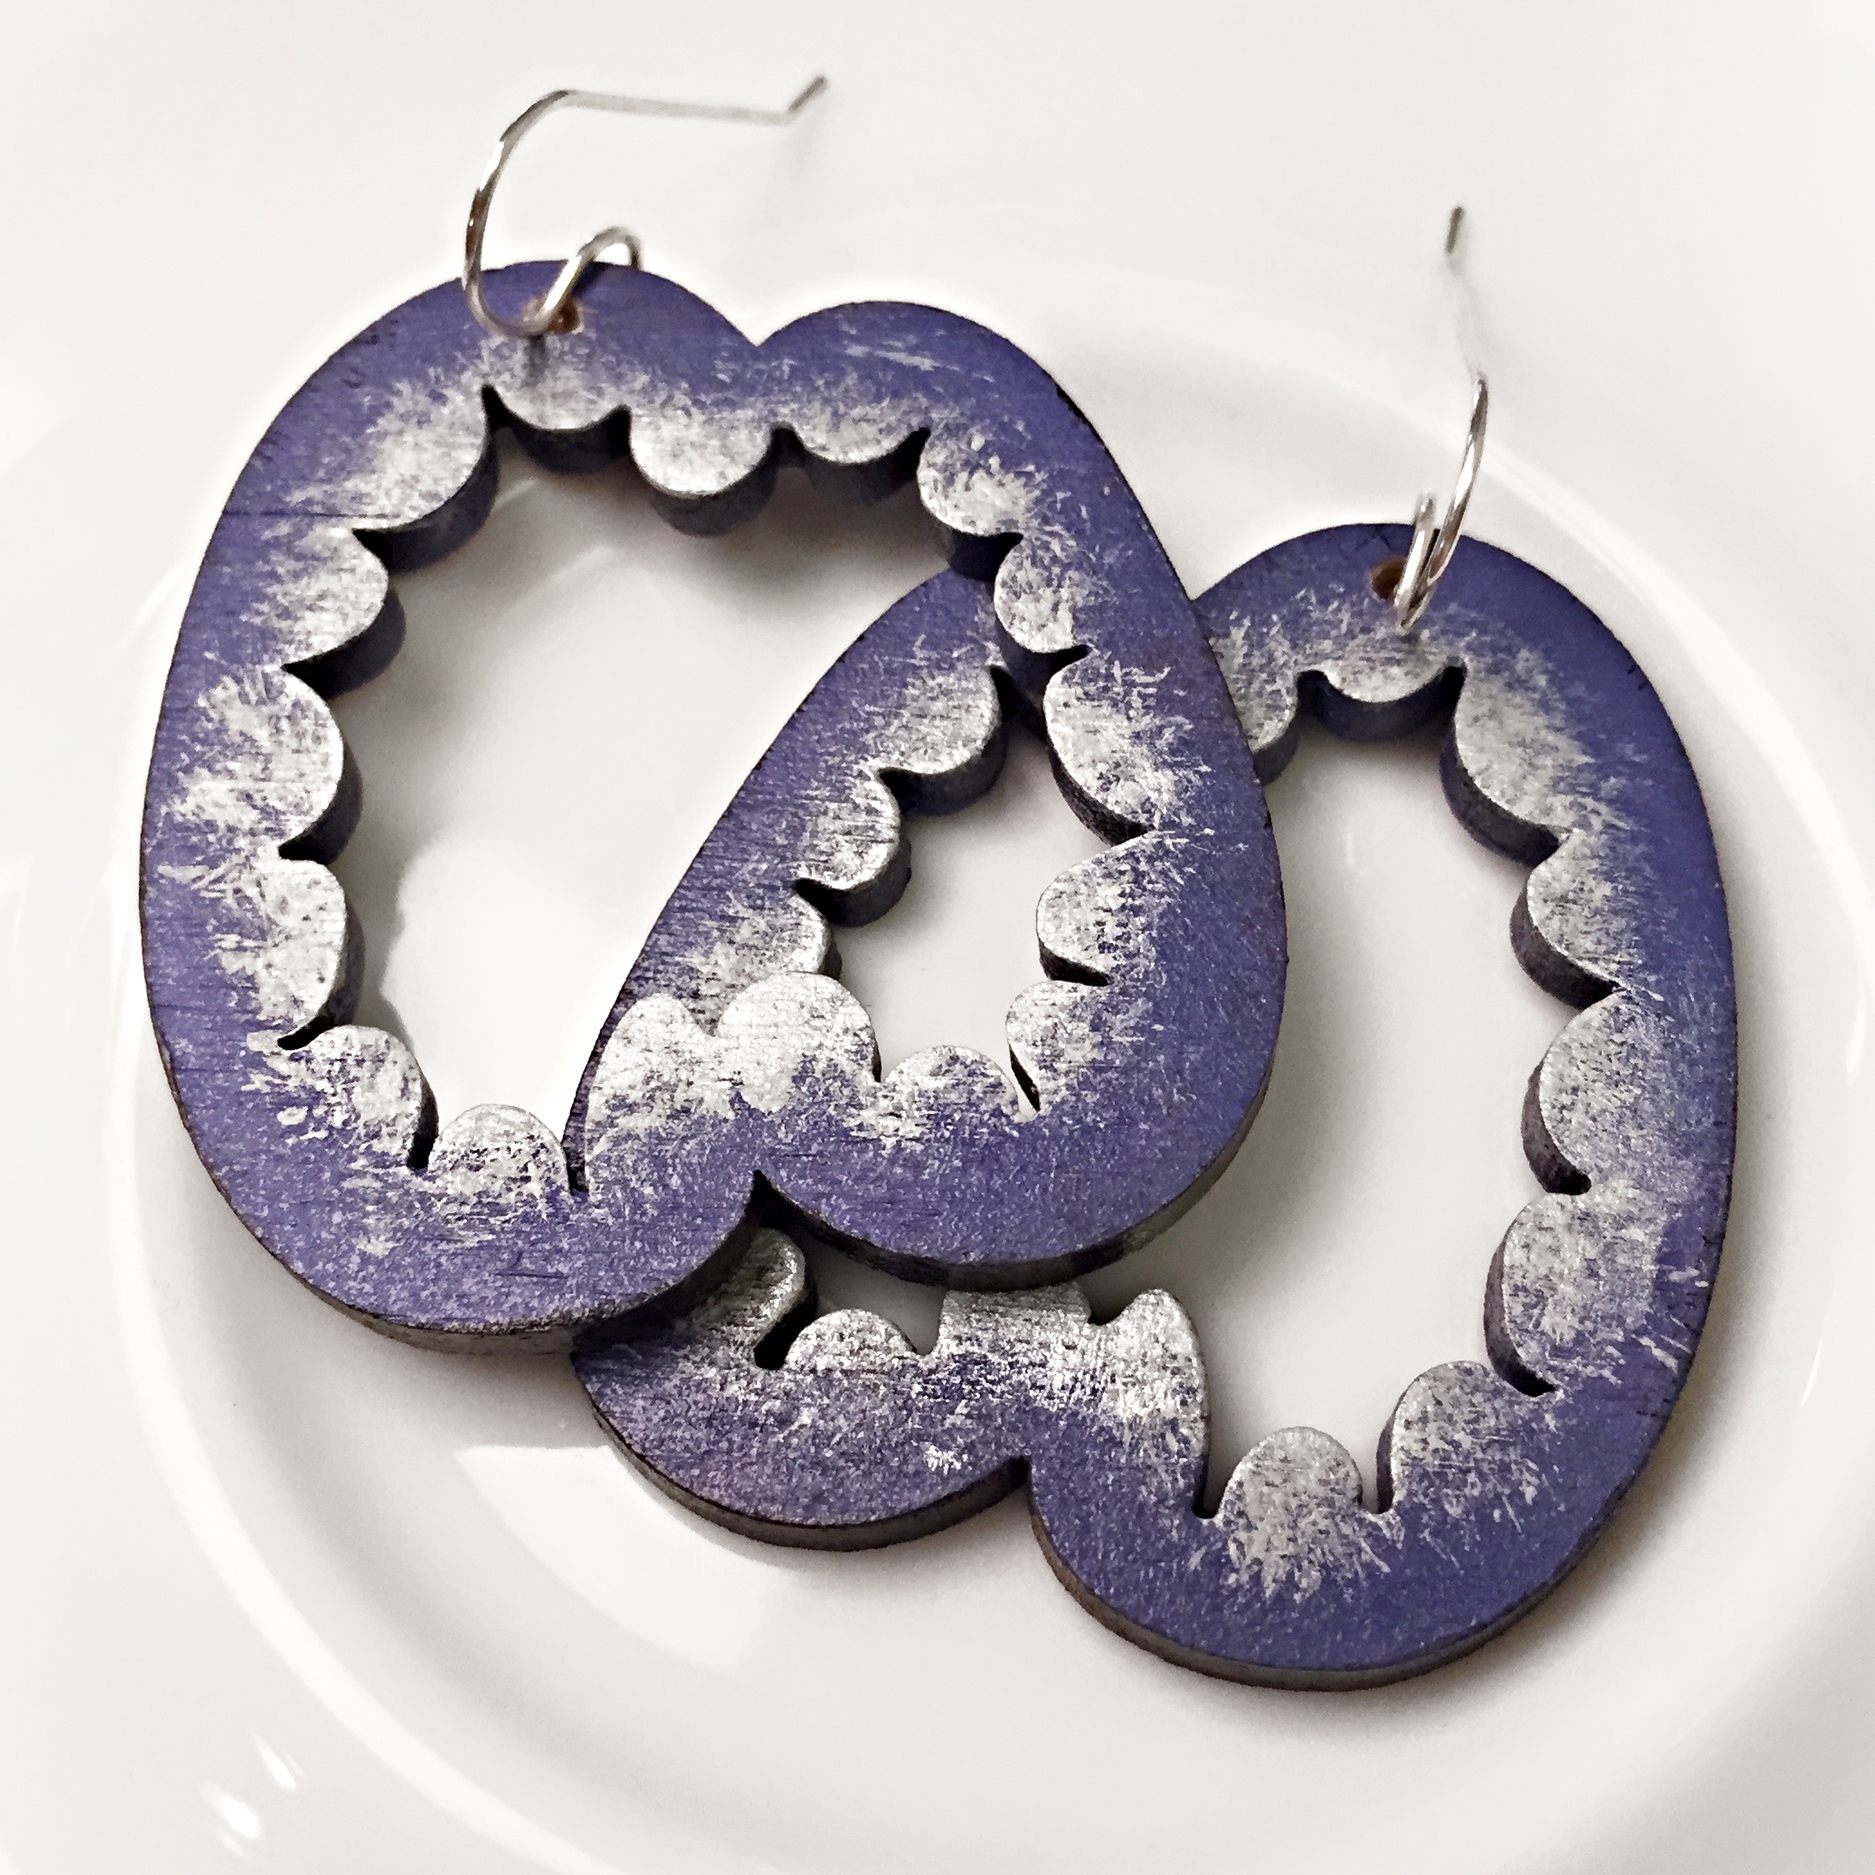
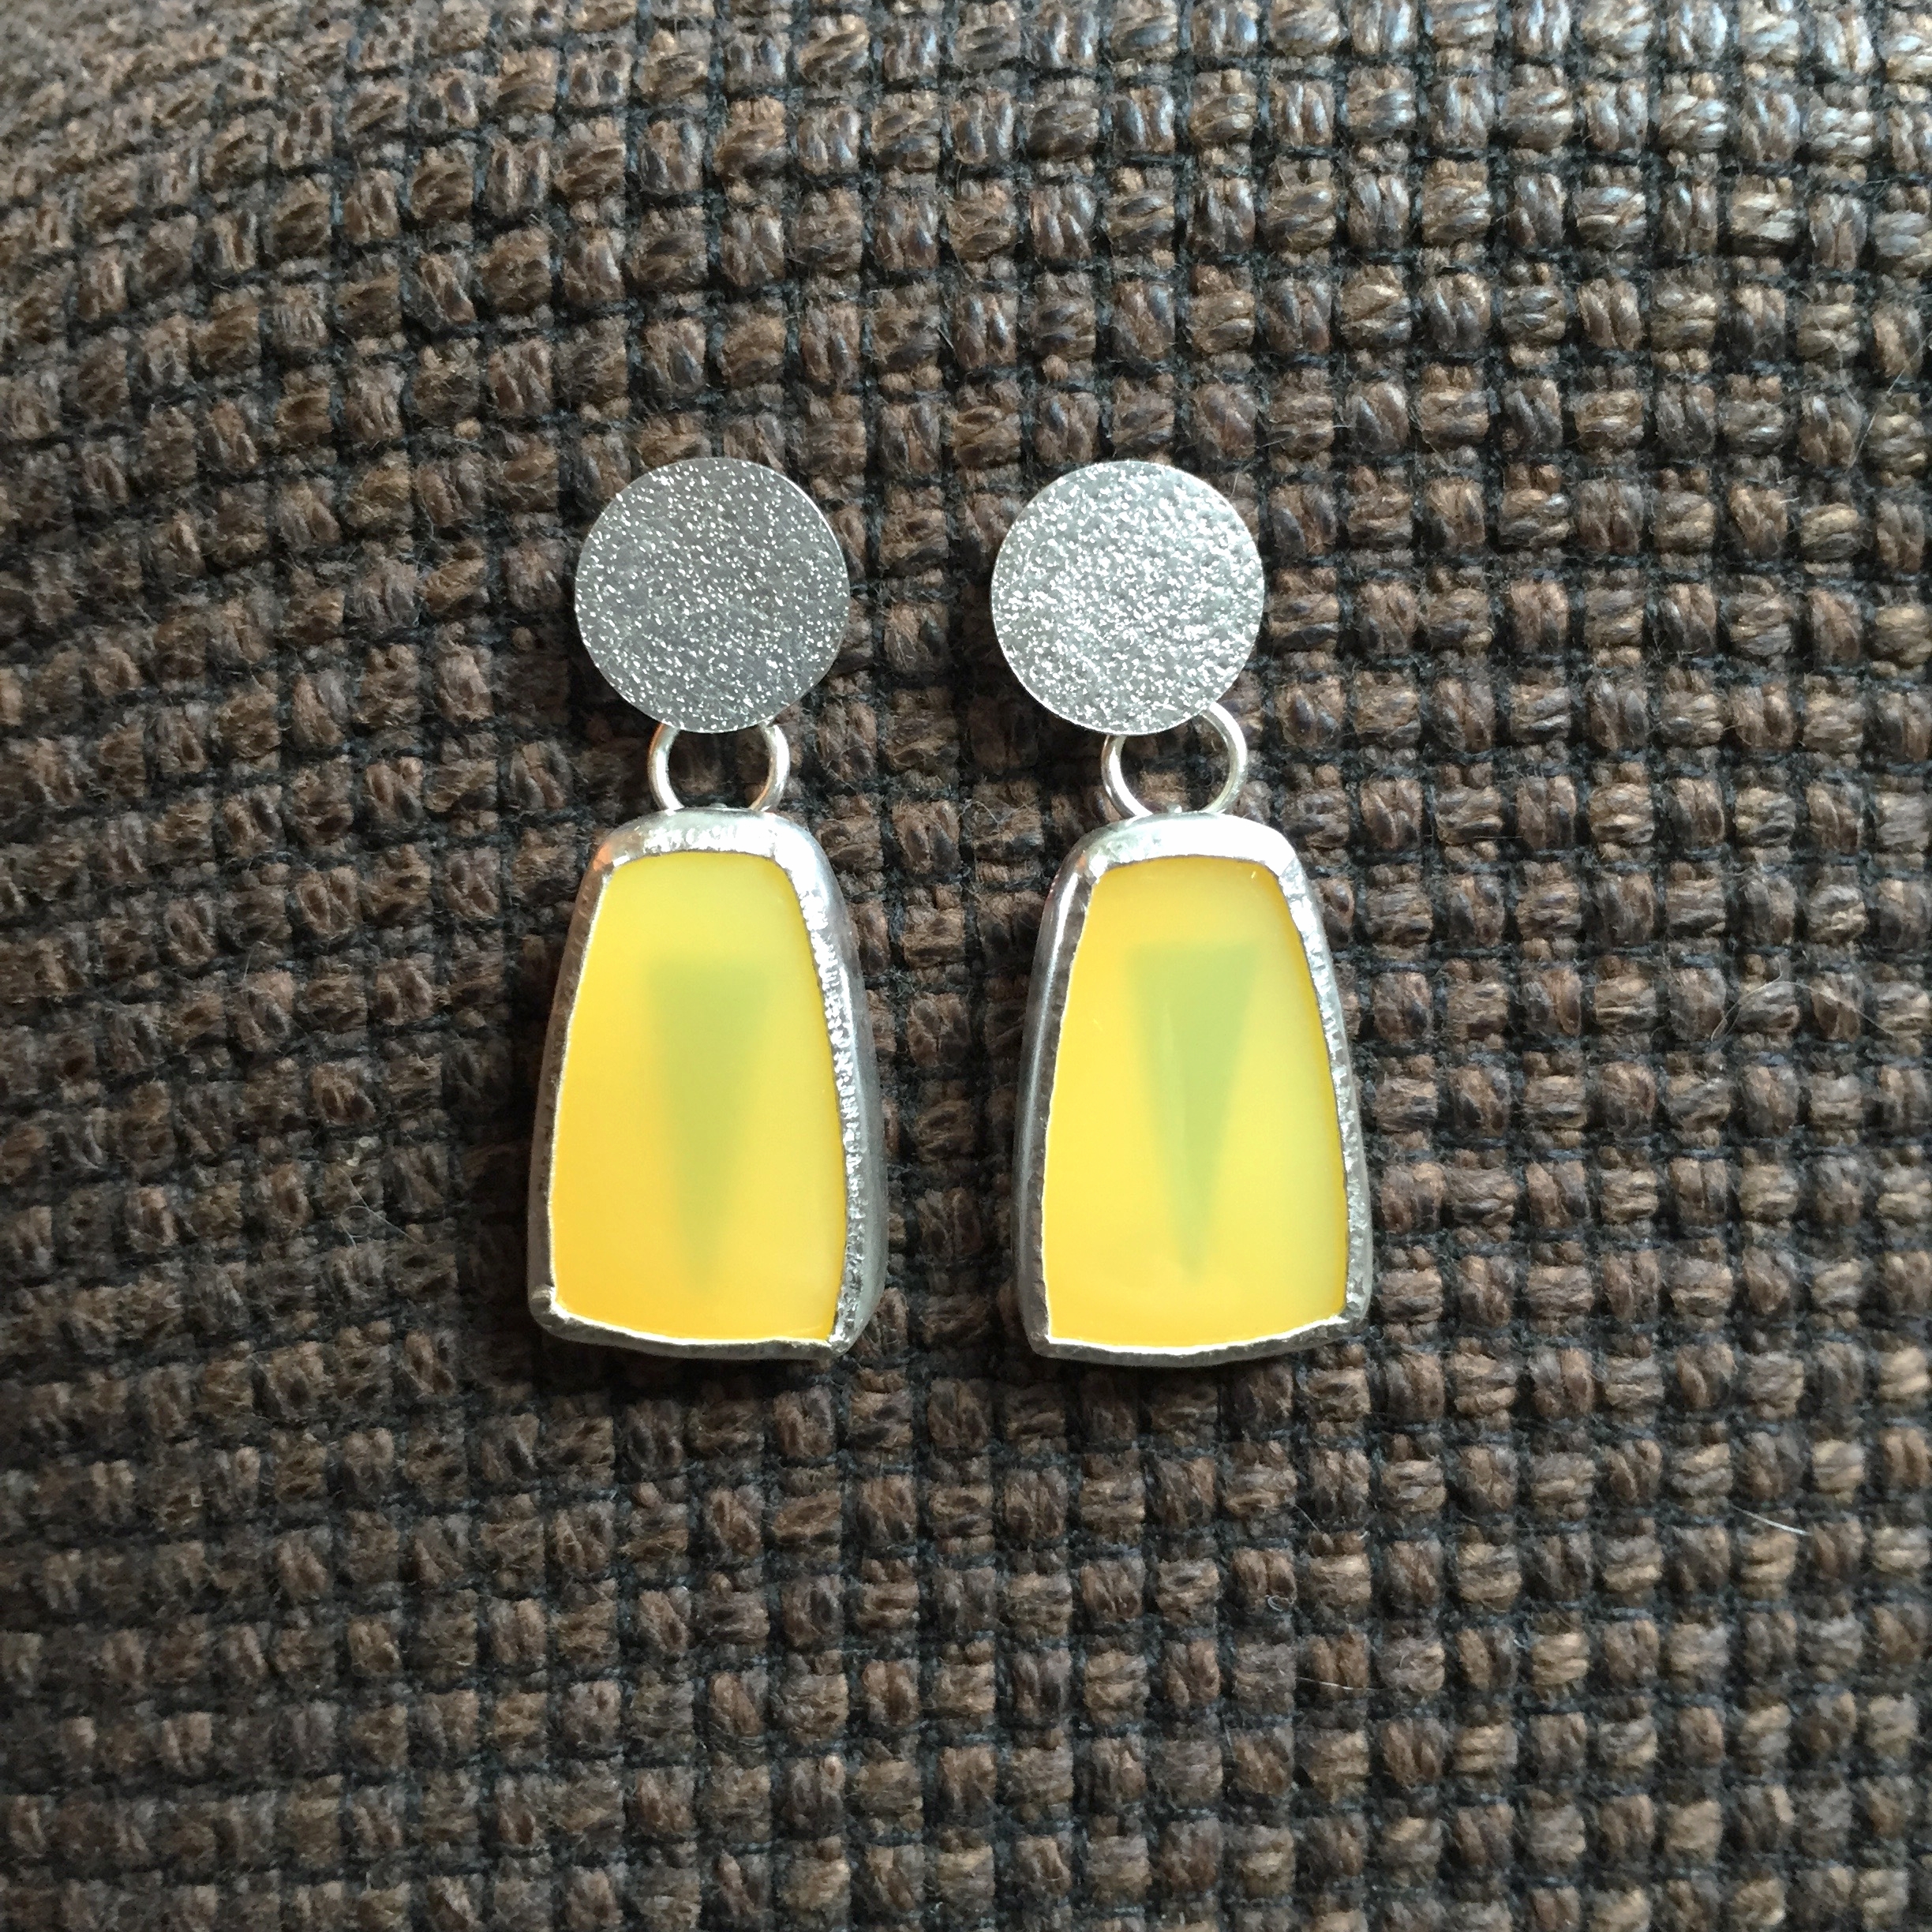
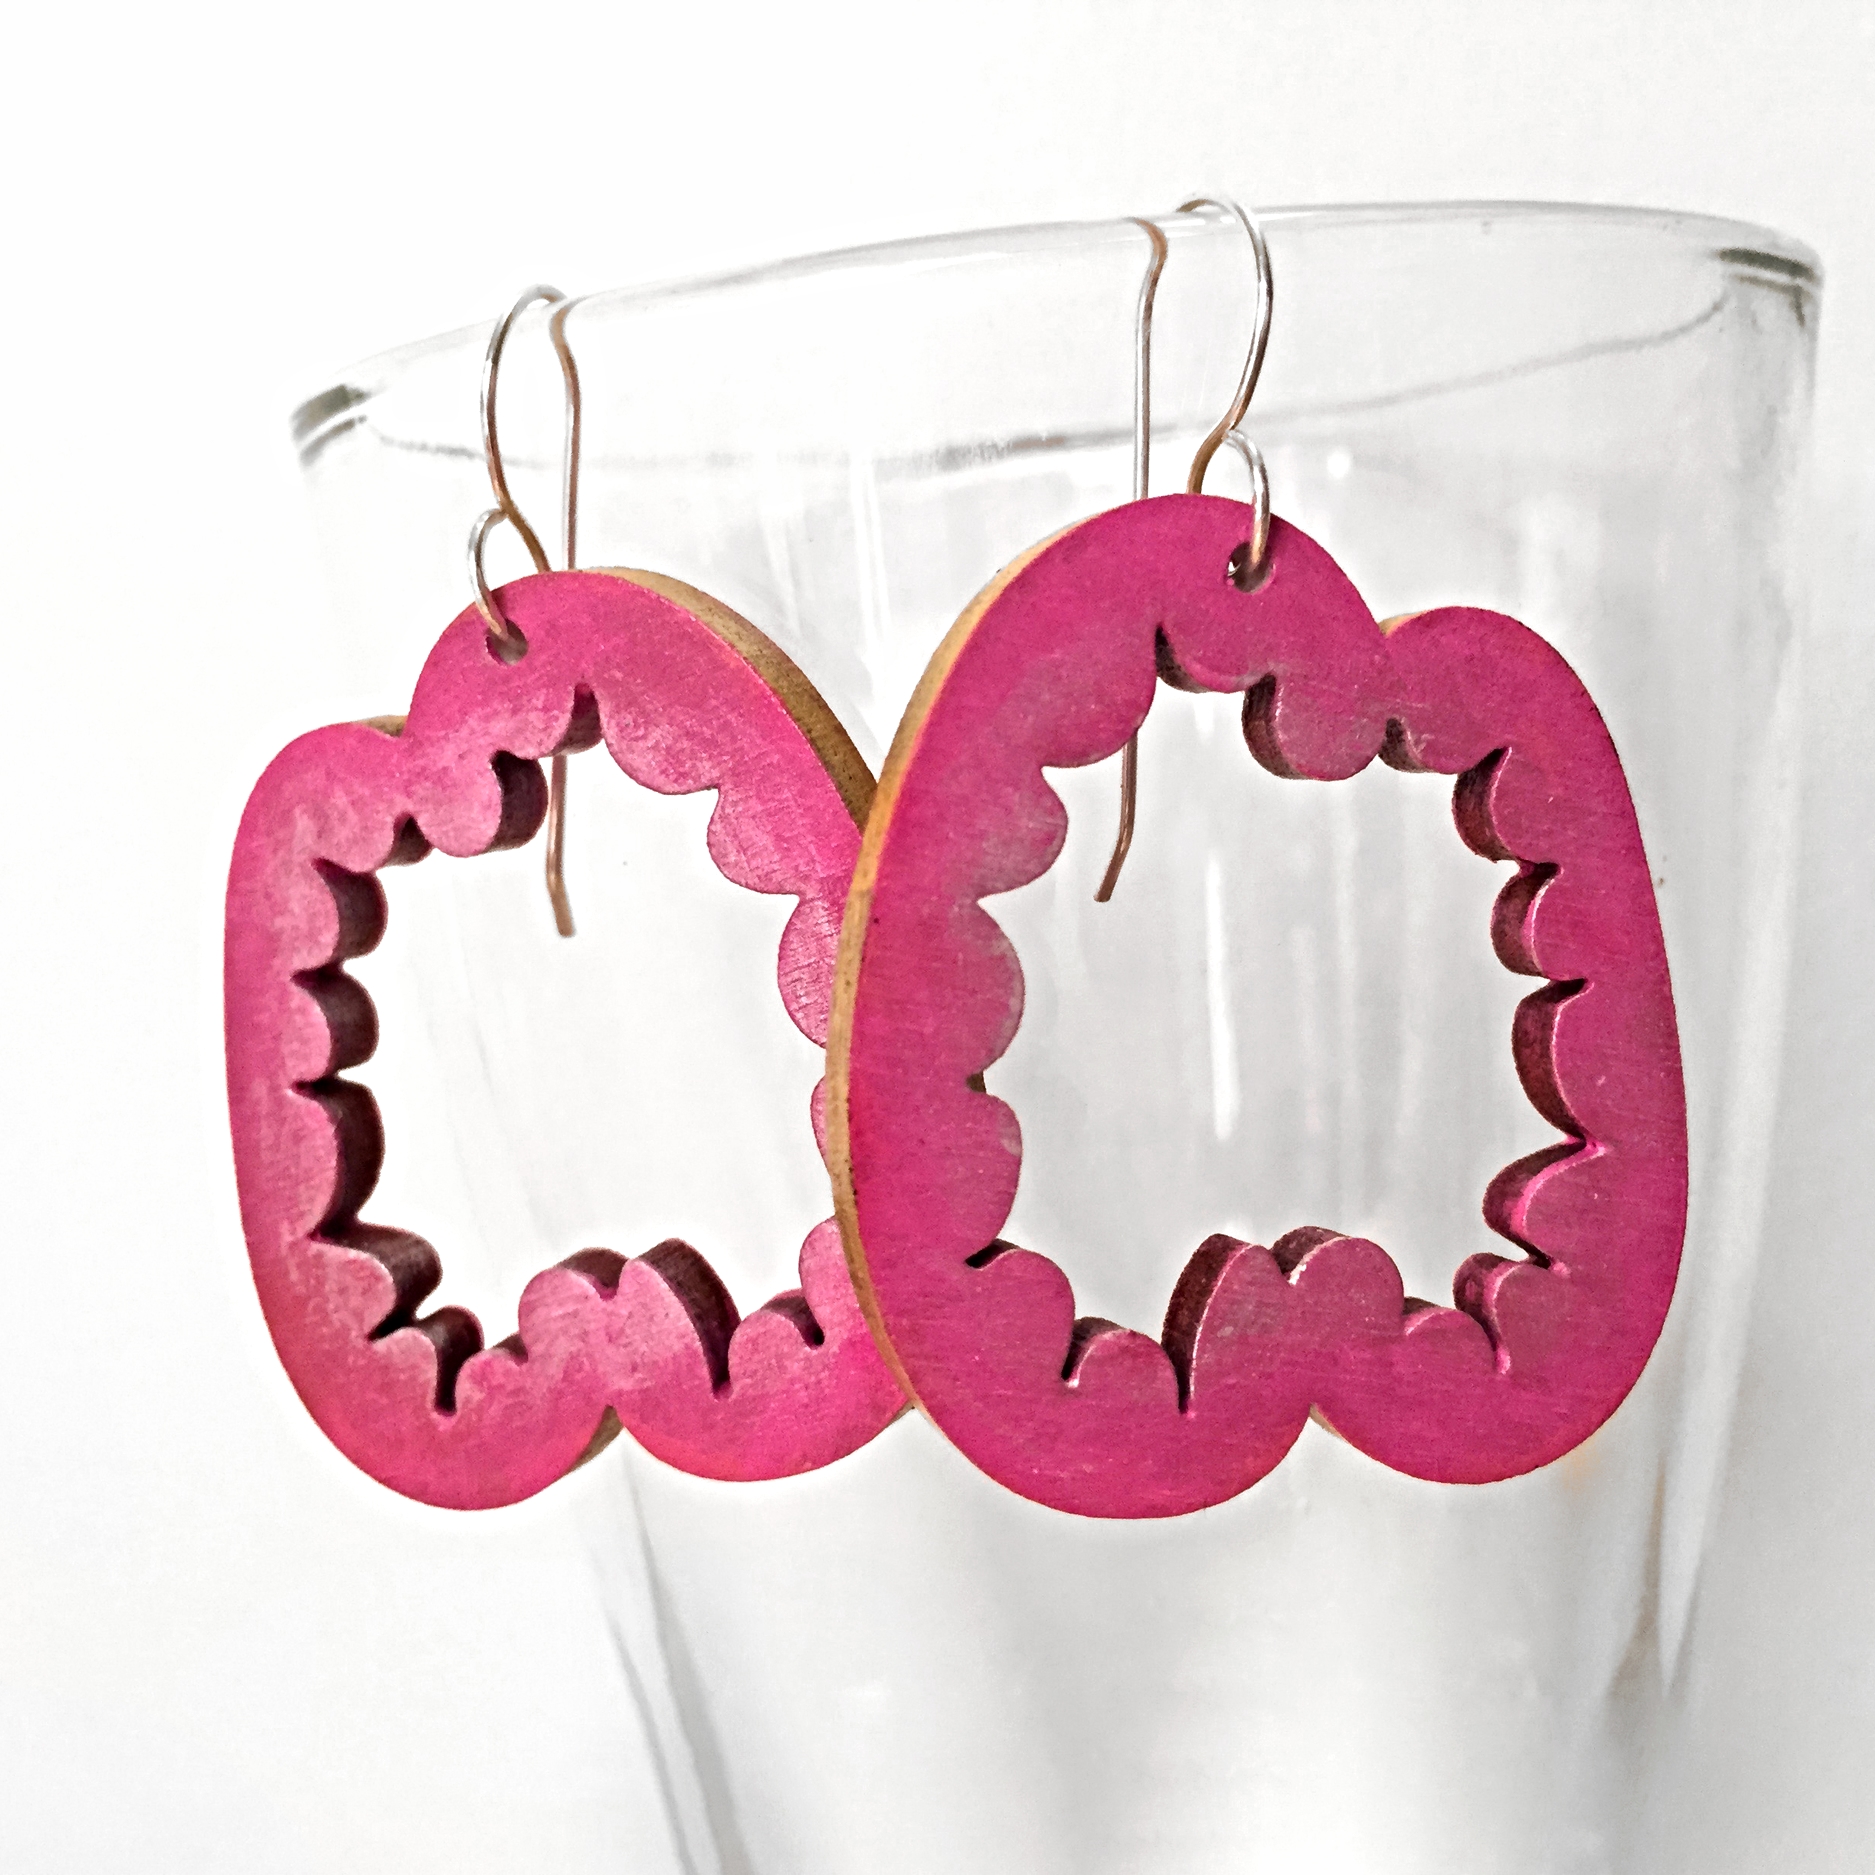
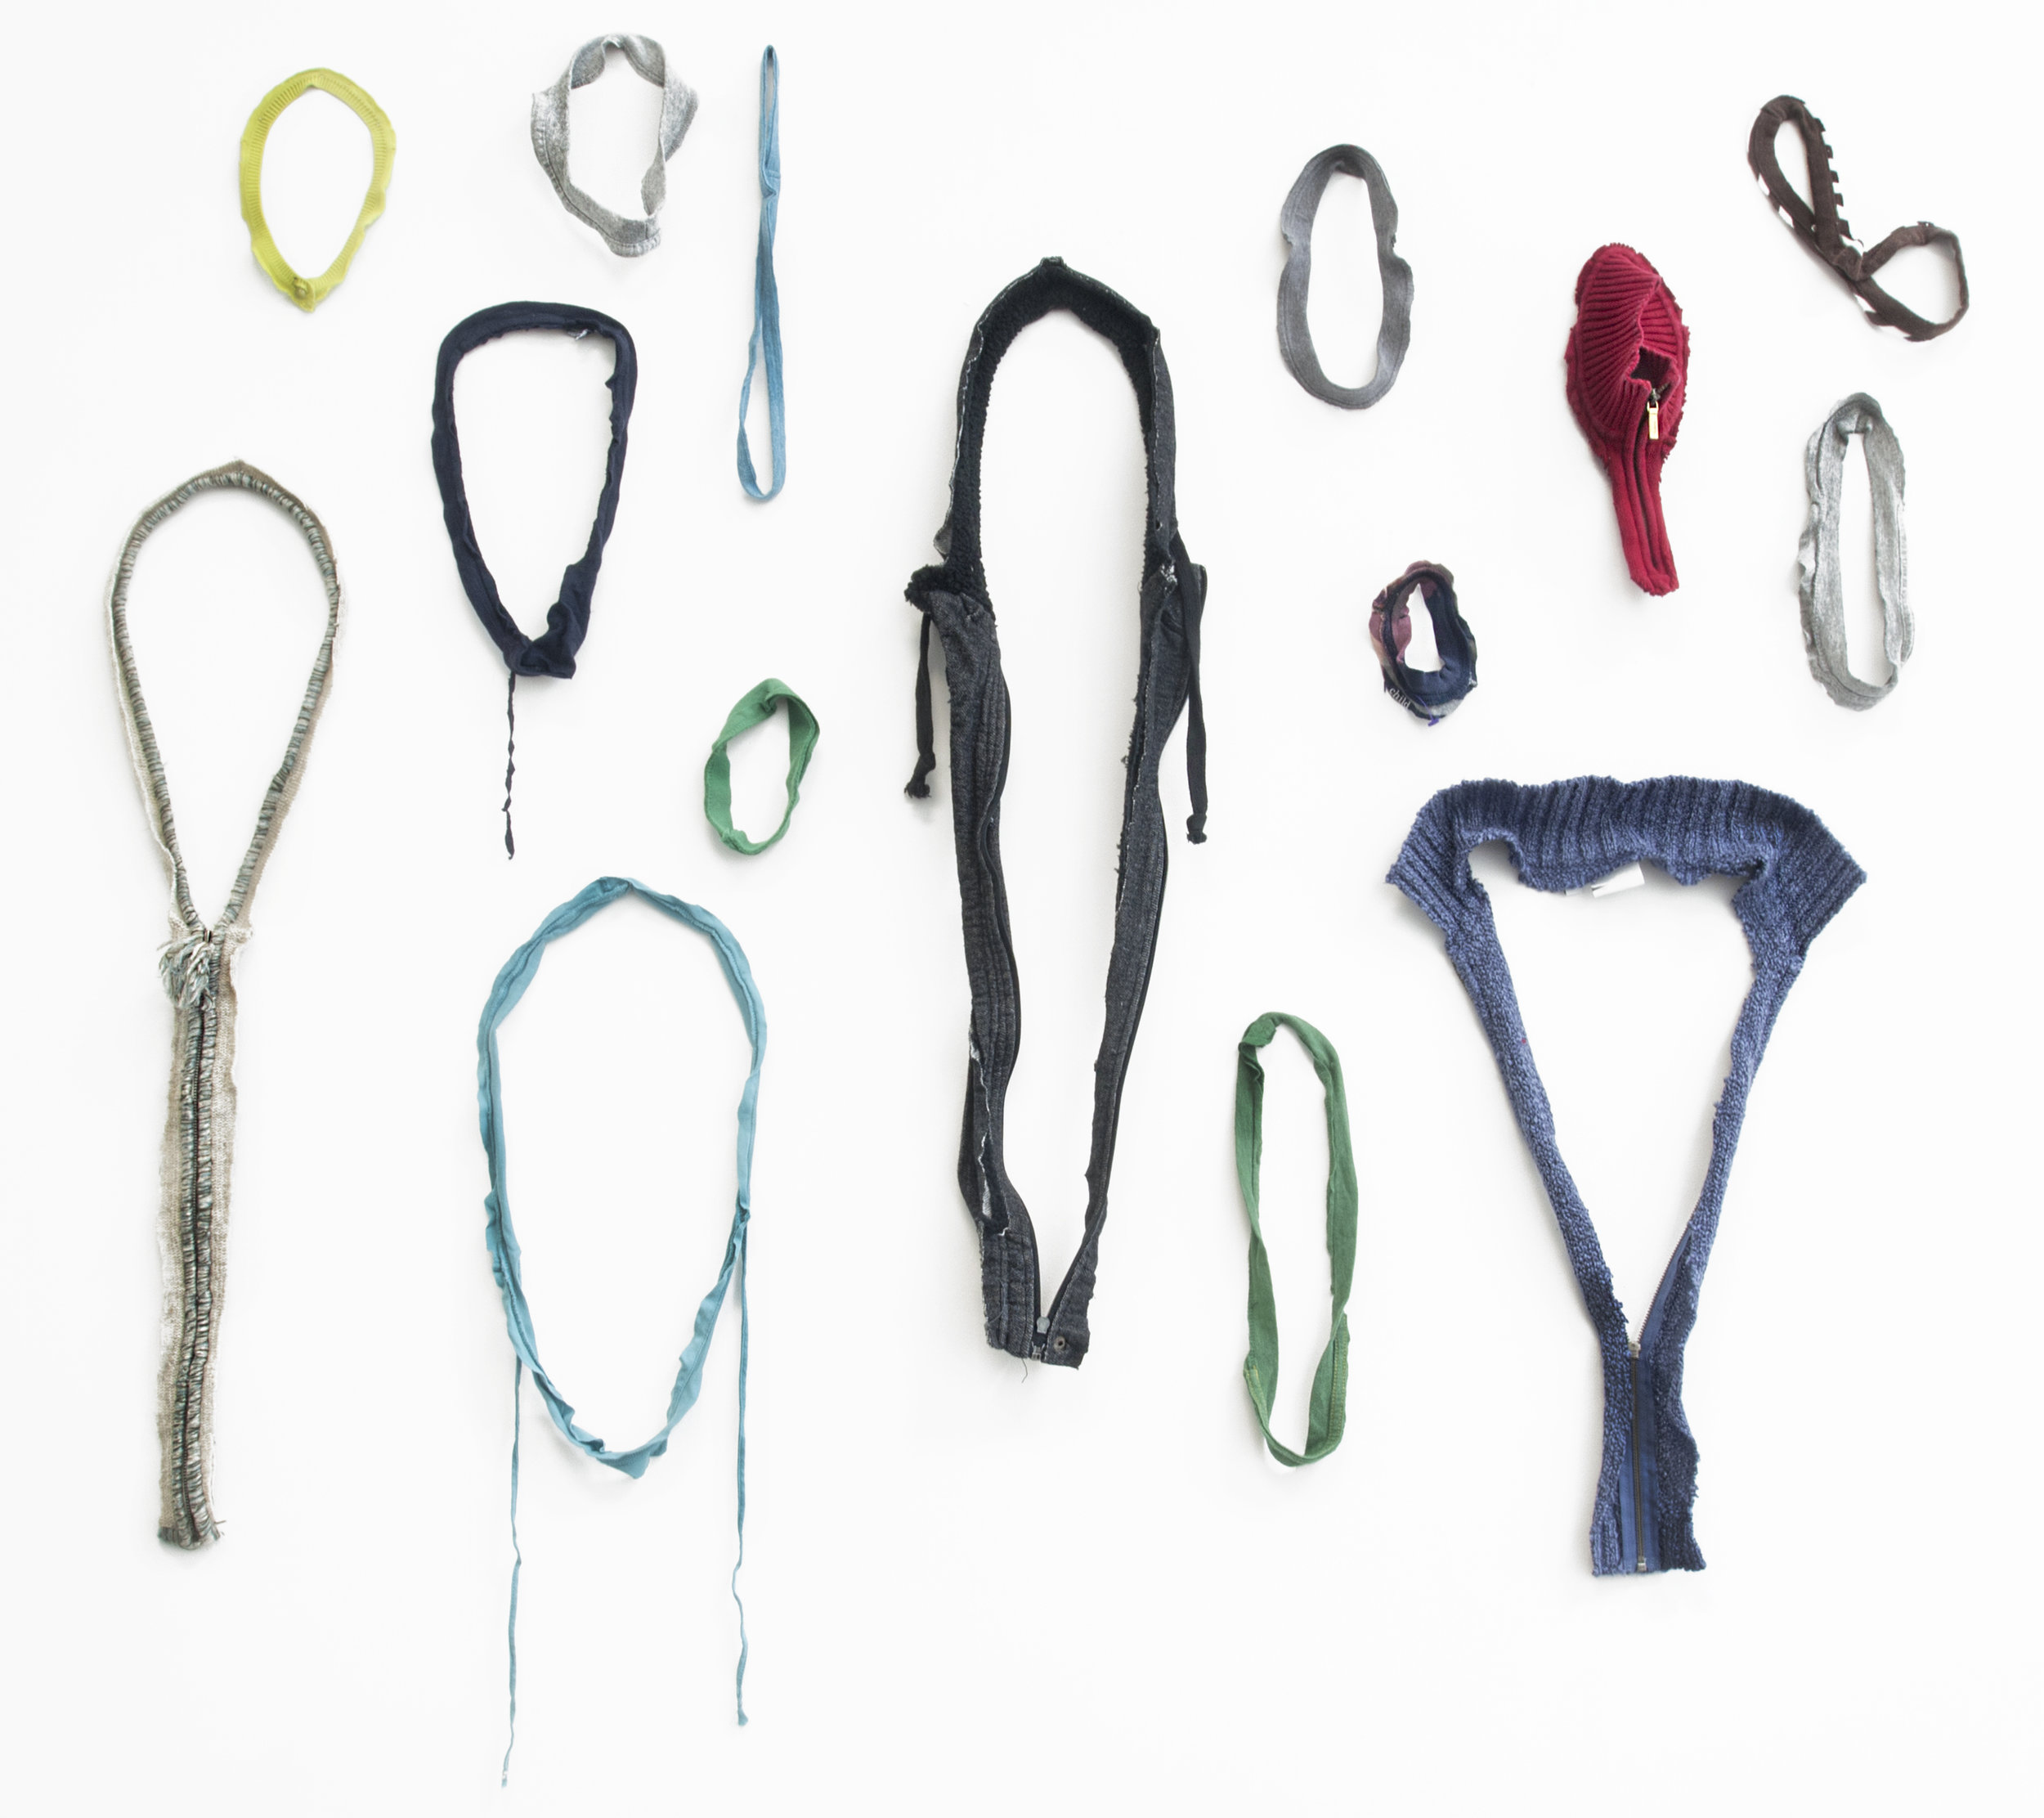
Here are some images of my work in the show and some other artists' work. (Photos from the website)
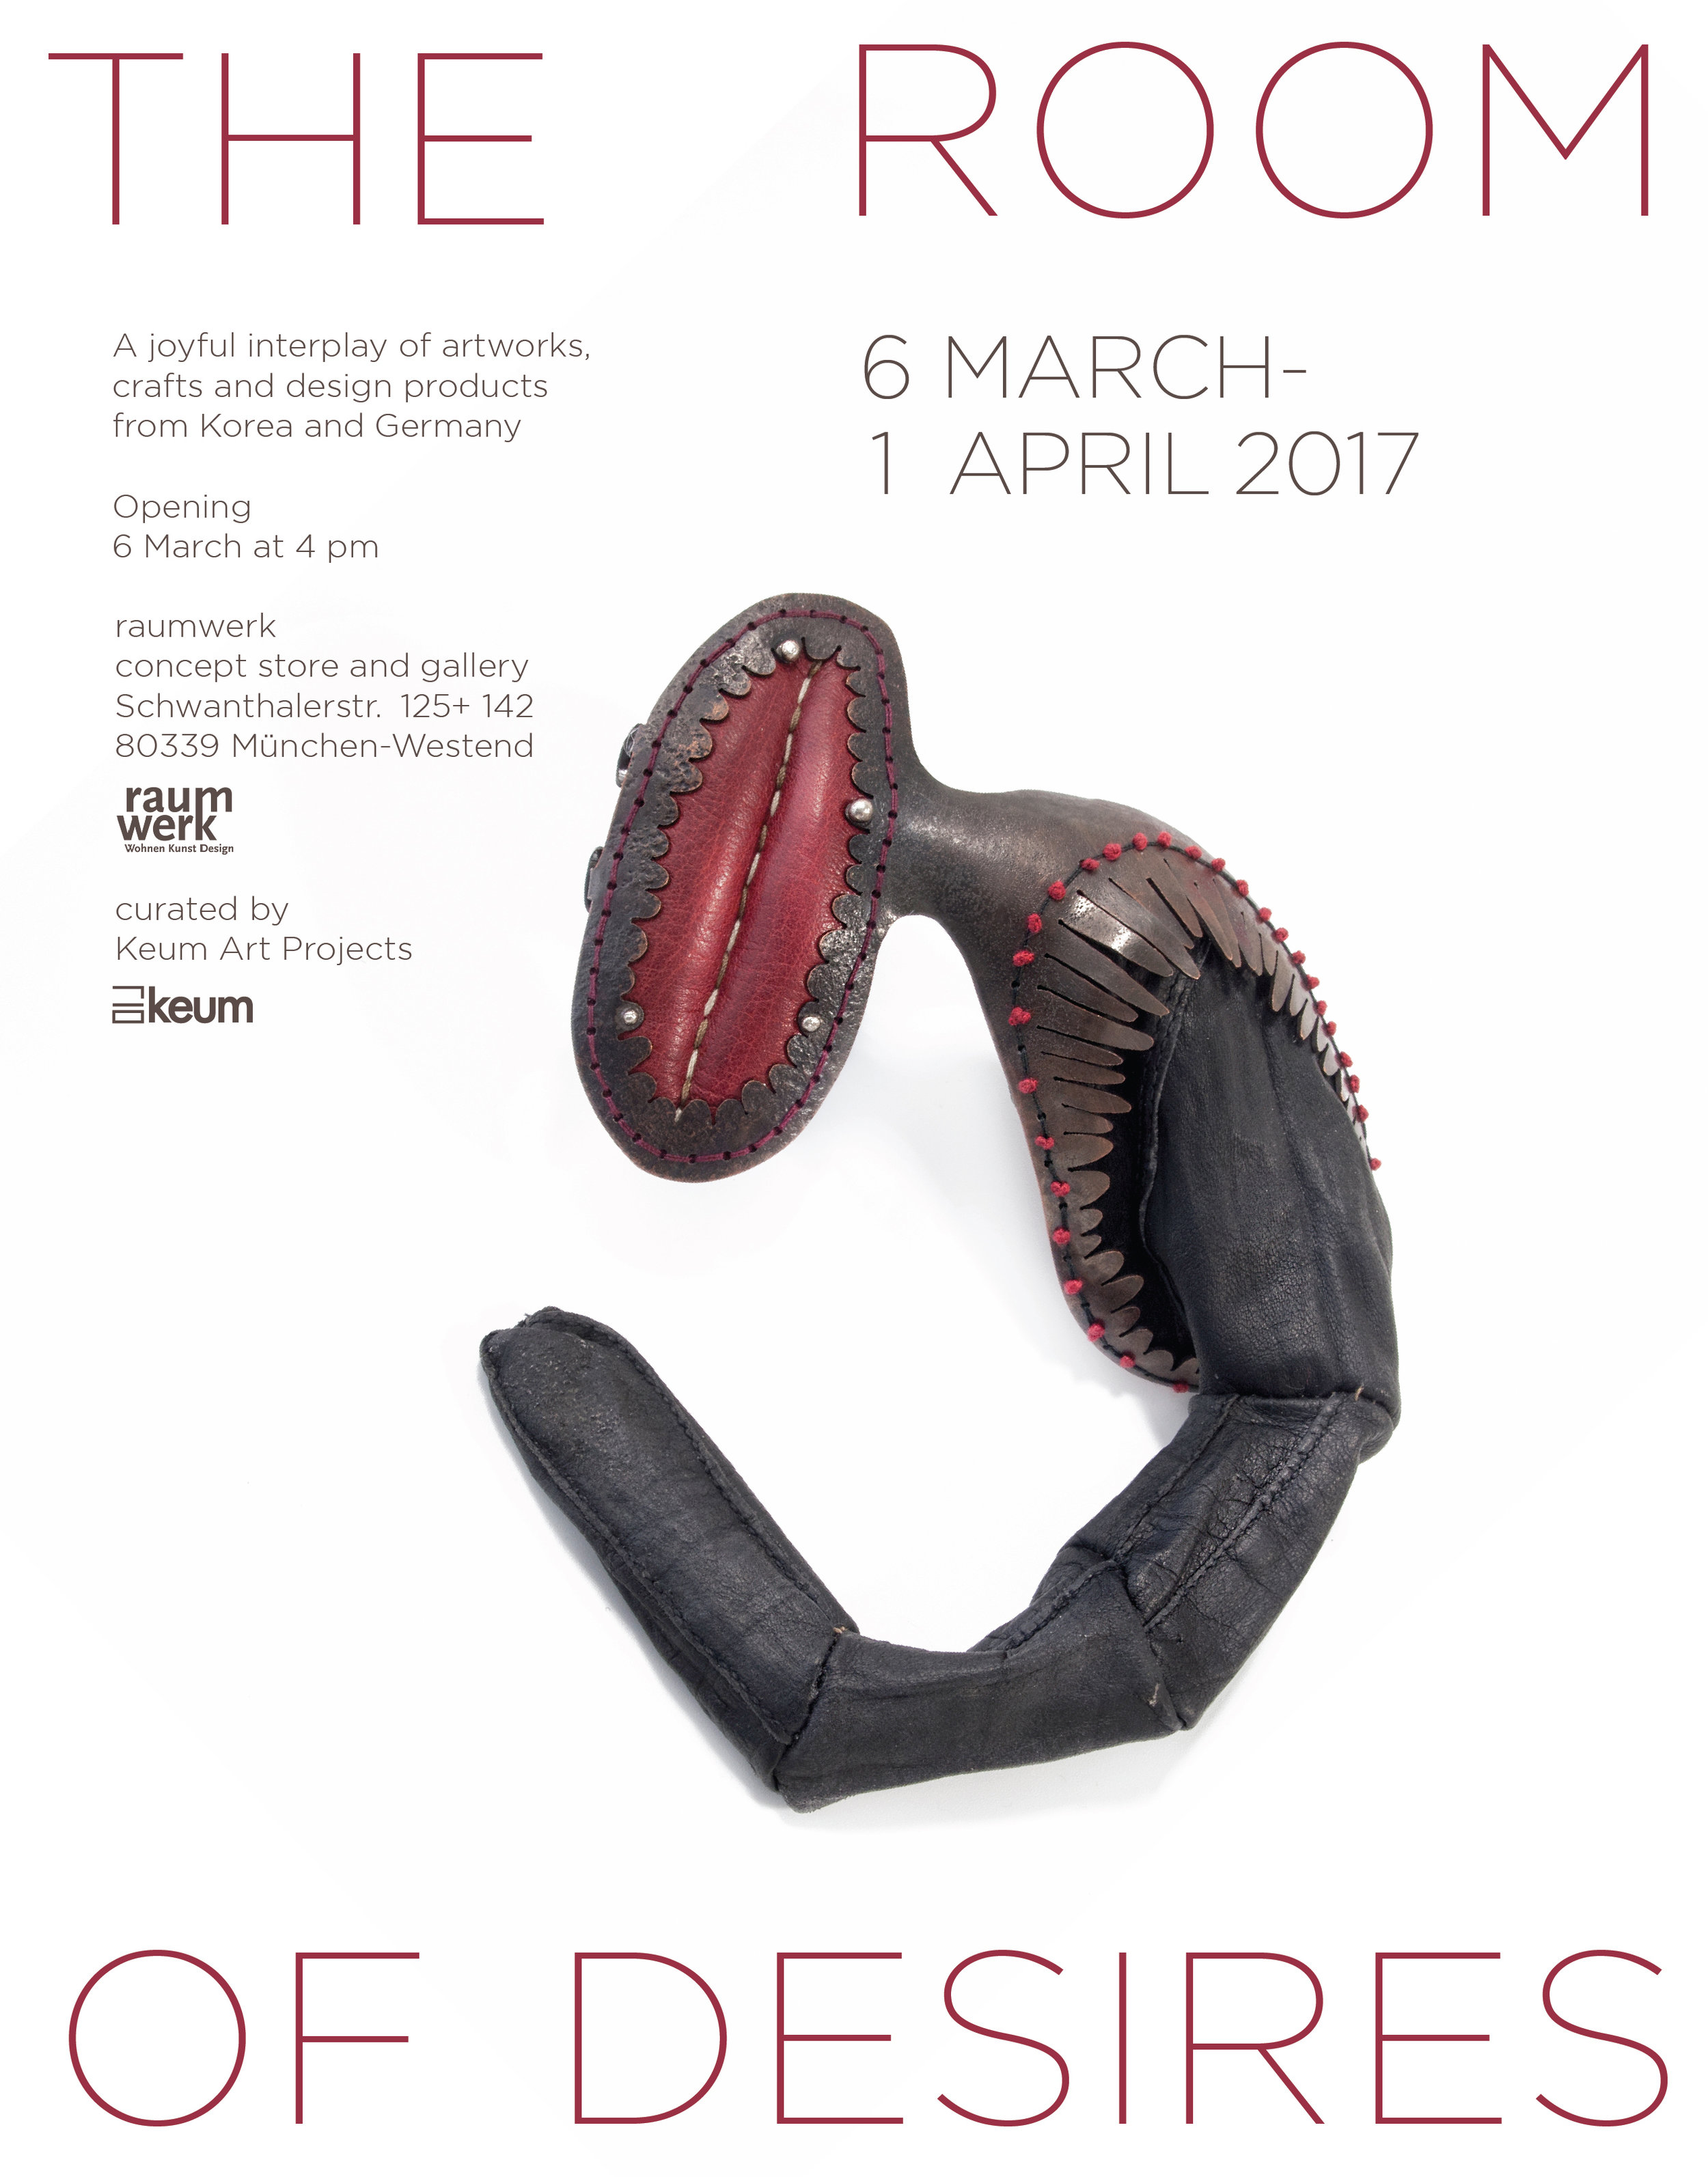
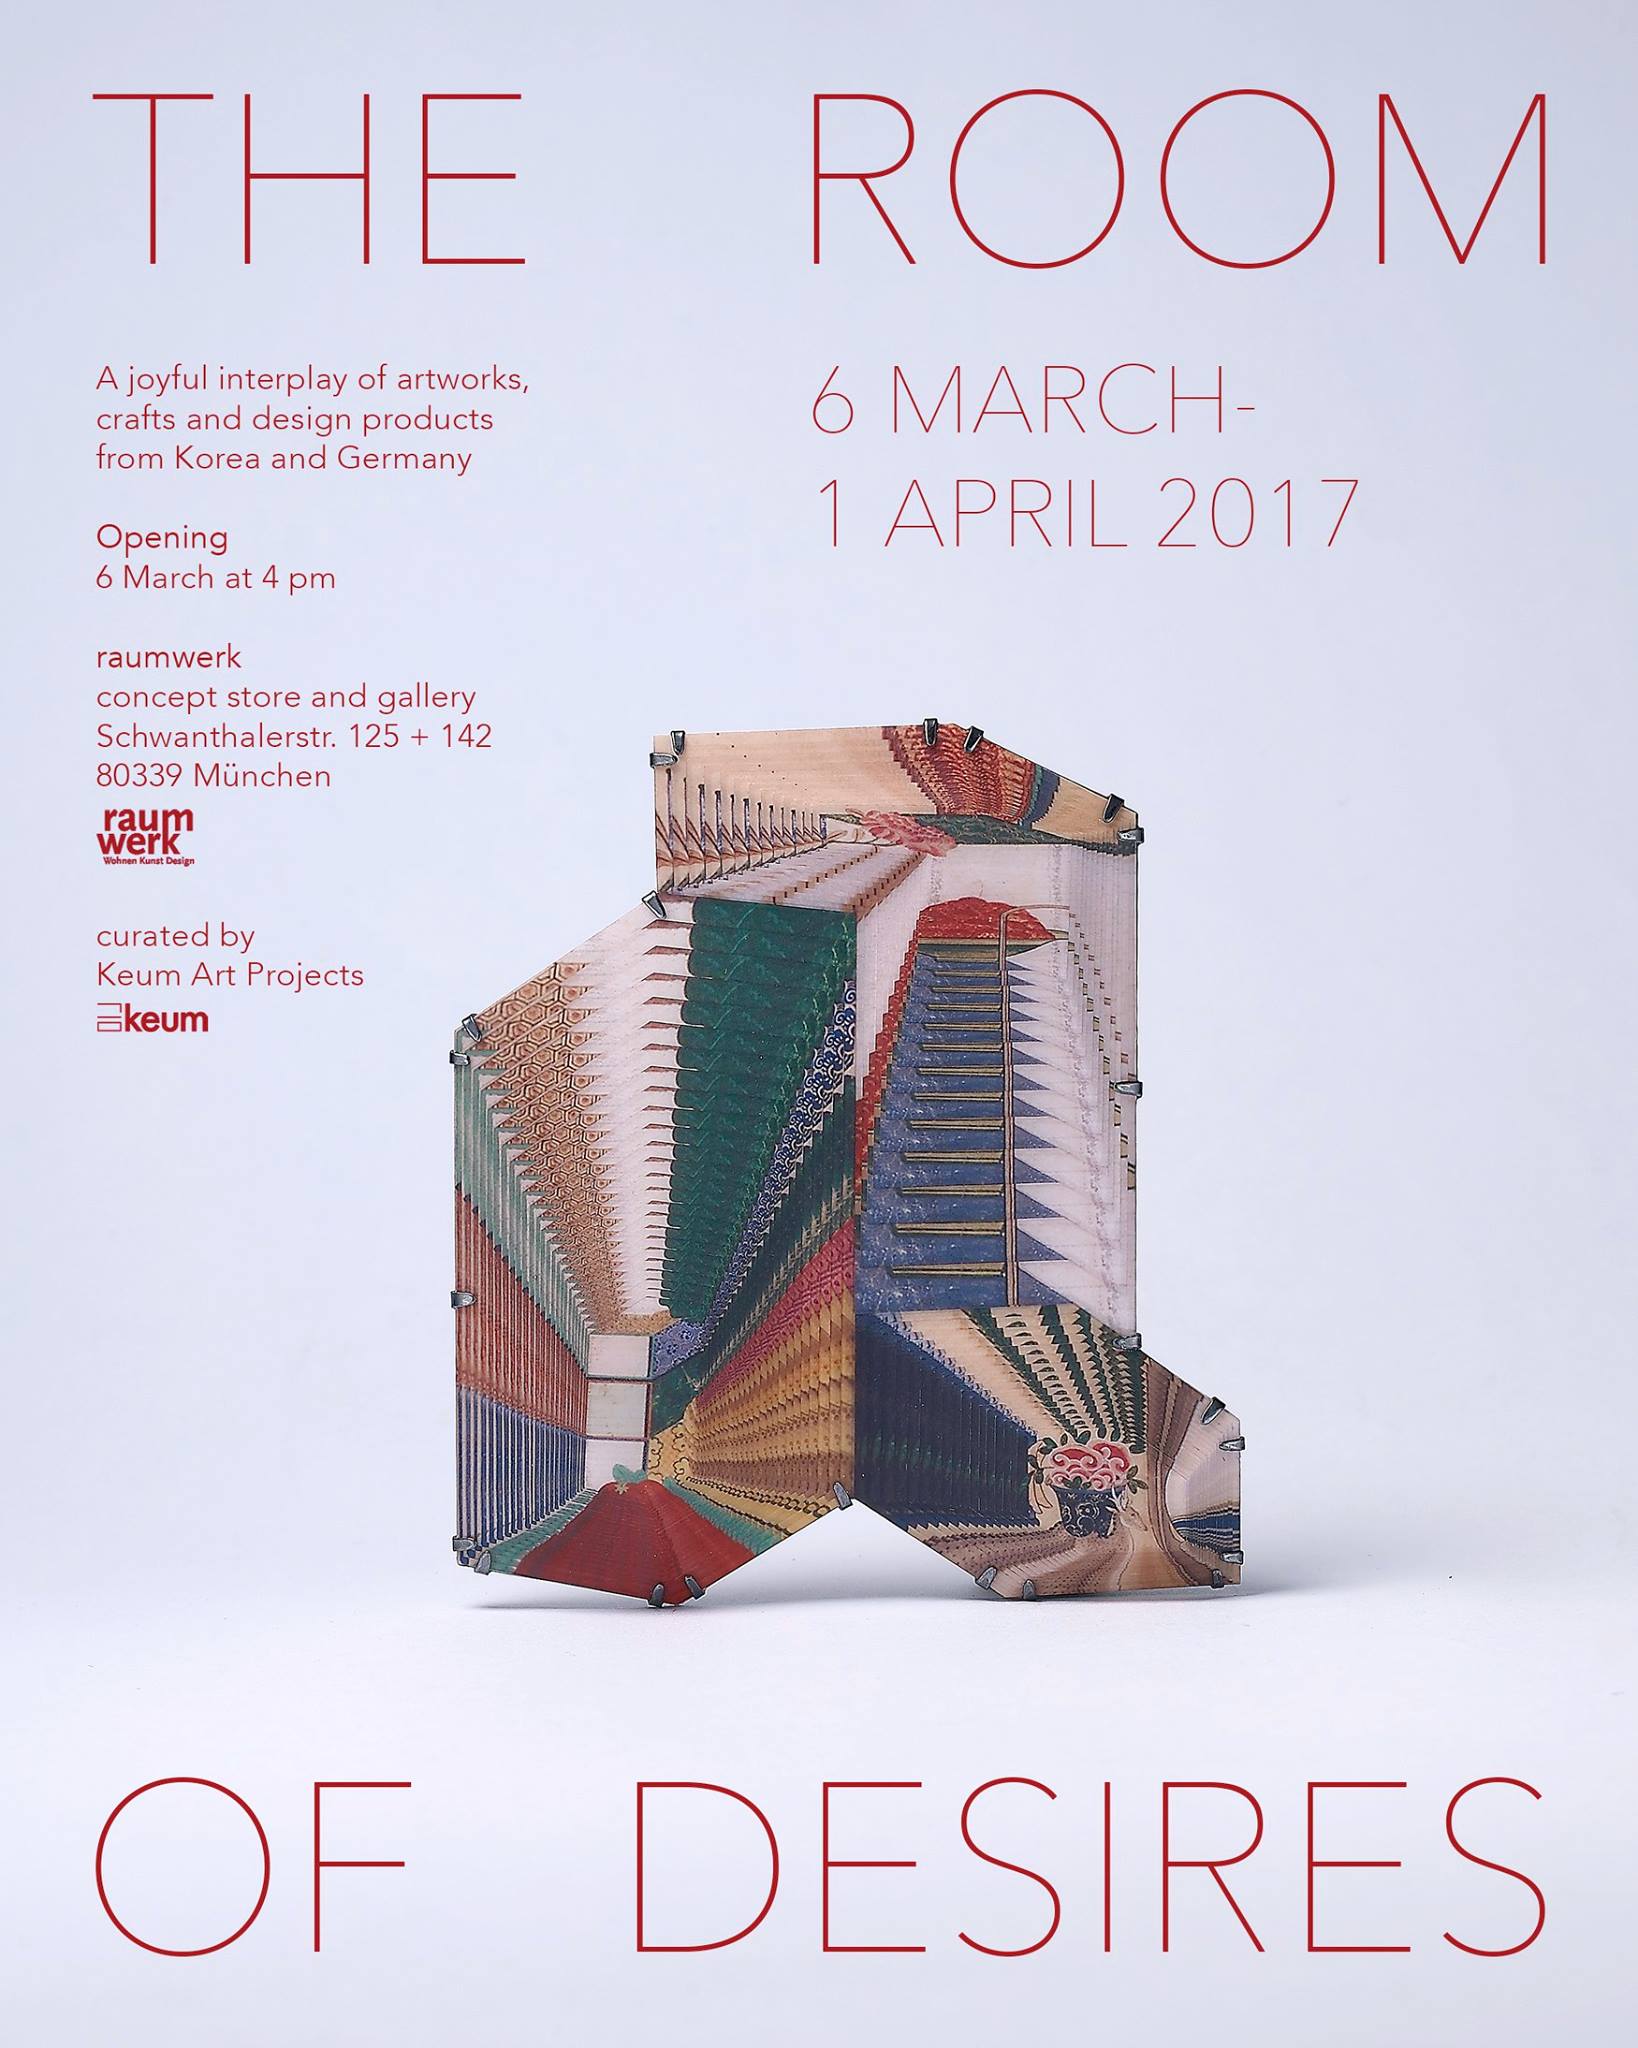
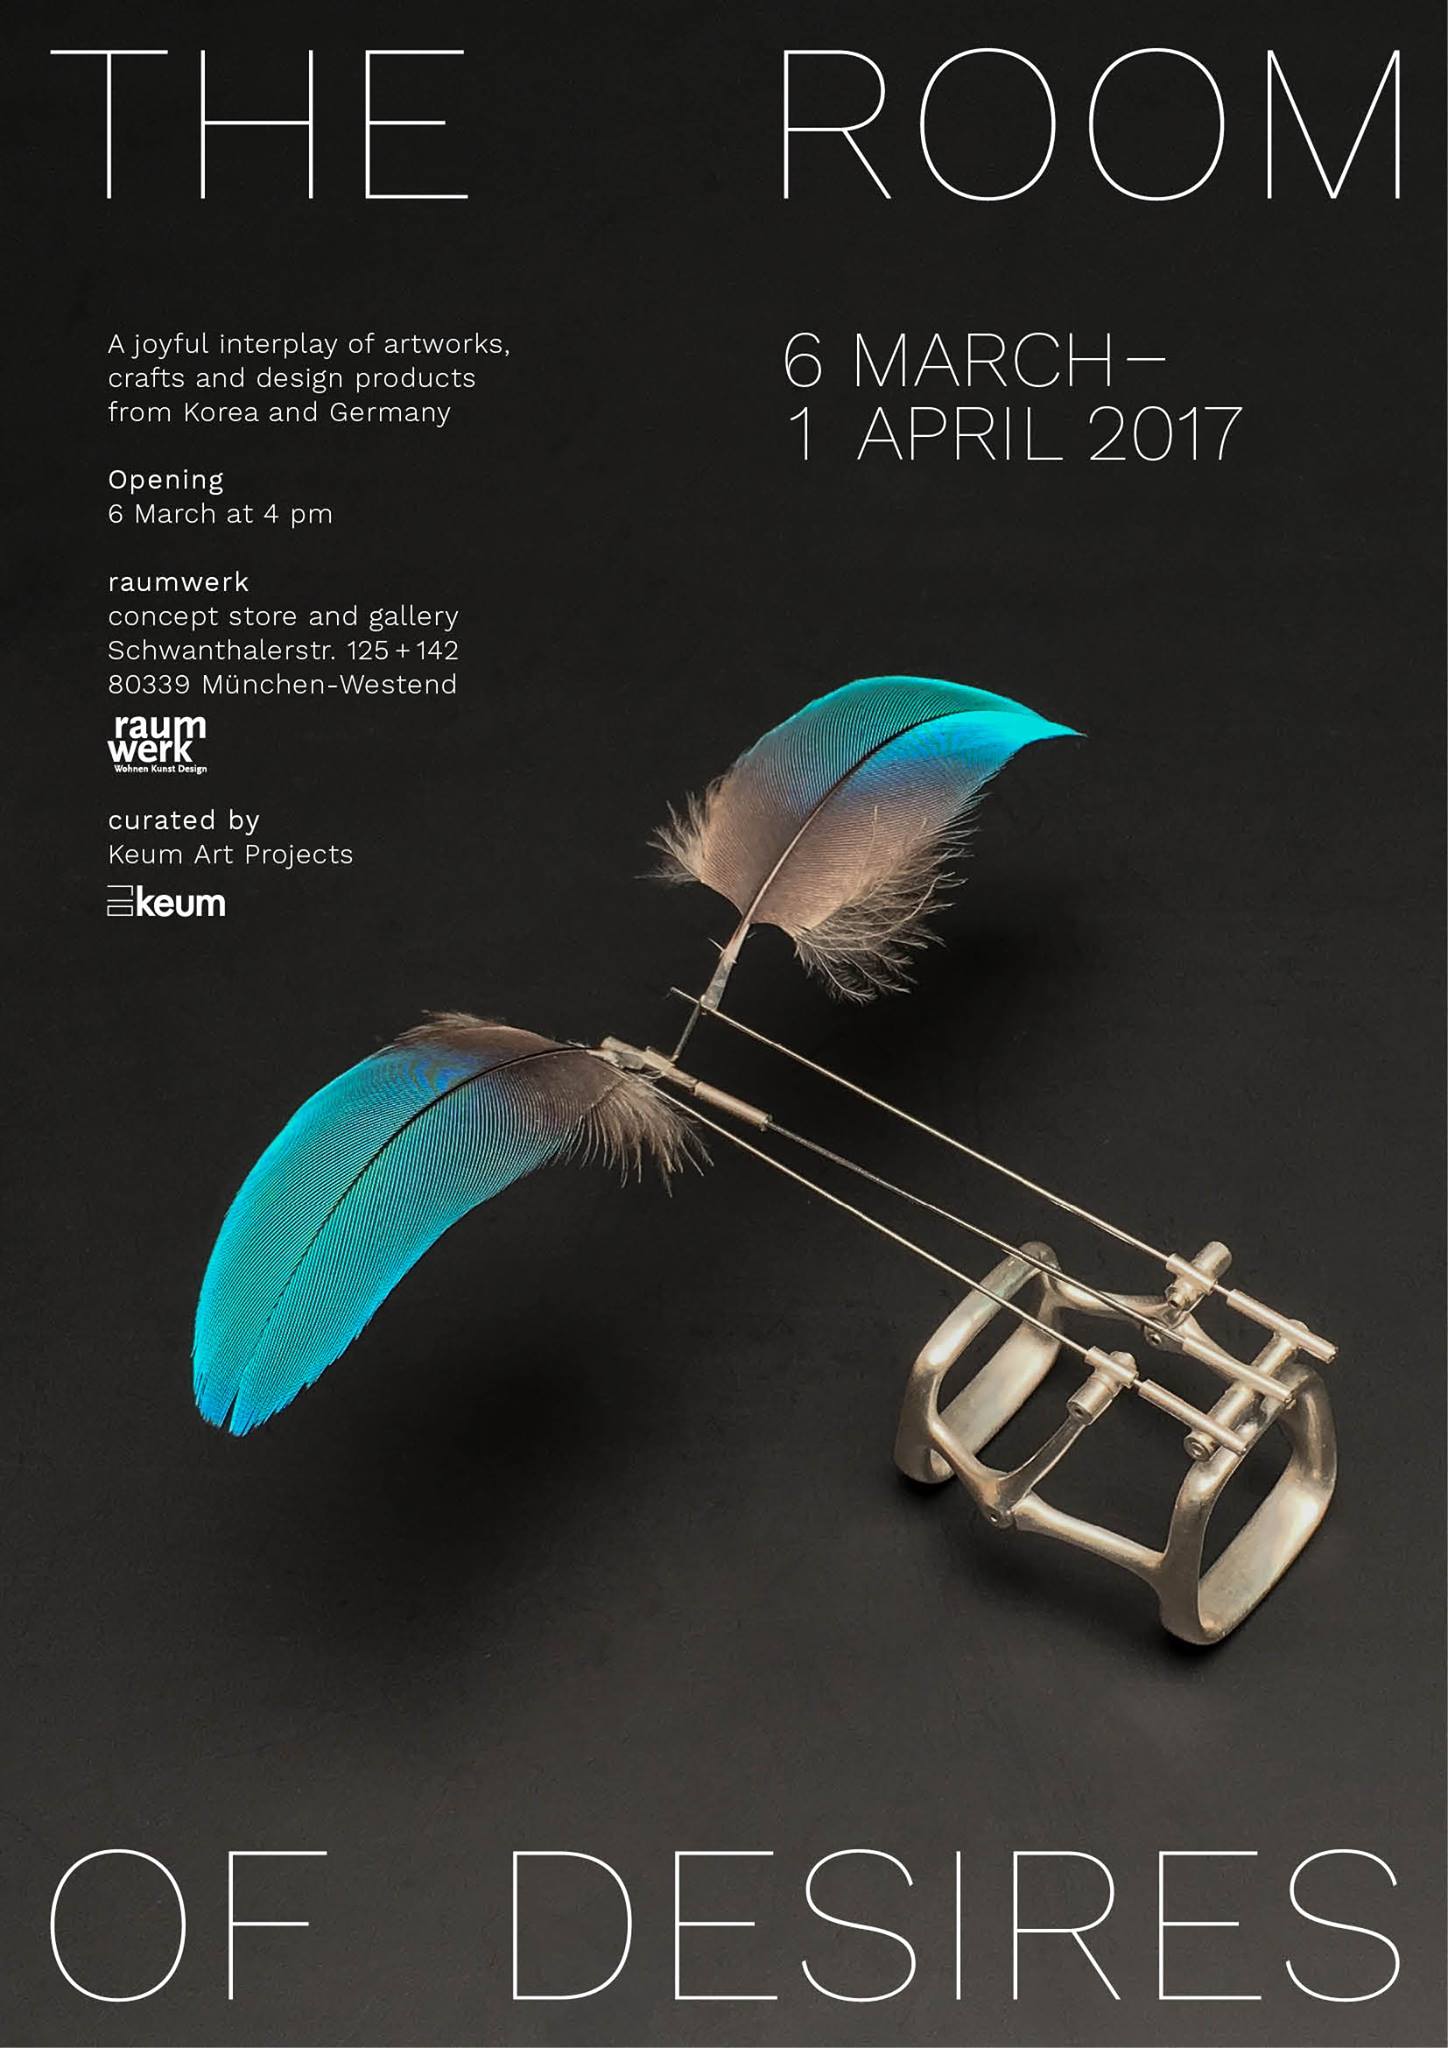


The Room of Desires 

A joyful interplay of artworks, crafts and design products from Korea and Germany.

Keum Art Projects : http://www.keumprojects.com
Raumwerk : http://raumwerkwestend.de


March 6 to April 1, 2017
raumwerk – Concept Store & Gallery
Schwanthaler Str. 125 + 142
80339 Munich-Westend

Artist, Designer and Artisan:
Andreas Berlin, Maria Volokhova/Johanna Spath, Helena Parada Kim, KIM Deok Ho, KIM Hye Jeong + Atsunobu KATAGIRI , KIM Hyun Sung, KIM Seo Yoon, KIM Soo Yeon, LEE In Hwa, LEE Jeong Won, PARK Neung Saeng, SEO Jina, Studio Ilio, Studio Yang Seung Bin, Studio Kyss, Kondo Yukako, YOON Duk No

Let's Make a Ring! - Wax Carving and the lost wax casting process - Part 1

Some days at the studio, I come across cool ideas about my new work. Some days, however, I feel totally blank and struggle to come up with anything new. In those days, I try to make some fun and fast projects so that I can at least keep my hands busy. I decided to carve some rings out of hard carving wax. I’d like to share the carving process with some pictures. 

The ring wax 

The ring wax 

I used a block of ring wax that I had and cut off just the right amount of it by using a band saw. I personally prefer the purple wax to the green because it seems to be more flexible and springy, which means it tends not to break or crack easily. When the wax model is thin and complicated, it becomes very fragile, which means it is easy to smash the model with your own fingers. There are ways to fix the damages like that, but still it can be a frustrating thing to have happen, especially after hours and hours of carving. Luckily, nothing bad happened this time to my work!

The beginning of the carving process 

The beginning of the carving process 

The original ring hole comes really small and it barely fits on my pinky finger. Since I do not have a ring wax sizer, I used the rounded side of the wax file to expand the size of the hole. It was tricky to carve a perfect(ish) circle, but it came out okay. Then, I cut out some big chunks of excess materials using a jeweler’s saw and started carving with the wax file. The wax file is courser than a jeweler’s file which allows the wax filings to not get stuck in between the teeth of the file. 

First thickness check. It was around 2mm, which is still too thick for me.

First thickness check. It was around 2mm, which is still too thick for me.

30-40 minutes later, the model started to look like the ring I had originally planned. When it gets close to the final design, I always check the thickness of the wax model with the thickness gauge. I like thinner and lighter jewelry. The wax for lost wax casting is so much lighter than metal, the cast object often turns out to be way heavier and chunkier than you expected. There is a way to get a rough estimated weight of your final object by multiplying by 10 (for sterling silver) with the weight of the wax model. If the model is 0.6g, the final silver product will be 6g. However, when you carve too much and make the wall too thin, I would say thinner than 0.4mm, the risk of failing the casting process becomes higher.  I usually tend to carve things less than a 1mm, probably 0.7-0.8mm thick and it has worked out perfectly so far. However, please keep that in mind that these are just my personal preferences. Your results may vary. 

Left : measuring thickness on the middle part / Right : measuring thickness on the rims

Left : measuring thickness on the middle part / Right : measuring thickness on the rims

In the middle of carving, I changed my design from a simple cylinder to an empty spool shape. I checked the thickness again. The rims were about 1.3mm and the concaved middle part was about 1mm thick. Since I was planning to add some textures on the surface, I decided not to make it any thinner.

Carving the shape is done, but the surface is still noticeably rough. 

Carving the shape is done, but the surface is still noticeably rough. 

After I finished carving the shape, the surface was still very rough and bumpy. I used 320 grit sandpaper to even out the surface. Here is my funny tip about smoothing out the surface - scrub towel! Unfortunately, I have never seen this kind of scrub towel in the States, so it might be hard to get your hands on one, but it really works well for this task. I learned this trick from the college I went to in Seoul, South Korea. 

image from http://rudder999.com

image from http://rudder999.com

The towel is a common bath towel in South Korea, sort of like a loofah. It is a loosely woven synthetic fabric. Little scratches that remain on the surface after using rough grit sandpaper can be perfectly smoothed out by rubbing the surface with the towel

The final wax model under the light

The final wax model under the light

I added some texture on the middle part of the ring using my wax carving tools. I've been using all different kinds of textures on the surface of wax models, and this texture is one of my favorites. It looks like some sort of fur and broken lines. When I sketch or paint something, that pattern shows up a lot as well. It appears to be floating on the surface, adding some fun movements to the shape. 

Two rings and one earring part I carved today

Two rings and one earring part I carved today

I spent a few hours to carve the rings and one possible earring part. I carved it for fun without any specific plan, so we will see how I can add that little baby part to make something cool. Next time I will make a post Part 2 about casting process. I can't wait to see them in shiny sterling silver! 

Jina's Bench - My Etsy store

Jina's Bench - Jina's Bench is a collection of handcrafted jewelry made by Urbana-Champaign based artists Jina Seo.

I had planed to open an easy store for a long long time. This summer I finally managed to do it. The shop name Jina's Bench represents the jeweler's work bench and strives to create an interesting mixture of both innovative and traditional jewelry. I am posting some photos of earrings, brooches, necklaces and pandects that I made so far. Most of them are made out of sterling silver and wood, and have my visual theme which is organic and bodily. I tried to combine lots of fun and pretty colorful natural stones as well, mostly cabochon cut and set with fine silver basel.  If you are a fashionable enough to look for some unique and fun jewelry, this is the right place to shop at! Enjoy :)

Click here to visit Jina's Bench!